HP Photosmart R927 User Guide - Page 18
Using Panorama mode, Sunset, Document, Aperture Priority, Shutter Priority, Manual, My Mode, Panorama
 |
View all HP Photosmart R927 manuals
Add to My Manuals
Save this manual to your list of manuals |
Page 18 highlights
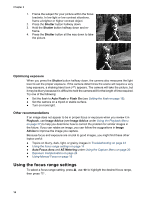
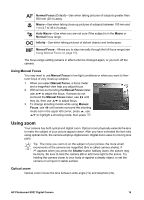
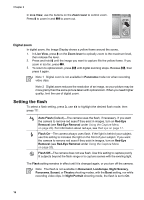
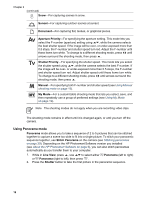
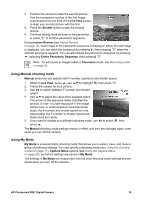
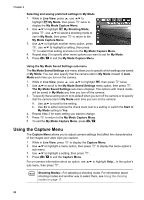
Chapter 2 (continued) Snow-For capturing scenes in snow. Sunset-For capturing outdoor scenes at sunset. Document-For capturing flat, textual, or graphical pieces. Aperture Priority-For specifying the aperture setting. This mode lets you select the F-number (aperture) setting using , while the camera selects the best shutter speed. If the image will be over- or under-exposed more than 0.5 stops, the F-number and shutter speed turn red. Adjust the F-number until these items turn white. To change to a different shooting mode, press until arrows surround the shooting mode, then press . Shutter Priority-For specifying the shutter speed. This mode lets you select the shutter speed using , while the camera selects the best F-number. If the image will be over- or under-exposed more than 0.5 stops, the F-number and shutter speed turn red. Adjust shutter speed until these items turn white. To change to a different shooting mode, press until arrows surround the shooting mode, then press . Manual-For specifying both F-number and shutter speed (see Using Manual shooting mode on page 19). My Mode-For a customizable shooting mode that lets you select, save, and then repeatedly use a group of preferred settings (see Using My Mode on page 19). Note The shooting modes do not apply when you are recording video clips. The shooting mode remains in effect until it is changed again, or until you turn off the camera. Using Panorama mode Panorama mode allows you to take a sequence of 2 to 5 pictures that can be stitched together to capture a scene too wide to fit into a single picture. To stitch your panoramic sequence together, use Stitch Panorama on the camera (see Stitching panoramas on page 29). Depending on the HP Photosmart Software version you installed (see About the HP Photosmart Software on page 9), you can also stitch panoramas automatically as you transfer them to your computer. 1. While in Live View, press , use to select either Panorama (left to right) or Panorama (right to left), then press . 2. Press the Shutter button to take the first picture in the panoramic sequence. 18
-
 1
1 -
2
-
3
-
4
-
5
-
6
-
7
-
8
-
9
-
10
-
11
-
12
-
 13
13 -
 14
14 -
 15
15 -
 16
16 -
 17
17 -
 18
18 -
 19
19 -
 20
20 -
 21
21 -
 22
22 -
 23
23 -
24
-
25
-
26
-
27
-
28
-
29
-
30
-
31
-
32
-
33
-
34
-
35
-
36
-
37
-
38
-
39
-
40
-
41
-
42
-
43
-
44
-
45
-
46
-
47
-
48
-
49
-
50
-
51
-
52
-
53
-
54
-
55
-
56
-
57
-
58
 |
 |