HP ProBook 4740s HP ProBook 4740s Notebook PC - Maintenance and Service Guide - Page 48
from the drive, and then remove the cover from the hard drive
 |
View all HP ProBook 4740s manuals
Add to My Manuals
Save this manual to your list of manuals |
Page 48 highlights
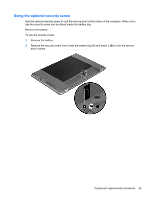
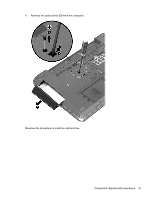
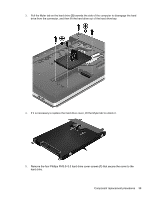
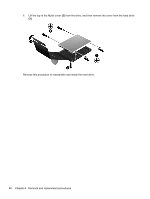
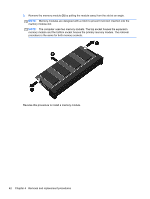
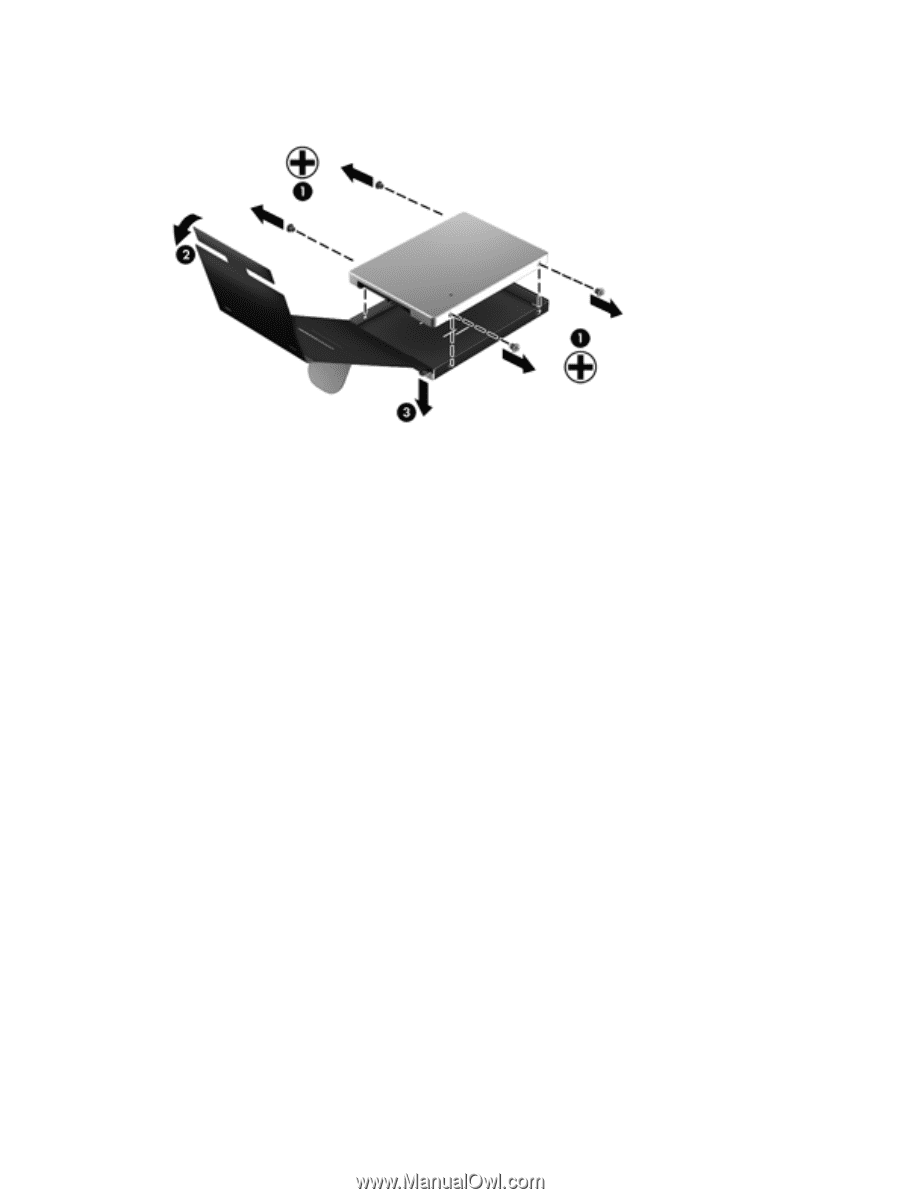
6. Lift the top of the Mylar cover (2) from the drive, and then remove the cover from the hard drive (3). Reverse this procedure to reassemble and install the hard drive. 40 Chapter 4 Removal and replacement procedures
-
 1
1 -
2
-
3
-
4
-
5
-
6
-
7
-
8
-
9
-
10
-
11
-
12
-
13
-
14
-
15
-
16
-
17
-
18
-
19
-
20
-
21
-
22
-
23
-
24
-
25
-
26
-
27
-
28
-
29
-
30
-
31
-
32
-
33
-
34
-
35
-
36
-
37
-
38
-
39
-
40
-
41
-
42
-
 43
43 -
 44
44 -
 45
45 -
 46
46 -
 47
47 -
 48
48 -
 49
49 -
 50
50 -
 51
51 -
 52
52 -
 53
53 -
54
-
55
-
56
-
57
-
58
-
59
-
60
-
61
-
62
-
63
-
64
-
65
-
66
-
67
-
68
-
69
-
70
-
71
-
72
-
73
-
74
-
75
-
76
-
77
-
78
-
79
-
80
-
81
-
82
-
83
-
84
-
85
-
86
-
87
-
88
-
89
-
90
-
91
-
92
-
93
-
94
-
95
-
96
-
97
-
98
-
99
-
100
-
101
-
102
-
103
-
104
-
105
-
106
-
107
-
108
-
109
-
110
-
111
-
112
-
113
-
114
-
115
-
116
-
117
-
118
-
119
-
120
-
121
-
122
-
123
-
124
-
125
 |
 |
6.
Lift the top of the Mylar cover
(2)
from the drive, and then remove the cover from the hard drive
(3)
.
Reverse this procedure to reassemble and install the hard drive.
40
Chapter 4
Removal and replacement procedures