HP ProLiant SL165z HP ProLiant SL165z G6 Server Maintenance and Service Guide - Page 28
Powering Down the Server, System Covers, Top Cover
 |
View all HP ProLiant SL165z manuals
Add to My Manuals
Save this manual to your list of manuals |
Page 28 highlights
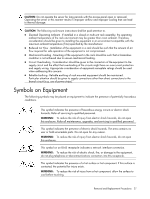
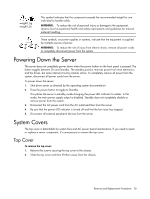
weight1_kg weight1_lb This symbol indicates that the component exceeds the recommended weight for one individual to handle safely. WARNING: To reduce the risk of personal injury or damage to the equipment, observe local occupational health and safety requirements and guidelines for manual material handling. These symbols, on power supplies or systems, indicate that the equipment is supplied by multiple sources of power. WARNING: To reduce the risk of injury from electric shock, remove all power cords to completely disconnect power from the system. Powering Down the Server The server does not completely power down when the power button on the front panel is pressed. The button toggles between On and Standby. The standby position removes power from most electronics and the drives, but some internal circuitry remains active. To completely remove all power from the system, disconnect all power cords from the server. To power down the server: 1. Shut down server as directed by the operating system documentation. 2. Press the power button to toggle to Standby. This places the server in standby mode changing the power LED indicator to amber. In this mode, the main power supply output is disabled. Standby does not completely disable or remove power from the system. 3. Disconnect the AC power cord from the AC outlet and then from the server. 4. Be sure that the power LED indicator is turned off and that the fan noise has stopped. 5. Disconnect all external peripheral devices from the server. System Covers The top cover is detachable for system fans and AC power board maintenance. If you need to repair or replace a server component, it's unnecessary to remove the top cover. Top Cover To remove the top cover: 1. Remove the screws securing the top cover to the chassis. 2. Slide the top cover and then lift them away from the chassis. Removal and Replacement Procedures 28
-
 1
1 -
2
-
3
-
4
-
5
-
6
-
7
-
8
-
9
-
10
-
11
-
12
-
13
-
14
-
15
-
16
-
17
-
18
-
19
-
20
-
21
-
22
-
 23
23 -
 24
24 -
 25
25 -
 26
26 -
 27
27 -
 28
28 -
 29
29 -
 30
30 -
 31
31 -
 32
32 -
 33
33 -
34
-
35
-
36
-
37
-
38
-
39
-
40
-
41
-
42
-
43
-
44
-
45
-
46
-
47
-
48
-
49
-
50
-
51
-
52
-
53
-
54
-
55
-
56
-
57
-
58
-
59
-
60
-
61
-
62
-
63
-
64
-
65
-
66
-
67
-
68
-
69
-
70
-
71
-
72
-
73
-
74
-
75
-
76
-
77
-
78
-
79
-
80
 |
 |
