HP ProLiant SL165z HP ProLiant SL165z G6 Server Maintenance and Service Guide - Page 47
Power Supply Unit (PSU
 |
View all HP ProLiant SL165z manuals
Add to My Manuals
Save this manual to your list of manuals |
Page 47 highlights
Figure 28 Reinstalling the165z system board to the tray To replace the tray with system board: 1. Push the tray assembly into the tray bay until it stops. 2. Rotate the tray handle until the tray latch catches. Figure 29 Installing the tray with system board into the chassis Power Supply Unit (PSU) Located on the rear panel of the server power supply is a standard auto ranging 750watt PSU with PFC (power factor correction) function. Removal and Replacement Procedures 47
-
 1
1 -
2
-
3
-
4
-
5
-
6
-
7
-
8
-
9
-
10
-
11
-
12
-
13
-
14
-
15
-
16
-
17
-
18
-
19
-
20
-
21
-
22
-
23
-
24
-
25
-
26
-
27
-
28
-
29
-
30
-
31
-
32
-
33
-
34
-
35
-
36
-
37
-
38
-
39
-
40
-
41
-
 42
42 -
 43
43 -
 44
44 -
 45
45 -
 46
46 -
 47
47 -
 48
48 -
 49
49 -
 50
50 -
 51
51 -
 52
52 -
53
-
54
-
55
-
56
-
57
-
58
-
59
-
60
-
61
-
62
-
63
-
64
-
65
-
66
-
67
-
68
-
69
-
70
-
71
-
72
-
73
-
74
-
75
-
76
-
77
-
78
-
79
-
80
 |
 |

Removal and Replacement Procedures
47
Figure 28
Reinstalling the165z system board to the tray
To replace the tray with system board:
1.
Push the tray assembly into the tray bay until it stops.
2.
Rotate the tray handle until the tray latch catches.
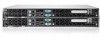
Figure 29
Installing the tray with system board into the chassis
Power Supply Unit (PSU)
Located on the rear panel of the server power supply is a standard auto ranging 750watt PSU with
PFC (power factor correction) function.