HP Workstation i2000 hp workstation i2000 processor installation (a6037-90060) - Page 16
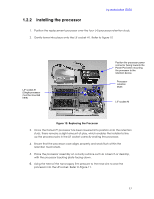
Removing the Power Pod, Removing the Processor
 |
View all HP Workstation i2000 manuals
Add to My Manuals
Save this manual to your list of manuals |
Page 16 highlights
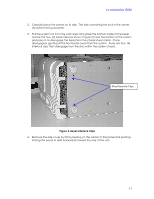
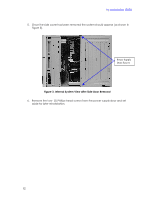
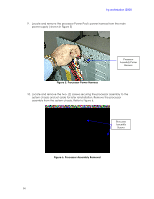
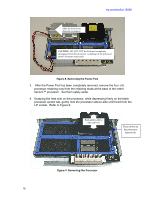
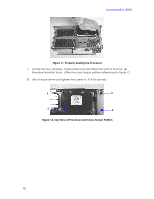
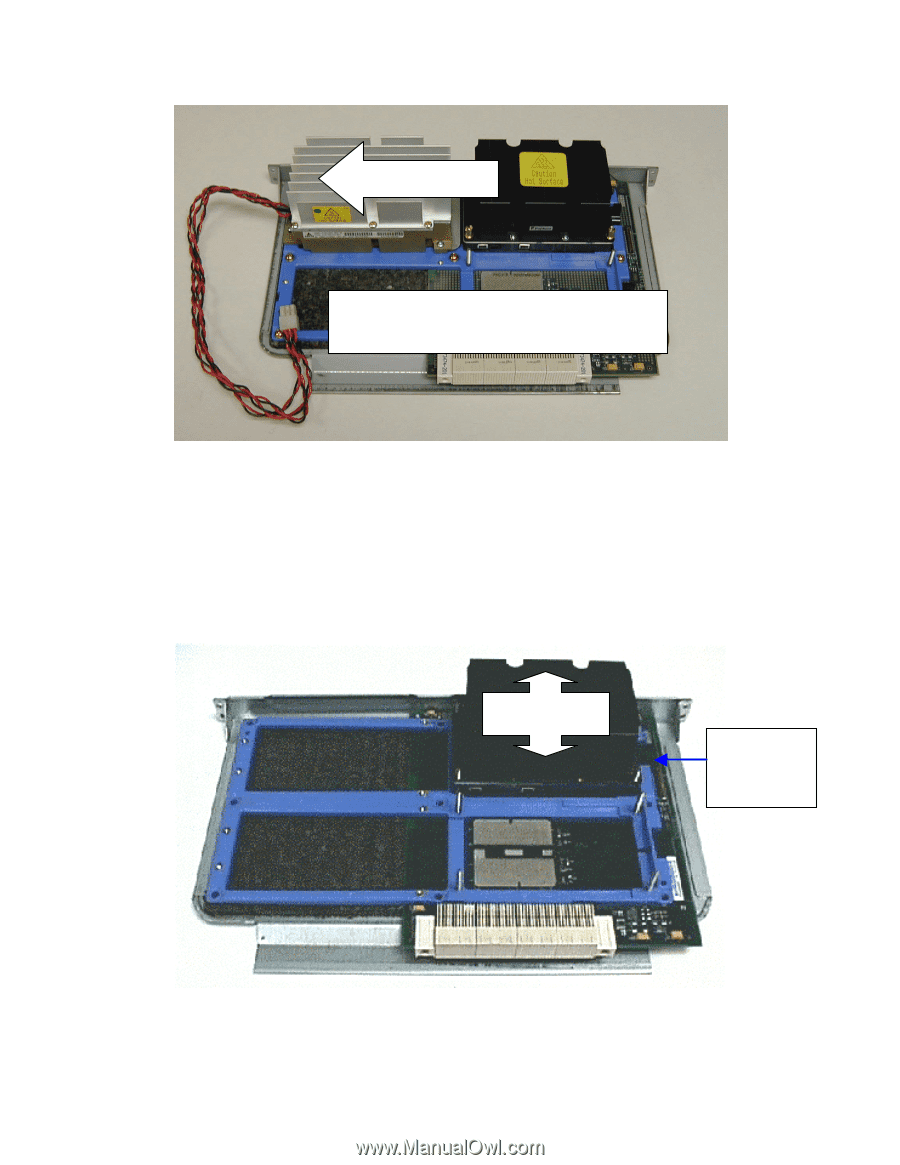
Slide the Pod in this direction to remove. hp workstation i2000 CAUTION: DO NOT LIFT the Pod until completely disengaged from the processor, or damage to the processor power connector may result. Figure 8. Removing the Power Pod 3. After the Power Pod has been completely removed, remove the four- (4) processor retaining nuts from the retaining studs at the base of the Intel Itanium™ processor. Set them safely aside. 4. Grasping the heat sink on the processor, while depressing firmly on the black processor ejector tab, gently rock the processor side-to-side until freed from the LIF socket. Refer to Figure 9. Rock gently side to side until free Press down on the processor ejector tab. Figure 9. Removing the Processor 16
-
 1
1 -
2
-
3
-
4
-
5
-
6
-
7
-
8
-
9
-
10
-
 11
11 -
 12
12 -
 13
13 -
 14
14 -
 15
15 -
 16
16 -
 17
17 -
 18
18 -
 19
19 -
 20
20 -
 21
21 -
22
-
23
-
24
 |
 |
hp workstation i2000
16
Figure 8. Removing the Power Pod
3.
After the Power Pod has been completely removed, remove the four- (4)
processor retaining nuts from the retaining studs at the base of the Intel
Itanium™ processor.
Set them safely aside.
4.
Grasping the heat sink on the processor, while depressing firmly on the black
processor ejector tab, gently rock the processor side-to-side until freed from the
LIF socket.
Refer to Figure 9.
Figure 9. Removing the Processor
CAUTION:
DO NOT LIFT
the Pod until completely
disengaged from the processor, or damage to the processor
power connector may result.
Slide the Pod in this
direction to remove.
Press down on
the processor
ejector tab.
Rock gently side to
side until free