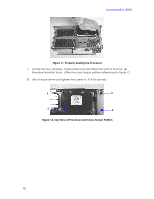
HP Workstation i2000 hp workstation i2000 processor installation (a6037-90060) - Page 19
replacing the power pod
 |
View all HP Workstation i2000 manuals
Add to My Manuals
Save this manual to your list of manuals |
Page 19 highlights
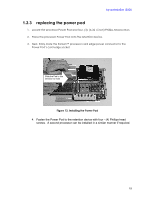
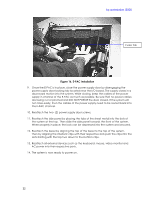
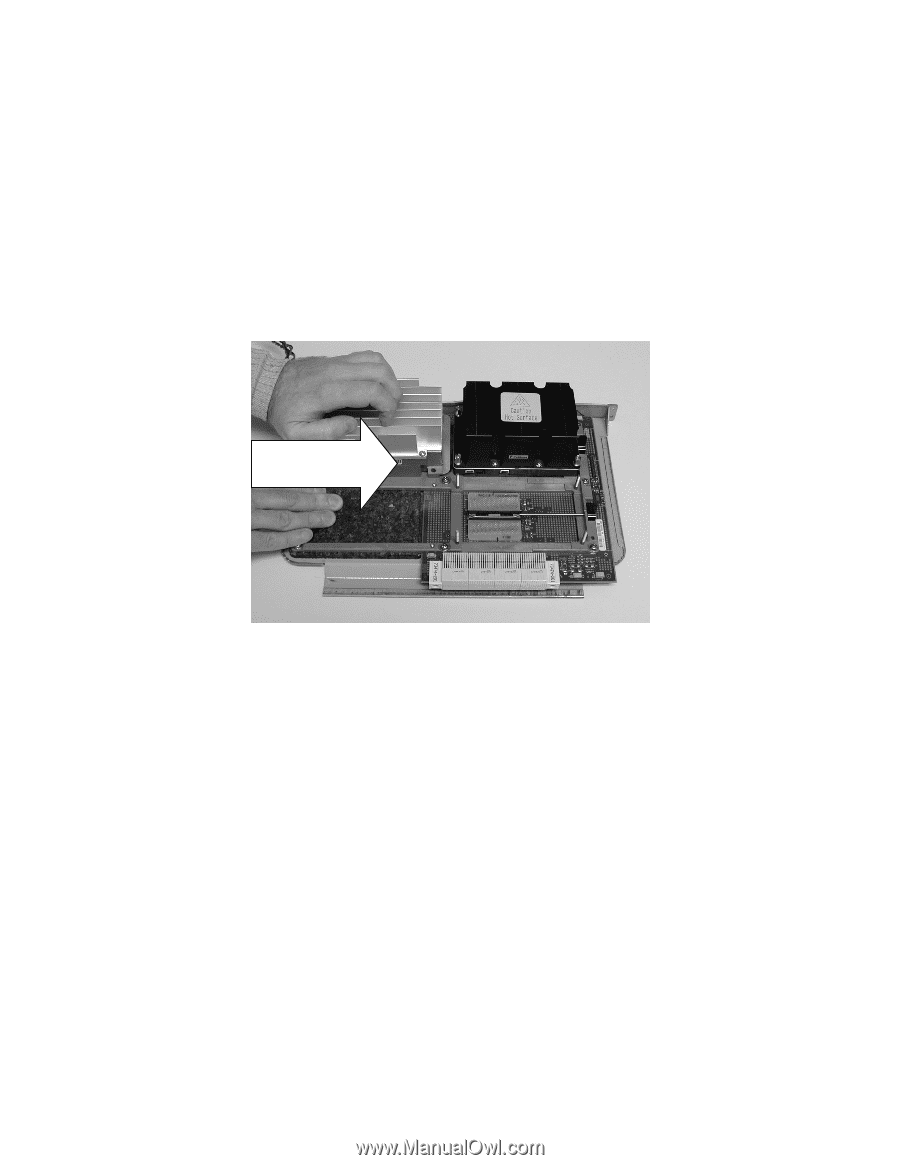
hp workstation i2000 1.2.3 replacing the power pod 1. Locate the processor Power Pod and four- (4), (6-32 .5 inch) Phillips-head screws. 2. Place the processor Power Pod onto the retention device. 3. Next, firmly mate the Itanium processor card edge power connector to the Power Pod's card edge socket. Slide the Pod in this direction to mate Figure 13. Installing the Power Pod 4. Fasten the Power Pod to the retention device with four - (4) Phillips-head screws. A second processor can be installed in a similar manner if required. 19
-
 1
1 -
2
-
3
-
4
-
5
-
6
-
7
-
8
-
9
-
10
-
11
-
12
-
13
-
 14
14 -
 15
15 -
 16
16 -
 17
17 -
 18
18 -
 19
19 -
 20
20 -
 21
21 -
 22
22 -
 23
23 -
 24
24
 |
 |
hp workstation i2000
19
1.2.3
replacing the power pod
1.
Locate the processor Power Pod and four- (4), (6-32 .5 inch) Phillips-head screws.
2.
Place the processor Power Pod onto the retention device.
3.
Next, firmly mate the Itanium
processor card edge power connector to the
Power Pod’s card edge socket.
Figure 13. Installing the Power Pod
4.
Fasten the Power Pod to the retention device with four - (4) Phillips-head
screws.
A second processor can be installed in a similar manner if required.
Slide the Pod in this
direction to mate