HP Z6100 HP Designjet Z6100 Printer Series - Setup Poster (42 inch) - Page 13
Load roll - spindle
 |
UPC - 882780989535
View all HP Z6100 manuals
Add to My Manuals
Save this manual to your list of manuals |
Page 13 highlights
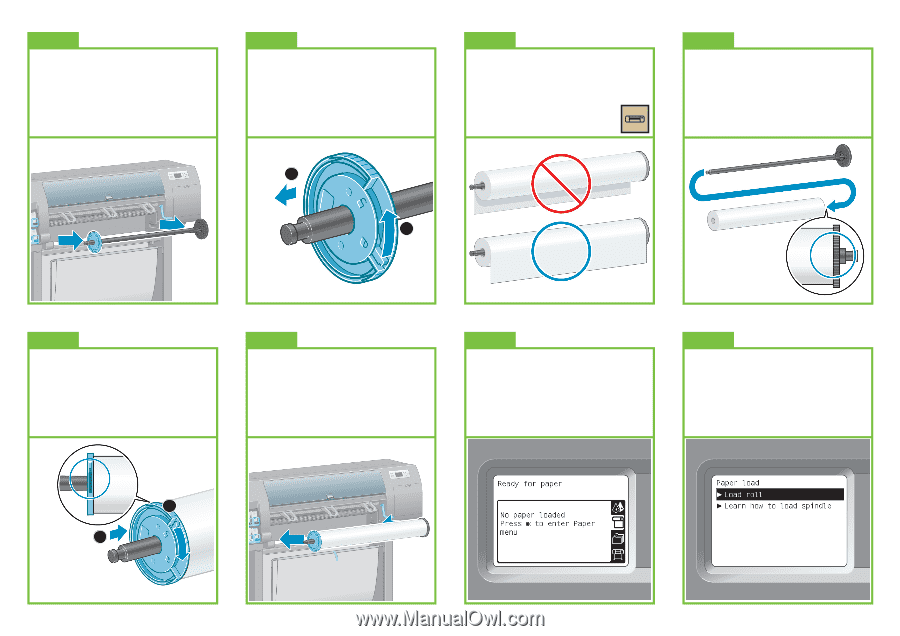
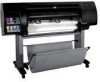
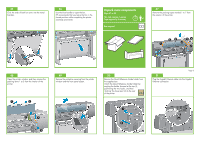
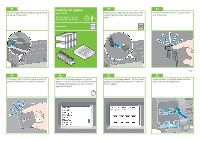
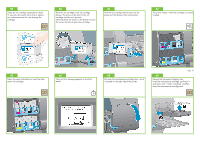
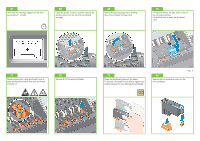
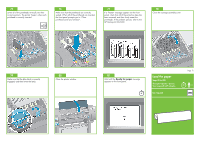
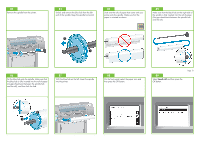
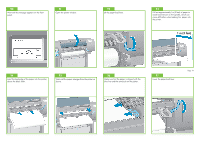
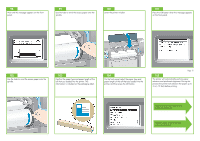
82 Remove the spindle from the printer. 83 Unlock and remove the blue hub from the left end of the spindle. Keep the spindle horizontal. 84 Slide one the rolls of paper that came with your printer onto the spindle. Make sure that the paper is oriented as shown. 85 Make sure that the black hub on the right side of the spindle is fully inserted into the roll of paper. (No gap should exist between the spindle hub and the roll.) 2 1 86 Put the blue hub onto the spindle. Make sure that the blue hub is fully inserted into the roll of paper (no gap should exist between the spindle hub and the roll), and then lock the hub. 87 With the blue hub on the left, lower the spindle into the printer. 88 On the front panel, select the paper icon and then press the OK button. 89 Select Load roll and then press the OK button. Page 13 2 1
-
 1
1 -
2
-
3
-
4
-
5
-
6
-
7
-
 8
8 -
 9
9 -
 10
10 -
 11
11 -
 12
12 -
 13
13 -
 14
14 -
 15
15 -
 16
16 -
 17
17 -
 18
18 -
19
-
20
 |
 |