HP Z6100 HP Designjet Z6100 Printer Series - Setup Poster (42 inch) - Page 3
of the printer. - supplies
 |
UPC - 882780989535
View all HP Z6100 manuals
Add to My Manuals
Save this manual to your list of manuals |
Page 3 highlights
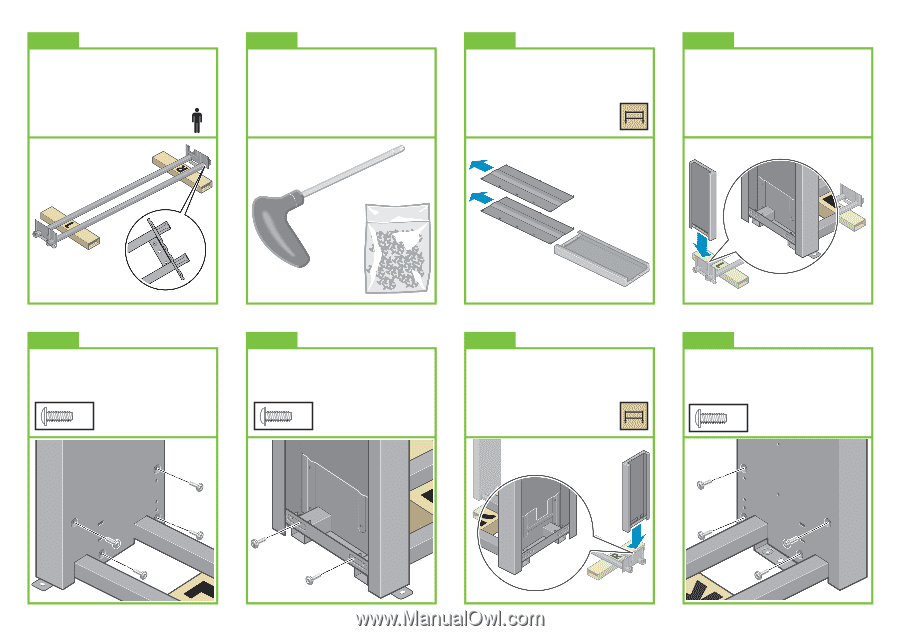
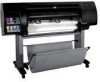
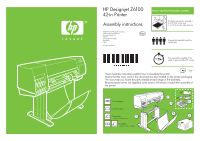
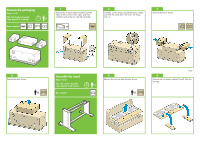
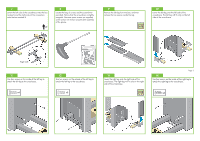
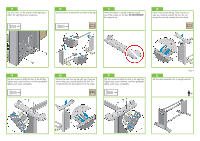
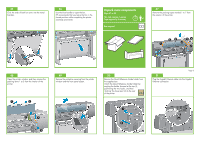
7 Lower the left side of the cross-brace onto the box marked L and the right side of the cross-brace onto the box marked R. x2 8 Locate the bag of screws and the screwdriver provided. Notice that the screwdriver is slightly magnetic. Because spare screws are supplied, some screws will remain unused after assembly of the printer. 9 Remove the left leg from the box, and then remove the two pieces inside the leg. 10 Lower the left leg onto the left side of the cross-brace. The left leg will fit only on the left side of the cross-brace. Right side. 11 Use four screws on the inside of the left leg to attach the left leg to the cross-brace. x4 12 Use two screws on the outside of the left leg to attach the left leg to the cross-brace. x2 13 Lower the right leg onto the right side of the cross-brace. The right leg will fit only on the right side of the cross-brace. Page 3 14 Use four screws on the inside of the right leg to attach the right leg to the cross-brace. x4
-
 1
1 -
 2
2 -
 3
3 -
 4
4 -
 5
5 -
 6
6 -
 7
7 -
 8
8 -
 9
9 -
10
-
11
-
12
-
13
-
14
-
15
-
16
-
17
-
18
-
19
-
20
 |
 |