HP Z6100 HP Designjet Z6100 Printer Series - Setup Poster (42 inch) - Page 5
Attach the printer engine to the, stand
 |
UPC - 882780989535
View all HP Z6100 manuals
Add to My Manuals
Save this manual to your list of manuals |
Page 5 highlights
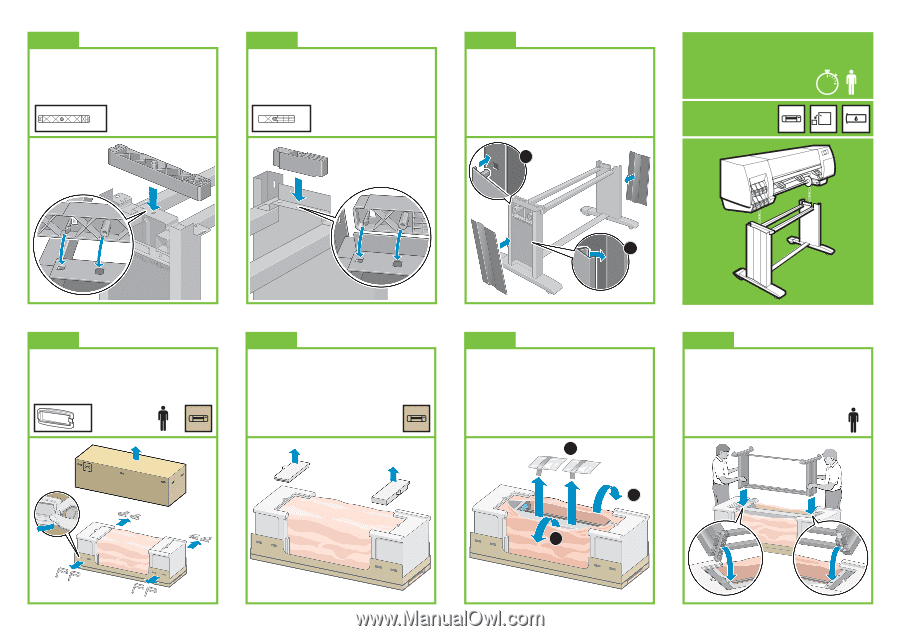
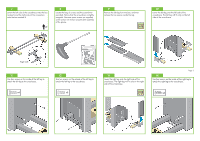
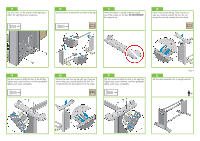
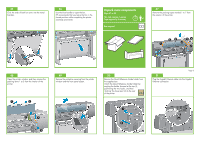
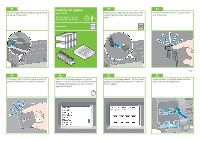
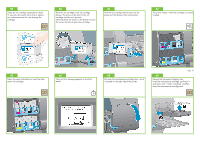
23 Attach the left stand spacer to the top of the left leg. It will 'click' into place. 24 Attach the right stand spacer to the top of the right leg. It will 'click' into place. x1 x1 25 Position the left and right leg covers on the front of the legs (1), and then clip the rear edge (2) into place. 2 Attach the printer engine to the stand Steps 26 to 38. This task requires 4 people. Time required is 15 minutes. 15' x4 Boxes required 26 Remove the eight plastic handles, and then remove the box shown. x8 x2 27 Remove the two packing pieces shown. 1 28 Pull open the protective plastic from the base of the printer (1), and then remove the two desiccant bags (2). Page 5 29 Lift the stand assembly onto the printer engine. The anti-slip material should face the rear of the printer. x2 2 1 1
-
 1
1 -
 2
2 -
 3
3 -
 4
4 -
 5
5 -
 6
6 -
 7
7 -
 8
8 -
 9
9 -
 10
10 -
 11
11 -
12
-
13
-
14
-
15
-
16
-
17
-
18
-
19
-
20
 |
 |