HP Z6100 HP Designjet Z6100 Printer Series - Setup Poster (42 inch) - Page 8
Unpack more components
 |
UPC - 882780989535
View all HP Z6100 manuals
Add to My Manuals
Save this manual to your list of manuals |
Page 8 highlights
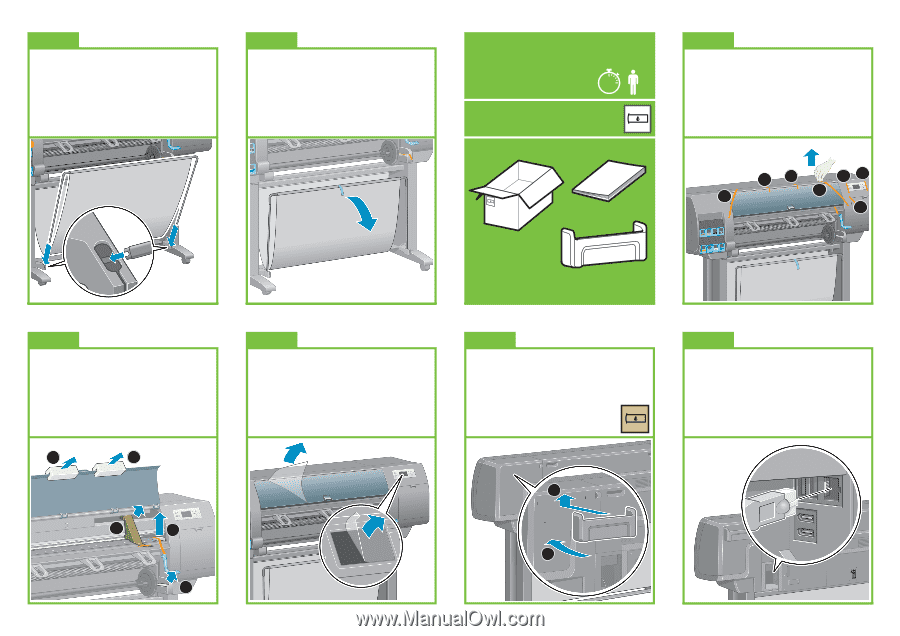
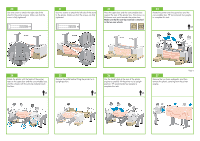
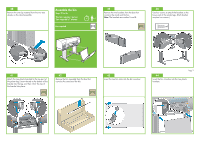
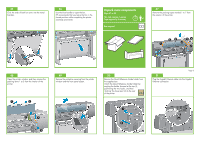
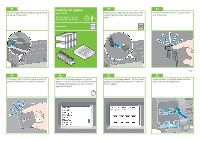
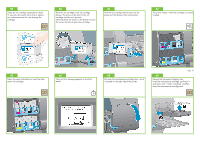
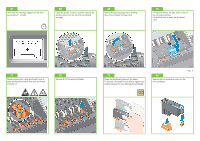
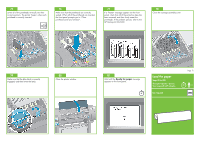
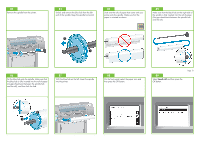
45 Click the ends of both bin arms into the metal brackets. 46 Use the blue handle to open the bin. HP recommends that you leave the bin in the closed position while completing the printer assembly procedures. Unpack more components Steps 47 to 52. This task requires 1 person. Time required is 5 minutes. 5' x1 Box required 47 Remove the packing tapes marked 1 to 7 from the exterior of the printer. 2 3 56 1 4 7 48 Open the printer window, and then remove the packing items 1 to 5 from the interior of the printer. 1 2 3 4 5 49 Remove the protective covering from the printer window and the front panel screen. 50 Remove the Quick Reference Guide holder from the supplies box. Attach the Quick Reference Guide holder by angling the holder forward at the top (1), positioning the two hooks, and then 'clicking' the lower part (2) to the rear of the printer. Page 8 51 Plug the Gigabit Ethernet cable into the Gigabit Ethernet connection. 1 2
-
 1
1 -
2
-
 3
3 -
 4
4 -
 5
5 -
 6
6 -
 7
7 -
 8
8 -
 9
9 -
 10
10 -
 11
11 -
 12
12 -
 13
13 -
14
-
15
-
16
-
17
-
18
-
19
-
20
 |
 |