HP Z6100 HP Designjet Z6100 Printer Series - Setup Poster (42 inch) - Page 9
Install the ink supplies - ink cartridges
 |
UPC - 882780989535
View all HP Z6100 manuals
Add to My Manuals
Save this manual to your list of manuals |
Page 9 highlights
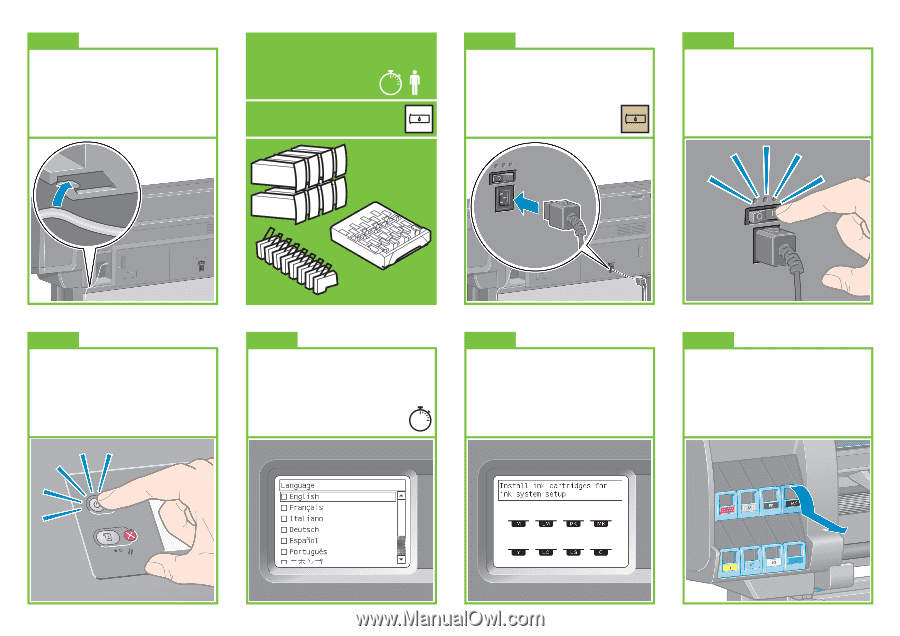
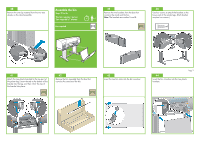
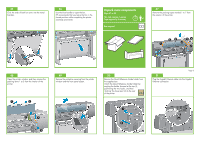
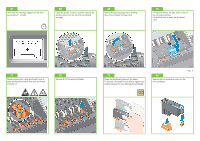
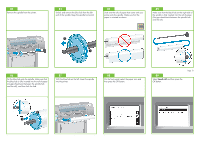
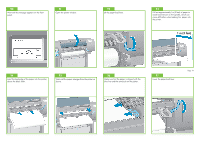
52 Pass the Gigabit Ethernet cable through the hook at the rear of the printer. Install the ink supplies Steps 53 to 81. This task requires 1 person. Time required is 40 minutes. 40' x1 Box required 53 Plug the power cable into the rear of the printer, and then plug the other end into the AC power outlet. 54 Turn the Power switch to the On position at the rear of the printer. 55 If the power light on the front panel remains off, press the Power button to switch on the printer. 56 Wait until this message appears on the front panel (~1 minute). Use the Up and Down buttons to highlight the language you want, and then press the OK button. 1' 57 Wait until this message appears. The front panel guides you through the procedures for inserting the ink supplies. Page 9 58 Gently pull down on the blue handle and then slide out the ink cartridge drawer.
-
 1
1 -
2
-
3
-
 4
4 -
 5
5 -
 6
6 -
 7
7 -
 8
8 -
 9
9 -
 10
10 -
 11
11 -
 12
12 -
 13
13 -
 14
14 -
15
-
16
-
17
-
18
-
19
-
20
 |
 |