HP rp8440 User Service Guide, Sixth Edition - HP Integrity rx8640, HP 9000 rp8 - Page 158
Removing and Replacing the Front Panel Board, Removing the Front Panel Board
 |
View all HP rp8440 manuals
Add to My Manuals
Save this manual to your list of manuals |
Page 158 highlights
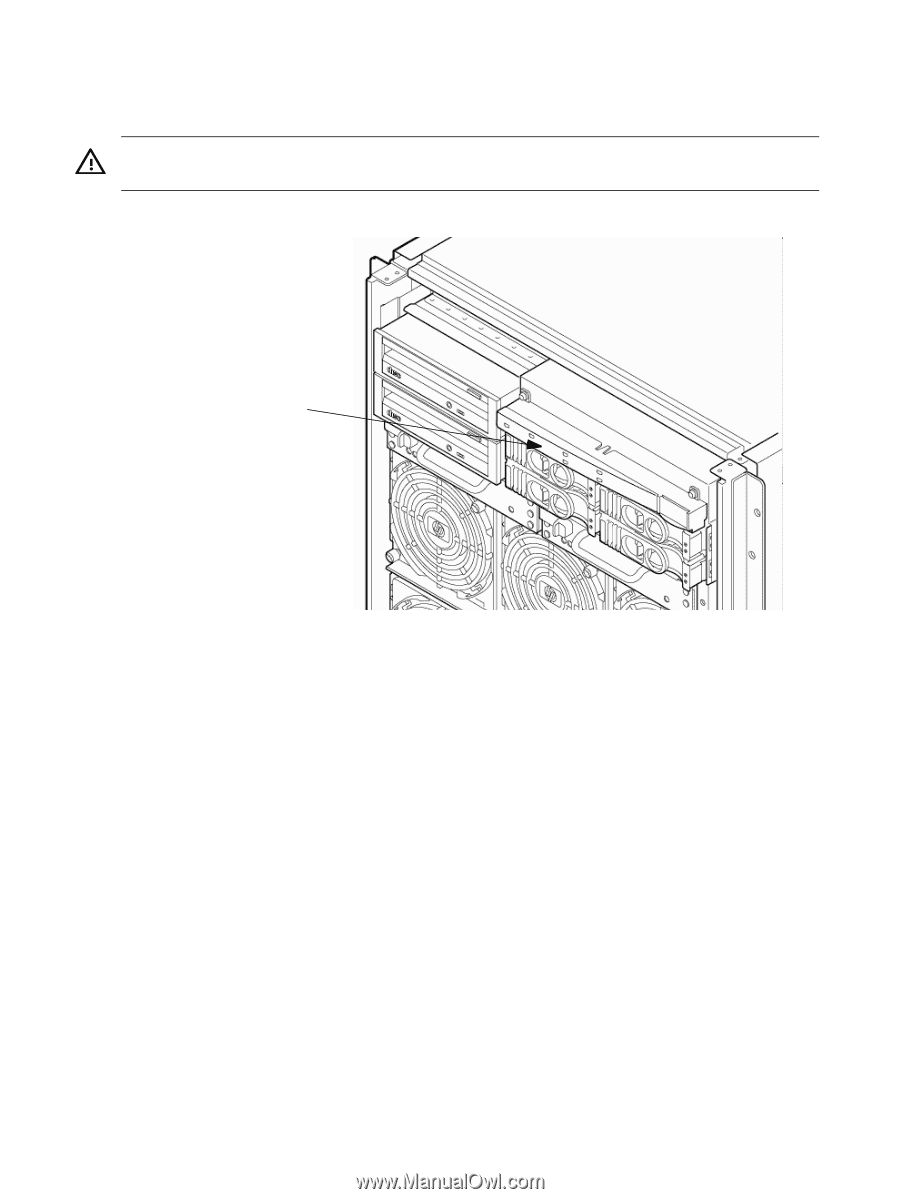
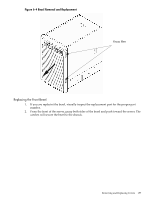
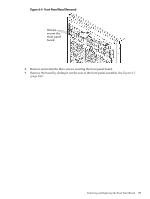
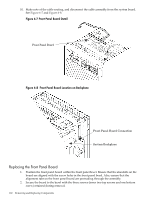
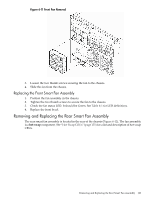
Removing and Replacing the Front Panel Board The front panel board is located behind the front panel bezel. Both are located on the front of the chassis (Figure 6-5). The system power must. WARNING! The system power must be turned off to replace this CRU. See "Powering Off Hardware Components and Powering On the Server" (page 153). Figure 6-5 Front Panel Assembly Location Front Panel Bezel Removing the Front Panel Board 1. Power off the system. 2. Remove the front bezel. 3. Remove the top cover. 4. Remove the left side cover. 5. Remove the two top disk drives. 6. Remove and retain the two screws securing the front panel bezel to the front panel. 7. Depress the front bezel center tab and pull straight out, away from chassis toward the front of the system (Figure 6-6). 158 Removing and Replacing Components
-
 1
1 -
2
-
3
-
4
-
5
-
6
-
7
-
8
-
9
-
10
-
11
-
12
-
13
-
14
-
15
-
16
-
17
-
18
-
19
-
20
-
21
-
22
-
23
-
24
-
25
-
26
-
27
-
28
-
29
-
30
-
31
-
32
-
33
-
34
-
35
-
36
-
37
-
38
-
39
-
40
-
41
-
42
-
43
-
44
-
45
-
46
-
47
-
48
-
49
-
50
-
51
-
52
-
53
-
54
-
55
-
56
-
57
-
58
-
59
-
60
-
61
-
62
-
63
-
64
-
65
-
66
-
67
-
68
-
69
-
70
-
71
-
72
-
73
-
74
-
75
-
76
-
77
-
78
-
79
-
80
-
81
-
82
-
83
-
84
-
85
-
86
-
87
-
88
-
89
-
90
-
91
-
92
-
93
-
94
-
95
-
96
-
97
-
98
-
99
-
100
-
101
-
102
-
103
-
104
-
105
-
106
-
107
-
108
-
109
-
110
-
111
-
112
-
113
-
114
-
115
-
116
-
117
-
118
-
119
-
120
-
121
-
122
-
123
-
124
-
125
-
126
-
127
-
128
-
129
-
130
-
131
-
132
-
133
-
134
-
135
-
136
-
137
-
138
-
139
-
140
-
141
-
142
-
143
-
144
-
145
-
146
-
147
-
148
-
149
-
150
-
151
-
152
-
 153
153 -
 154
154 -
 155
155 -
 156
156 -
 157
157 -
 158
158 -
 159
159 -
 160
160 -
 161
161 -
 162
162 -
 163
163 -
164
-
165
-
166
-
167
-
168
-
169
-
170
-
171
-
172
-
173
-
174
-
175
-
176
-
177
-
178
-
179
-
180
-
181
-
182
-
183
-
184
-
185
-
186
-
187
-
188
-
189
-
190
-
191
-
192
-
193
-
194
-
195
-
196
-
197
 |
 |