HP t5335z Troubleshooting Guide: HP t5335 Thin Clients - Page 12
Troubleshooting - review
 |
View all HP t5335z manuals
Add to My Manuals
Save this manual to your list of manuals |
Page 12 highlights
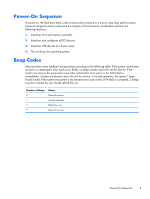
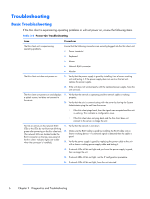
Troubleshooting Basic Troubleshooting If the thin client is experiencing operating problems or will not power on, review the following items. Table 2-2 Power-On Troubleshooting Issue The thin client unit is experiencing operating problems. The thin client unit does not power on. Procedures Ensure that the following connectors are securely plugged into the thin client unit: ● Power connector ● Keyboard ● Mouse ● Network RJ-45 connector ● Monitor 1. Verify that the power supply is good by installing it on a known working unit and testing it. If the power supply does not work on the test unit, replace the power supply. 2. If the unit does not work properly with the replaced power supply, have the unit serviced. The thin client unit powers on and displays a splash screen, but does not connect to the server. 1. Verify that the network is operating and the network cable is working properly. 2. Verify that the unit is communicating with the server by having the System Administrator ping the unit from the server: ◦ If the thin client pings back, then the signal was accepted and the unit is working. This indicates a configuration issue. ◦ If the thin client does not ping back and the thin client does not connect to the server, re-image the unit. No link or activity on the network RJ-45 1. Verify that the network is not down. LEDs or the LEDs do not illuminate blinking green after powering on the thin client unit. 2. Make sure the RJ-45 cable is good by installing the RJ-45 cable onto a (The network LEDs are located inside the known working device-if a network signal is detected then the cable is RJ-45 connector on the top, rear panel of good. the thin client. Indicator lights are visible when the connector is installed.) 3. Verify the power supply is good by replacing the power cable to the unit with a known working power supply cable and testing it. 4. If network LEDs still do not light and you know the power supply is good, then re-image the unit. 5. If network LEDs still do not light, run the IP configuration procedure. 6. If network LEDs still do not light, have the unit serviced. 6 Chapter 2 Diagnostics and Troubleshooting
-
 1
1 -
2
-
3
-
4
-
5
-
6
-
 7
7 -
 8
8 -
 9
9 -
 10
10 -
 11
11 -
 12
12 -
 13
13 -
 14
14 -
 15
15 -
 16
16 -
 17
17 -
18
-
19
-
20
-
21
-
22
-
23
-
24
-
25
-
26
-
27
-
28
-
29
-
30
-
31
-
32
 |
 |
