Hitachi DZHS300A Owners Guide - Page 130
Remove the disc, insert the other disc whose
 |
UPC - 050585223851
View all Hitachi DZHS300A manuals
Add to My Manuals
Save this manual to your list of manuals |
Page 130 highlights
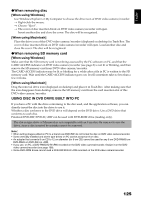
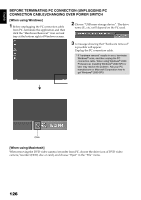
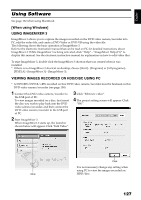
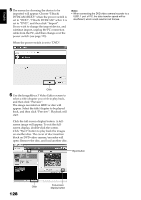
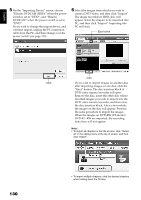
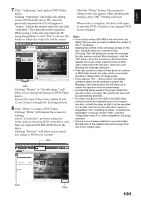
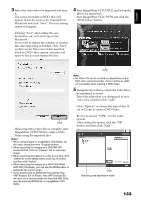
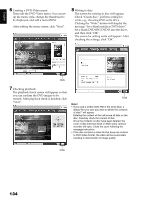
English 5 On the "Importing Device" screen, choose "Hitachi DVDCAM (HDD)" when the power switch is set to "HDD"; and "Hitachi DVDCAM" when the power switch is set to "DVD". If you wish to change the import device, and continue import, unplug the PC connection cable from the PC, and then change over the power switch (see page 123). 6 Select the images from which you wish to create a DVD-Video, and then click "Import". The image recorded on HDD, disc will appear. Select the chapter to be imported into PC, and then click "Import": Importing into PC will start. Eject button Click Click If you wish to import images on another disc after importing images on one disc, click the "Eject" button. The disc insertion block of DVD video camera/recorder will open: Remove the disc, insert the other disc whose recorded images you wish to import into the DVD video camera/recorder, and then close the disc insertion block. After a short while, the images on the disc will appear: Perform the same procedure to import the images. When the images on DVD-RW (VF-mode)/ DVD-R/+RW are imported, the recording date/time will not appear. Note: • To import all chapters in the title at once, click "Select all" in the editing menu at the top of screen, and then click "Import". 130 • To import multiple chapters, click the desired chapters while holding down the Ctrl key.
-
 1
1 -
2
-
3
-
4
-
5
-
6
-
7
-
8
-
9
-
10
-
11
-
12
-
13
-
14
-
15
-
16
-
17
-
18
-
19
-
20
-
21
-
22
-
23
-
24
-
25
-
26
-
27
-
28
-
29
-
30
-
31
-
32
-
33
-
34
-
35
-
36
-
37
-
38
-
39
-
40
-
41
-
42
-
43
-
44
-
45
-
46
-
47
-
48
-
49
-
50
-
51
-
52
-
53
-
54
-
55
-
56
-
57
-
58
-
59
-
60
-
61
-
62
-
63
-
64
-
65
-
66
-
67
-
68
-
69
-
70
-
71
-
72
-
73
-
74
-
75
-
76
-
77
-
78
-
79
-
80
-
81
-
82
-
83
-
84
-
85
-
86
-
87
-
88
-
89
-
90
-
91
-
92
-
93
-
94
-
95
-
96
-
97
-
98
-
99
-
100
-
101
-
102
-
103
-
104
-
105
-
106
-
107
-
108
-
109
-
110
-
111
-
112
-
113
-
114
-
115
-
116
-
117
-
118
-
119
-
120
-
121
-
122
-
123
-
124
-
 125
125 -
 126
126 -
 127
127 -
 128
128 -
 129
129 -
 130
130 -
 131
131 -
 132
132 -
 133
133 -
 134
134 -
 135
135 -
136
-
137
-
138
-
139
-
140
-
141
-
142
-
143
-
144
-
145
-
146
-
147
-
148
-
149
-
150
-
151
-
152
-
153
-
154
-
155
-
156
-
157
-
158
-
159
-
160
-
161
-
162
-
163
-
164
-
165
-
166
-
167
-
168
-
169
-
170
 |
 |
