Hoover UH30065 Manual - Page 4
Carton contents, Unpacking your cleaner - model
 |
View all Hoover UH30065 manuals
Add to My Manuals
Save this manual to your list of manuals |
Page 4 highlights
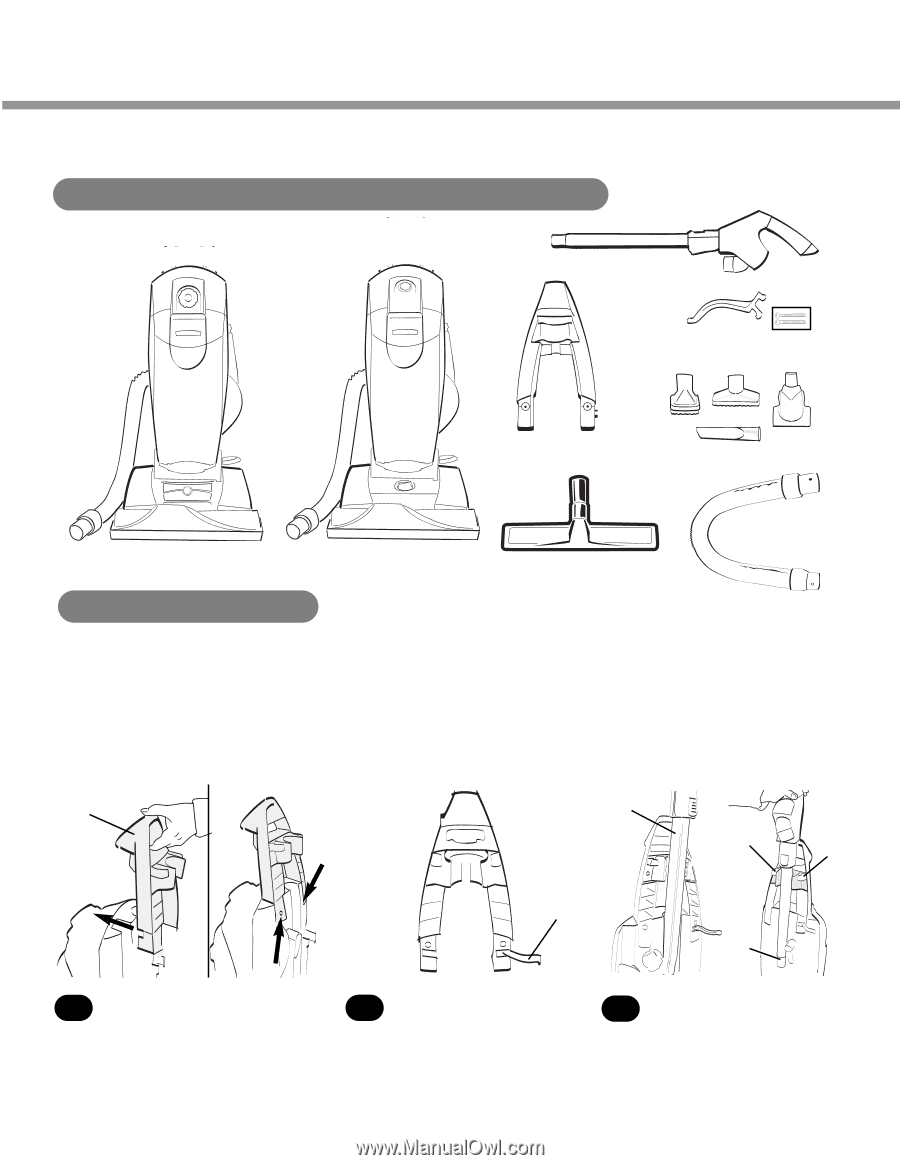
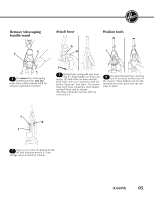
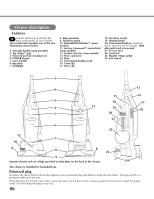
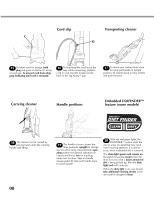
Unpacking your cleaner C E D F H A or B G Carton contents A. or B. Cleaner body and Hose C. Telescoping handle/wand D. Tag Along™ grip E. Hose clip and (2) Tag Along™ handle screws F. Tools G. Floor brush* H. Extra reach hose* *Available on some models. Attach Tag Along™ grip A Attach hose clip Position handle C E E B D 1 Slide the Tag Along™ grip (A) onto the back of the cleaner. Push screws into holes on back of handle. Using a Phillips screwdriver, tighten screws securely. 04 2 With back of upper handle fac- ing you, insert hose clip (B) into slot on right. 3 The telescoping handle/wand (C) needs to be positioned and secured in place. Align the telescop- ing handle/wand with the recesses on the upper handle. Push the wand all the way down into the cup (D) until the handle/wand release latches (E) snap into position.
-
 1
1 -
 2
2 -
 3
3 -
 4
4 -
 5
5 -
 6
6 -
 7
7 -
 8
8 -
 9
9 -
 10
10 -
11
-
12
-
13
-
14
-
15
-
16
-
17
-
18
-
19
-
20
-
21
-
22
-
23
-
24
-
25
-
26
-
27
-
28
-
29
-
30
-
31
-
32
-
33
-
34
-
35
-
36
 |
 |