Husqvarna AUTOMOWER 430XH Owner Manual - Page 20
Installation of the product
 |
View all Husqvarna AUTOMOWER 430XH manuals
Add to My Manuals
Save this manual to your list of manuals |
Page 20 highlights
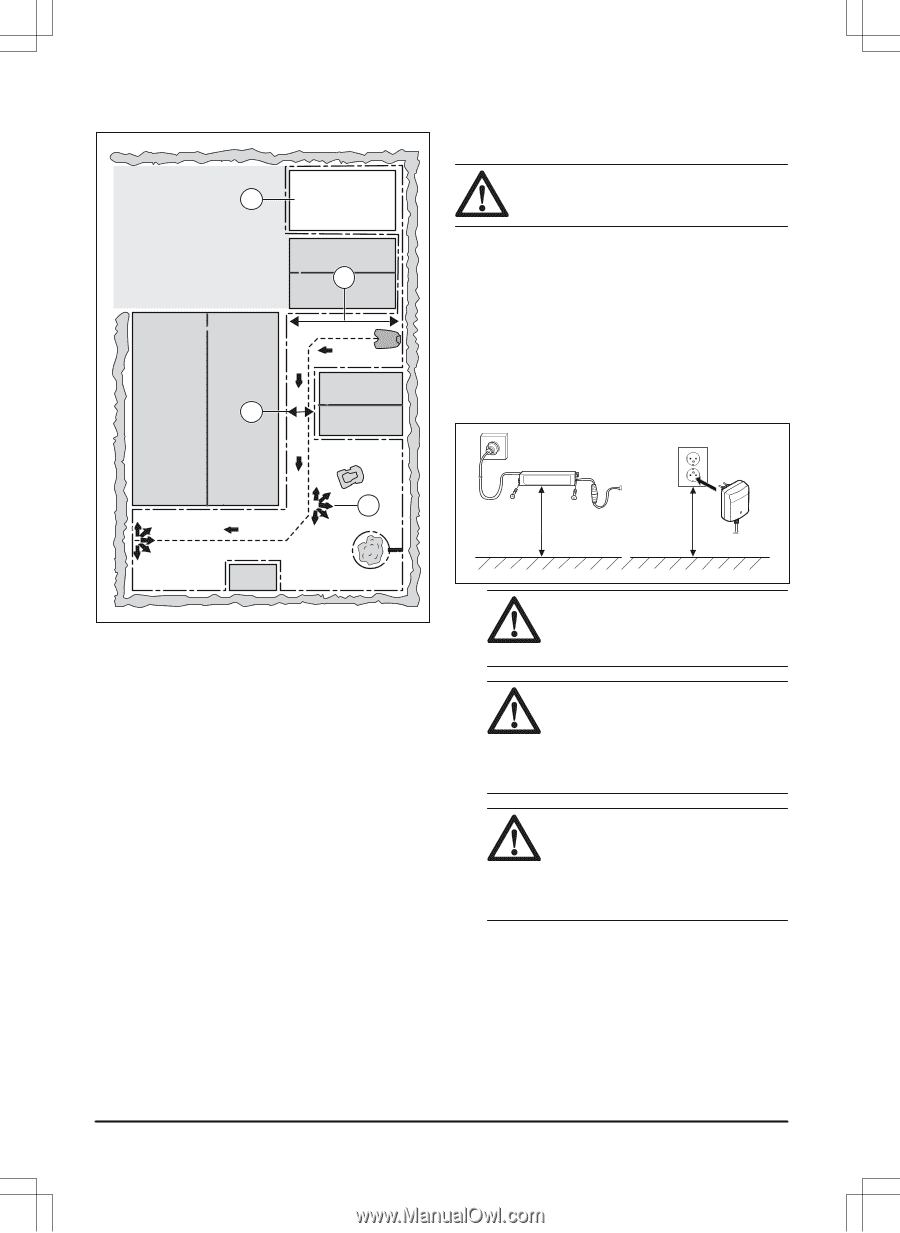
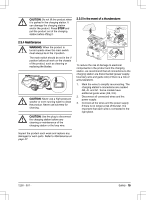
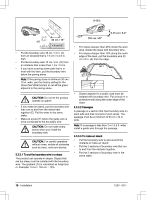
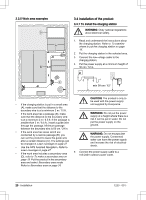
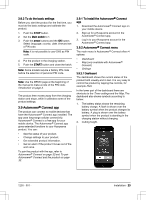
3.3.5 Work area examples D A B 3.4 Installation of the product 3.4.1 To install the charging station WARNING: Obey national regulations about electrical safety. 1. Read and understand the instructions about the charging station. Refer to To examine where to put the charging station on page 16. 2. Put the charging station in the selected area. 3. Connect the low-voltage cable to the charging station. 4. Put the power supply at a minimum height of 30 cm / 12 in. C min 30 cm / 12" CAUTION: The product is only to be used with the power supply • If the charging station is put in a small area unit supplied by Husqvarna. (A), make sure that the distance to the boundary wire is at a minimum 3 m / 10 ft. • If the work area has a passage (B), make sure that the distance to the boundary wire is at a minimum 2 m / 6.5 ft. If the passage is smaller than 2 m / 6.5 ft., install a guide wire through the passage. Minimum passage WARNING: Do not put the power supply at a height where there is a risk it can be put in water. Do not put the power supply on the ground. between the boundary wire is 60 cm / 24 in. • If the work area has areas which are connected by a narrow passage (B), you can set the product to leave the guide wire after a certain distance (C). The settings can be changed in Lawn coverage on page 27. • Use the GPS Assisted Navigation. Refer to WARNING: Do not encapsulate the power supply. Condensed water can harm the power supply and increase the risk of electrical shock. Lawn coverage on page 27. • If the work area includes a secondary area (D), refer to To make a secondary area on 5. Connect the power supply cable to a 100-240V outdoor power outlet. page 19. Put the product in the secondary area and select Secondary area mode. Refer to Secondary area on page 34. 20 - Installation 1230 - 001 -
-
 1
1 -
2
-
3
-
4
-
5
-
6
-
7
-
8
-
9
-
10
-
11
-
12
-
13
-
14
-
 15
15 -
 16
16 -
 17
17 -
 18
18 -
 19
19 -
 20
20 -
 21
21 -
 22
22 -
 23
23 -
 24
24 -
 25
25 -
26
-
27
-
28
-
29
-
30
-
31
-
32
-
33
-
34
-
35
-
36
-
37
-
38
-
39
-
40
-
41
-
42
-
43
-
44
-
45
-
46
-
47
-
48
-
49
-
50
-
51
-
52
-
53
-
54
-
55
-
56
-
57
-
58
-
59
-
60
 |
 |