IBM 72335LU User Guide - Page 46
Installing, internal, removable, flash, drive, Memory, module - m2 server compatibility
 |
UPC - 883436081535
View all IBM 72335LU manuals
Add to My Manuals
Save this manual to your list of manuals |
Page 46 highlights
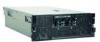
Installing an internal removable flash drive The server supports one internal removable flash drive that is installed in a USB connector on the I/O board. You do not have to turn off the server to install an internal removable flash drive. To install an internal removable flash drive, complete the following steps. Locking collar 1. Read the safety information that begins on page v and "Installation guidelines" on page 26. 2. Remove the server cover (see "Removing the cover and bezel" on page 28). 3. Insert the drive into the connector. 4. Pull up on the locking collar to lock the drive in place. Note: To remove an internal removable flash drive, push down on the connector to unlock the drive before you remove the drive. If you have other devices to install or remove, do so now. Otherwise, go to "Completing the installation" on page 50. Memory module The following notes describe the types of dual inline memory modules (DIMMs) that the server supports and other information that you must consider when you install DIMMs: v The server supports 1.8 V, 240-pin, PC2-5300 double data-rate (DDR) II, registered synchronous dynamic random-access memory (SDRAM) with error correcting code (ECC) DIMMs. These DIMMs must be compatible with the latest PC2-5300 SDRAM Registered DIMM specifications. For a list of the supported optional devices for the server, see http://www.ibm.com/servers/eserver/ serverproven/compat/us/. v The server supports up to four memory cards. Each memory card holds up to eight DIMMs. 34 IBM System x3850 M2 and System x3950 M2 Type 7141: User's Guide
-
 1
1 -
2
-
3
-
4
-
5
-
6
-
7
-
8
-
9
-
10
-
11
-
12
-
13
-
14
-
15
-
16
-
17
-
18
-
19
-
20
-
21
-
22
-
23
-
24
-
25
-
26
-
27
-
28
-
29
-
30
-
31
-
32
-
33
-
34
-
35
-
36
-
37
-
38
-
39
-
40
-
 41
41 -
 42
42 -
 43
43 -
 44
44 -
 45
45 -
 46
46 -
 47
47 -
 48
48 -
 49
49 -
 50
50 -
 51
51 -
52
-
53
-
54
-
55
-
56
-
57
-
58
-
59
-
60
-
61
-
62
-
63
-
64
-
65
-
66
-
67
-
68
-
69
-
70
-
71
-
72
-
73
-
74
-
75
-
76
-
77
-
78
-
79
-
80
-
81
-
82
-
83
-
84
-
85
-
86
-
87
-
88
-
89
-
90
-
91
-
92
-
93
-
94
-
95
-
96
 |
 |
