Icom IC-2820H Instruction Manual - Page 17
rst contact
 |
View all Icom IC-2820H manuals
Add to My Manuals
Save this manual to your list of manuals |
Page 17 highlights
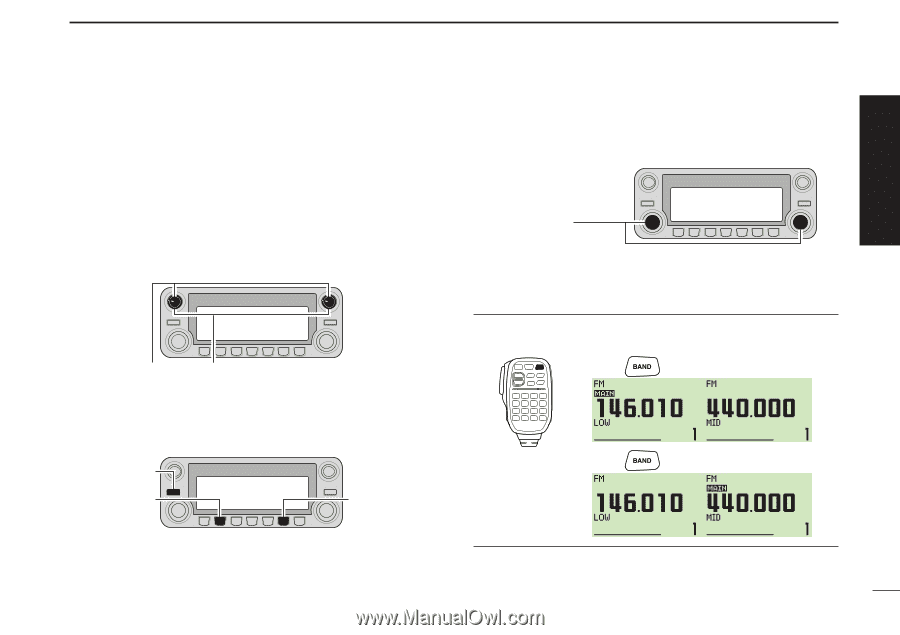
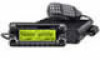
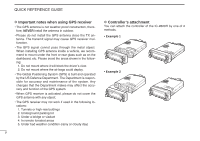
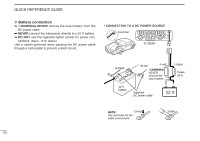
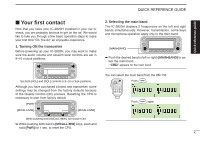
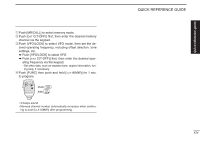
QUICK REFERENCE GUIDE Quick reference guide ■ Your first contact Now that you have your IC-2820H installed in your car or shack, you are probably anxious to get on the air. We would like to take you through a few basic operation steps to make your first time "On The Air" an enjoyable experience. 1. Turning ON the transceiver Before powering up your IC-2820H, you may want to make sure the audio volume and squelch level controls are set in 9-10 o'clock positions. Set both [VOL] and [SQL] controls to 9-10 o'clock positions. Although you have purchased a brand new transceiver, some settings may be changed from the factory defaults because of the Quality Control (QC) process. Resetting the CPU is necessary to start from factory default. [PWR] [M/CALL•MW] [M/CALL•MW] While pushing both [M/CALL•MW], turn power ON. ➥ While pushing both band's [M/CALL•MW] keys, push and hold [PWR] for 1 sec. to reset the CPU. 2. Selecting the main band The IC-2820H displays 2 frequencies on the left and right bands simultaneously. However, transmission, some keys and microphone operation apply only to the main band. [MAIN•BAND] ➥ Push the desired band's (left or right) [MAIN•BAND] to select the main band. • "Q" appears for the main band. Using the HM-133 You can select the main band from the HM-133. Push Push again X
-
 1
1 -
2
-
3
-
4
-
5
-
6
-
7
-
8
-
9
-
10
-
11
-
 12
12 -
 13
13 -
 14
14 -
 15
15 -
 16
16 -
 17
17 -
 18
18 -
 19
19 -
 20
20 -
 21
21 -
 22
22 -
23
-
24
-
25
-
26
-
27
-
28
-
29
-
30
-
31
-
32
-
33
-
34
-
35
-
36
-
37
-
38
-
39
-
40
-
41
-
42
-
43
-
44
-
45
-
46
-
47
-
48
-
49
-
50
-
51
-
52
-
53
-
54
-
55
-
56
-
57
-
58
-
59
-
60
-
61
-
62
-
63
-
64
-
65
-
66
-
67
-
68
-
69
-
70
-
71
-
72
-
73
-
74
-
75
-
76
-
77
-
78
-
79
-
80
-
81
-
82
-
83
-
84
-
85
-
86
-
87
-
88
-
89
-
90
-
91
-
92
-
93
-
94
-
95
-
96
-
97
-
98
-
99
-
100
-
101
-
102
-
103
-
104
-
105
-
106
-
107
-
108
-
109
-
110
-
111
-
112
-
113
-
114
-
115
-
116
-
117
-
118
-
119
-
120
-
121
-
122
-
123
-
124
-
125
-
126
-
127
-
128
-
129
-
130
-
131
-
132
-
133
-
134
-
135
-
136
-
137
-
138
-
139
-
140
-
141
-
142
-
143
-
144
-
145
-
146
-
147
-
148
-
149
-
150
-
151
-
152
-
153
-
154
-
155
-
156
-
157
-
158
-
159
-
160
-
161
-
162
-
163
-
164
 |
 |