Intel AFCSASRISER User Guide - Page 154
Flashing the Firmware, Enabling RAID Premium Features, Enabling Full Disk Encryption feature
 |
View all Intel AFCSASRISER manuals
Add to My Manuals
Save this manual to your list of manuals |
Page 154 highlights
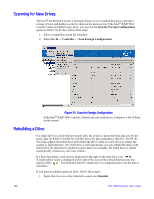
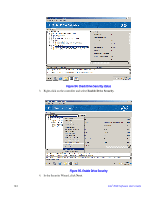
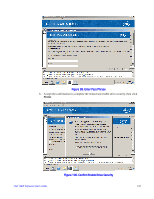
4. Right-click again and select Prepare for Removal. This will change drive status to Ready to Remove 5. If you change your mind, right-click it and select Undo Prepare for Removal. Otherwise, wait until the drive spins down and then remove it. Warning: While the system is powered off, never replace a drive that has not failed (and is not marked by the controller as failed). A drive must always be failed before it is replaced in an array. Flashing the Firmware The Intel® RAID Web Console 2 enables you to easily upgrade the controller firmware. To flash the controller firmware, follow these steps: 1. In the left panel, click on the icon of the controller you need to upgrade. 2. Right-click it and select Update Controller Firmware. 3. Browse for the .rom flash update file and click OK. The Intel® RAID Web Console 2 displays the version of the existing firmware and the version of the new firmware file. 4. When you are prompted to ask if you want to upgrade the firmware, click Yes. The controller is updated with the new firmware code contained in the .ROM file. Enabling RAID Premium Features Enabling Full Disk Encryption feature This feature is supported by Intel® RAID controller RS2BL080DE, RS2PI008DE, and by other controllers with Intel® RAID Premium Feature Key AXXRPFKDE installed. This feature also requires that Self-Encrypting Drives (SEDs) are connected to the RAID controller. Refer to Intel® RAID Premium Feature Key AXXRPFKSSD, AXXRPFKDE, and AXXRPFKSNSH Installation Guide (E88588-00x) for physical installation of the Premium Feature Key. This feature enables authentication key management for data security protection for Self Encrypting Drives (SED), auto-lock, and instant erase of self-encrypting drives. • It transparently auto-Locks Volumes; Volumes are automatically locks when powered down. • It provides secure data when a drive is misplaced, failed, experiencing drive theft, experiencing Server theft "Smash & Grab" • It provides Instant Secure Erase: Before returning leased Drives; Before redeploying with the datacenter. • It helps reduce risk of data being compromised when drives eventually leave the data center. • It significantly reduces the cost and time of repurposing or retiring drives. 142 Intel® RAID Software User's Guide
-
 1
1 -
2
-
3
-
4
-
5
-
6
-
7
-
8
-
9
-
10
-
11
-
12
-
13
-
14
-
15
-
16
-
17
-
18
-
19
-
20
-
21
-
22
-
23
-
24
-
25
-
26
-
27
-
28
-
29
-
30
-
31
-
32
-
33
-
34
-
35
-
36
-
37
-
38
-
39
-
40
-
41
-
42
-
43
-
44
-
45
-
46
-
47
-
48
-
49
-
50
-
51
-
52
-
53
-
54
-
55
-
56
-
57
-
58
-
59
-
60
-
61
-
62
-
63
-
64
-
65
-
66
-
67
-
68
-
69
-
70
-
71
-
72
-
73
-
74
-
75
-
76
-
77
-
78
-
79
-
80
-
81
-
82
-
83
-
84
-
85
-
86
-
87
-
88
-
89
-
90
-
91
-
92
-
93
-
94
-
95
-
96
-
97
-
98
-
99
-
100
-
101
-
102
-
103
-
104
-
105
-
106
-
107
-
108
-
109
-
110
-
111
-
112
-
113
-
114
-
115
-
116
-
117
-
118
-
119
-
120
-
121
-
122
-
123
-
124
-
125
-
126
-
127
-
128
-
129
-
130
-
131
-
132
-
133
-
134
-
135
-
136
-
137
-
138
-
139
-
140
-
141
-
142
-
143
-
144
-
145
-
146
-
147
-
148
-
 149
149 -
 150
150 -
 151
151 -
 152
152 -
 153
153 -
 154
154 -
 155
155 -
 156
156 -
 157
157 -
 158
158 -
 159
159 -
160
-
161
-
162
-
163
-
164
-
165
-
166
-
167
-
168
-
169
-
170
-
171
-
172
-
173
-
174
-
175
-
176
-
177
-
178
-
179
-
180
-
181
-
182
-
183
-
184
-
185
-
186
-
187
-
188
-
189
-
190
-
191
-
192
 |
 |