Intel AFCSASRISER User Guide - Page 47
Intel® RAID Drivers, RAID Driver Installation for Microsoft Windows* - motherboard
 |
View all Intel AFCSASRISER manuals
Add to My Manuals
Save this manual to your list of manuals |
Page 47 highlights
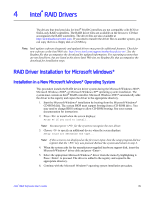
4 Intel® RAID Drivers The drivers that Intel provides for Intel® RAID Controllers are not compatible with SCSI or SATA-only RAID controllers. The RAID driver files are available on the Resource CD that accompanies the RAID controllers. The driver files are also available at http://downloadcenter.intel.com. If you need to transfer the driver files to another system, you can copy them to a floppy disk or a USB key. Note: Intel updates software frequently and updated drivers may provide additional features. Check for new software at the Intel Web site: http://www.intel.com/support/motherboards/server/. See the Readme file that accompanies the download for updated information. For operating systems that are not listed here, but are listed at the above Intel Web site see Readme file that accompanies the download for installation steps. RAID Driver Installation for Microsoft Windows* Installation in a New Microsoft Windows* Operating System This procedure installs the RAID device driver system during the Microsoft Windows 2003*, Microsoft Windows 2000*, or Microsoft Windows XP* operating system installation. The system must contain an Intel® RAID controller. Microsoft Windows 2003* automatically adds the driver to the registry and copies the driver to the appropriate directory. 1. Start the Microsoft Windows* installation by booting from the Microsoft Windows* CD-ROM disk. The system BIOS must support booting from a CD-ROM drive. You may need to change BIOS settings to allow CD-ROM booting. See your system documentation for instructions. 2. Press to install when the screen displays: Press F6 if you need to install... Note: You must press for the system to recognize the new driver. 3. Choose to specify an additional device when the screen displays: Setup could not determine the type... Note: If this screen is not displayed as the first user input, then the setup program did not register that the key was pressed. Reboot the system and return to step 2. 4. When the system asks for the manufacturer-supplied hardware support disk, insert the Microsoft Windows* driver disk and press . 5. Select the appropriate Microsoft Windows* driver from the menu by highlighting it. Press to proceed. The driver is added to the registry and copied to the appropriate directory. 6. Continue with the Microsoft Windows* operating system installation procedure. Intel® RAID Software User's Guide 35
-
 1
1 -
2
-
3
-
4
-
5
-
6
-
7
-
8
-
9
-
10
-
11
-
12
-
13
-
14
-
15
-
16
-
17
-
18
-
19
-
20
-
21
-
22
-
23
-
24
-
25
-
26
-
27
-
28
-
29
-
30
-
31
-
32
-
33
-
34
-
35
-
36
-
37
-
38
-
39
-
40
-
41
-
 42
42 -
 43
43 -
 44
44 -
 45
45 -
 46
46 -
 47
47 -
 48
48 -
 49
49 -
 50
50 -
 51
51 -
 52
52 -
53
-
54
-
55
-
56
-
57
-
58
-
59
-
60
-
61
-
62
-
63
-
64
-
65
-
66
-
67
-
68
-
69
-
70
-
71
-
72
-
73
-
74
-
75
-
76
-
77
-
78
-
79
-
80
-
81
-
82
-
83
-
84
-
85
-
86
-
87
-
88
-
89
-
90
-
91
-
92
-
93
-
94
-
95
-
96
-
97
-
98
-
99
-
100
-
101
-
102
-
103
-
104
-
105
-
106
-
107
-
108
-
109
-
110
-
111
-
112
-
113
-
114
-
115
-
116
-
117
-
118
-
119
-
120
-
121
-
122
-
123
-
124
-
125
-
126
-
127
-
128
-
129
-
130
-
131
-
132
-
133
-
134
-
135
-
136
-
137
-
138
-
139
-
140
-
141
-
142
-
143
-
144
-
145
-
146
-
147
-
148
-
149
-
150
-
151
-
152
-
153
-
154
-
155
-
156
-
157
-
158
-
159
-
160
-
161
-
162
-
163
-
164
-
165
-
166
-
167
-
168
-
169
-
170
-
171
-
172
-
173
-
174
-
175
-
176
-
177
-
178
-
179
-
180
-
181
-
182
-
183
-
184
-
185
-
186
-
187
-
188
-
189
-
190
-
191
-
192
 |
 |