Intel SE440BX-2 Product Guide - Page 23
How to Set the Processor Speed - processor support
 |
UPC - 735858129466
View all Intel SE440BX-2 manuals
Add to My Manuals
Save this manual to your list of manuals |
Page 23 highlights
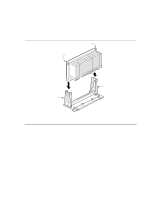
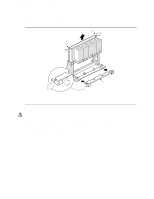
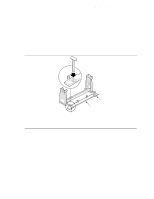
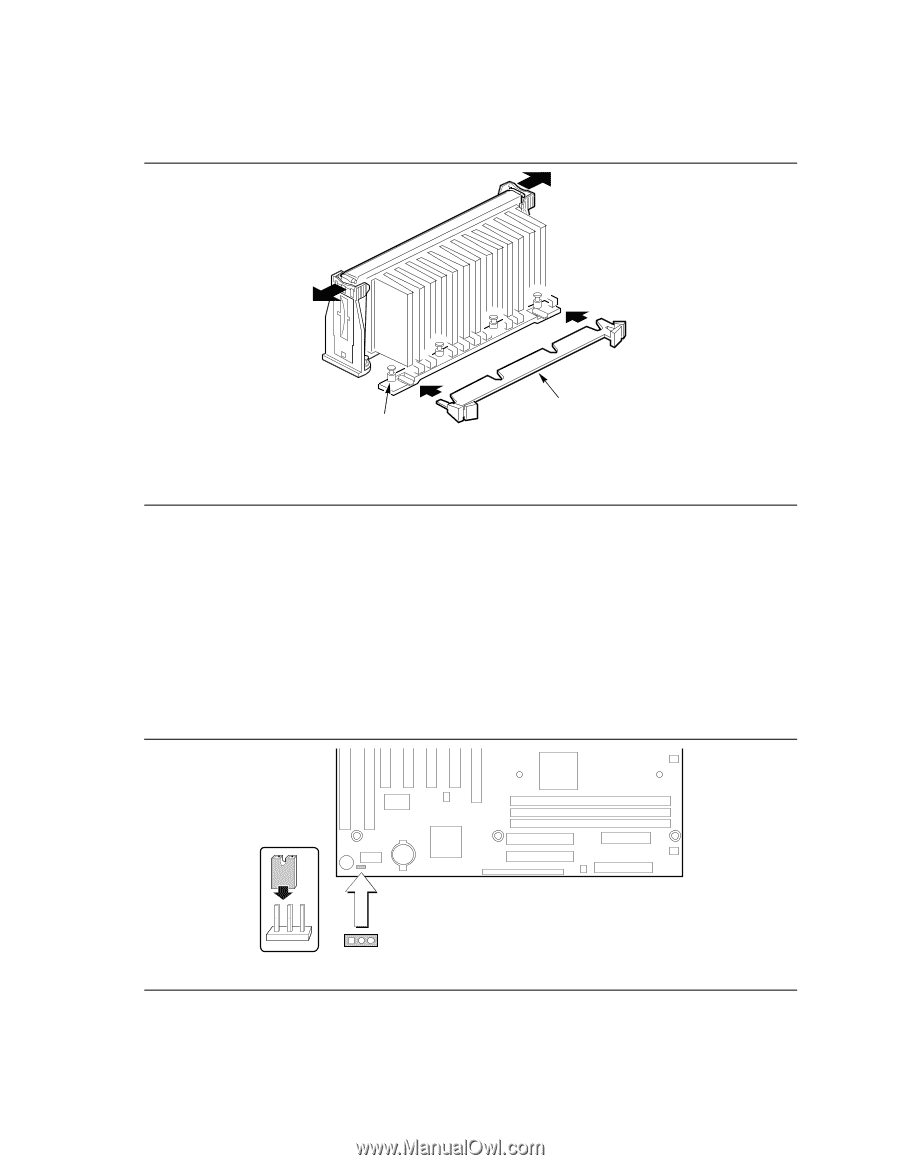
SE440BX-2 Motherboard Product Guide 3. Slide the top heatsink support bar onto the retaining pins of the support's base as shown in Figure 6. B A Heatsink support bar B Retaining pins A OM07179 Figure 6. Installing the Heatsink Support Top Bar How to Set the Processor Speed Set the processor speed after you have installed or upgraded the processor. This procedure assumes that the motherboard is installed in the computer and the configuration jumper block is set to normal mode. Figure 7 shows the location of the configuration jumper block on the motherboard. The jumper is set to normal mode at the factory. 1 3 J8A1 OM07285 Figure 7. Location of the Configuration Jumper Block 23
-
 1
1 -
2
-
3
-
4
-
5
-
6
-
7
-
8
-
9
-
10
-
11
-
12
-
13
-
14
-
15
-
16
-
17
-
 18
18 -
 19
19 -
 20
20 -
 21
21 -
 22
22 -
 23
23 -
 24
24 -
 25
25 -
 26
26 -
 27
27 -
 28
28 -
29
-
30
-
31
-
32
-
33
-
34
-
35
-
36
-
37
-
38
-
39
-
40
-
41
-
42
-
43
-
44
-
45
-
46
-
47
-
48
-
49
-
50
-
51
-
52
-
53
-
54
-
55
-
56
-
57
-
58
-
59
-
60
-
61
-
62
-
63
-
64
-
65
-
66
 |
 |
SE440BX-2 Motherboard Product Guide
23
3.
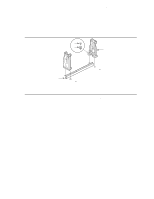
Slide the top heatsink support bar onto the retaining pins of the support’s base as shown in
Figure 6.
A
OM07179
B
A
Heatsink support bar
B
Retaining pins
Figure 6.
Installing the Heatsink Support Top Bar
How to Set the Processor Speed
Set the processor speed after you have installed or upgraded the processor.
This procedure
assumes that the motherboard is installed in the computer and the configuration jumper block is set
to normal mode.
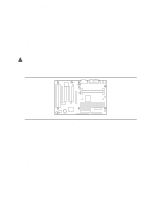
Figure 7 shows the location of the configuration jumper block on the motherboard.
The jumper is
set to normal mode at the factory.
OM07285
3
1
J8A1
Figure 7.
Location of the Configuration Jumper Block