Intel SR1520MLNA User Guide - Page 72
Removing Front Panel Board
 |
UPC - 735858197434
View all Intel SR1520MLNA manuals
Add to My Manuals
Save this manual to your list of manuals |
Page 72 highlights
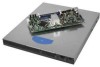
A B C C Figure 41. Removing Front Panel Board AF002510 Note: For ease of access, connect the cables before installing the front panel board. 9. Connect the USB and front panel cables to the replacement front panel board. See letter "A" in the following figure. 10. Set the front panel board into place, inserting the two knobs on the floor of the system through the two holes in the front panel board. See letter "B" in the figure. 11. Slide the front panel board forward to match the screw holes in the board and system. Screw the front panel board into place. See letters "C" and "D" in the figure. 52 Intel® Server System SR1520ML User's Guide
-
 1
1 -
2
-
3
-
4
-
5
-
6
-
7
-
8
-
9
-
10
-
11
-
12
-
13
-
14
-
15
-
16
-
17
-
18
-
19
-
20
-
21
-
22
-
23
-
24
-
25
-
26
-
27
-
28
-
29
-
30
-
31
-
32
-
33
-
34
-
35
-
36
-
37
-
38
-
39
-
40
-
41
-
42
-
43
-
44
-
45
-
46
-
47
-
48
-
49
-
50
-
51
-
52
-
53
-
54
-
55
-
56
-
57
-
58
-
59
-
60
-
61
-
62
-
63
-
64
-
65
-
66
-
 67
67 -
 68
68 -
 69
69 -
 70
70 -
 71
71 -
 72
72 -
 73
73 -
 74
74 -
 75
75 -
 76
76 -
 77
77 -
78
-
79
-
80
-
81
-
82
-
83
-
84
-
85
-
86
-
87
-
88
-
89
-
90
-
91
-
92
-
93
-
94
-
95
-
96
-
97
-
98
-
99
-
100
-
101
-
102
-
103
-
104
-
105
-
106
-
107
-
108
-
109
-
110
-
111
-
112
-
113
-
114
-
115
-
116
-
117
-
118
-
119
-
120
-
121
-
122
-
123
-
124
-
125
-
126
-
127
-
128
-
129
-
130
-
131
-
132
-
133
-
134
-
135
-
136
-
137
-
138
-
139
-
140
-
141
-
142
-
143
-
144
-
145
-
146
-
147
-
148
-
149
-
150
-
151
-
152
-
153
-
154
-
155
-
156
-
157
-
158
-
159
-
160
 |
 |

52
Intel
®
Server System SR1520ML User’s Guide
Figure 41. Removing Front Panel Board
Note:
For ease of access, connect the cables before installing the front panel board.
9.
Connect the USB and front panel cables to the replacement front panel board. See
letter “A” in the following figure.
10.
Set the front panel board into place, inserting the two knobs on the floor of the
system through the two holes in the front panel board. See letter “B” in the figure.
11.
Slide the front panel board forward to match the screw holes in the board and
system. Screw the front panel board into place. See letters “C” and “D” in the
figure.
C
A
B
C
AF002510