Intel WX58BP Product Guide - Page 57
Removing the Battery
 |
UPC - 735858208864
View all Intel WX58BP manuals
Add to My Manuals
Save this manual to your list of manuals |
Page 57 highlights
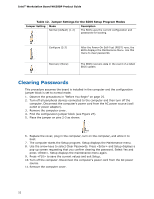
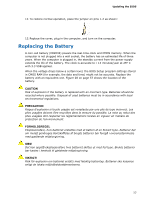
Updating the BIOS To replace the battery, follow these steps: 1. Observe the precautions in "Before You Begin" (see page 25). 2. Turn off all peripheral devices connected to the computer. Disconnect the computer's power cord from the AC power source (wall outlet or power adapter). 3. Remove the computer cover. 4. Locate the battery on the board (see Figure 28). 5. With a medium flat-bladed screwdriver, gently pry the battery free from its connector. Note the orientation of the "+" and "-" on the battery. 6. Install the new battery in the connector, orienting the "+" and "-" correctly. 7. Replace the computer cover. Figure 28. Removing the Battery 57
-
 1
1 -
2
-
3
-
4
-
5
-
6
-
7
-
8
-
9
-
10
-
11
-
12
-
13
-
14
-
15
-
16
-
17
-
18
-
19
-
20
-
21
-
22
-
23
-
24
-
25
-
26
-
27
-
28
-
29
-
30
-
31
-
32
-
33
-
34
-
35
-
36
-
37
-
38
-
39
-
40
-
41
-
42
-
43
-
44
-
45
-
46
-
47
-
48
-
49
-
50
-
51
-
 52
52 -
 53
53 -
 54
54 -
 55
55 -
 56
56 -
 57
57 -
 58
58 -
 59
59 -
 60
60 -
 61
61 -
 62
62 -
63
-
64
-
65
-
66
-
67
-
68
-
69
-
70
-
71
-
72
-
73
-
74
-
75
-
76
-
77
-
78
 |
 |

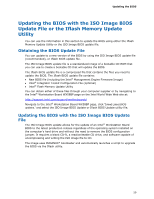
Updating the BIOS
57
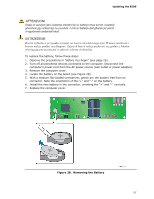
To replace the battery, follow these steps:
1.
Observe the precautions in "Before You Begin" (see page 25).
2.
Turn off all peripheral devices connected to the computer. Disconnect the
computer’s power cord from the AC power source (wall outlet or power adapter).
3.
Remove the computer cover.
4.
Locate the battery on the board (see Figure 28).
5.
With a medium flat-bladed screwdriver, gently pry the battery free from its
connector. Note the orientation of the “+” and “-” on the battery.
6.
Install the new battery in the connector, orienting the “+” and “-” correctly.
7.
Replace the computer cover.
Figure 28.
Removing the Battery