Intermec PC43d Fingerprint Developer's Guide (PC23d, PC43d/t, PM23c, PM43, PM4 - Page 124
Using the Printer Display, Controlling the LEDs and Beeper, Using an LED ON|OFF|BLINK Statement
 |
View all Intermec PC43d manuals
Add to My Manuals
Save this manual to your list of manuals |
Page 124 highlights
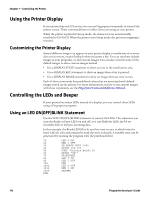
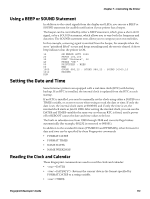
Chapter 7 - Controlling the Printer Using the Printer Display If your printer has an LCD screen, you can use Fingerprint commands to control the printer screen. These commands have no effect if you are using an icon printer. When the printer is placed in Setup mode, the character set is automatically switched to US-ASCII. When the printer exits Setup mode, the previous mapping is restored. Customizing the Printer Display Several different images can appear on your printer display to notify you of an event, alert you to errors, or give feedback when you press a key. You can use these default images in your programs, or add custom images. You can also override some of the default images to show custom images instead. • Use a DISPLAY STATE statement to show an icon in the notification area. • Use a DISPLAY KEY statement to show an image when a key is pressed. • Use a DISPLAY IMAGE statement to show an image when an error occurs. Each of these commands has predefined values that are associated with default images stored on the printer. For more information on how to use custom images with these commands, see the Fingerprint Command Reference Manual. Controlling the LEDs and Beeper If your printer has status LEDs instead of a display, you can control these LEDs using a Fingerprint program. Using an LED ON|OFF|BLINK Statement Use the LED ON|OFF|BLINK statement to control the LEDs. This statement can turn the Ready or Error LEDs on and off, or it can blink the LEDs (at 0.4 sec intervals) with or without incoming data. In this example, the Ready LED (0) is lit until an error occurs, at which time the Error LED (1) is lit and remains lit until the error is cleared. A suitable error can be generated by running the program with the printhead lifted. 10 20 30 40 50 60 70 80 90 100 1000 1010 1020 RUN LED 0 ON LED 1 OFF ON ERROR GOTO 1000 PRPOS 100,100 FONT "Univers Bold",36 PRTXT "OK!" PRINTFEED LED 0 ON LED 1 OFF END LED 0 OFF LED 1 ON RESUME 112 Fingerprint Developer's Guide
-
 1
1 -
2
-
3
-
4
-
5
-
6
-
7
-
8
-
9
-
10
-
11
-
12
-
13
-
14
-
15
-
16
-
17
-
18
-
19
-
20
-
21
-
22
-
23
-
24
-
25
-
26
-
27
-
28
-
29
-
30
-
31
-
32
-
33
-
34
-
35
-
36
-
37
-
38
-
39
-
40
-
41
-
42
-
43
-
44
-
45
-
46
-
47
-
48
-
49
-
50
-
51
-
52
-
53
-
54
-
55
-
56
-
57
-
58
-
59
-
60
-
61
-
62
-
63
-
64
-
65
-
66
-
67
-
68
-
69
-
70
-
71
-
72
-
73
-
74
-
75
-
76
-
77
-
78
-
79
-
80
-
81
-
82
-
83
-
84
-
85
-
86
-
87
-
88
-
89
-
90
-
91
-
92
-
93
-
94
-
95
-
96
-
97
-
98
-
99
-
100
-
101
-
102
-
103
-
104
-
105
-
106
-
107
-
108
-
109
-
110
-
111
-
112
-
113
-
114
-
115
-
116
-
117
-
118
-
 119
119 -
 120
120 -
 121
121 -
 122
122 -
 123
123 -
 124
124 -
 125
125 -
 126
126 -
 127
127 -
 128
128 -
 129
129 -
130
-
131
-
132
-
133
-
134
-
135
-
136
-
137
-
138
-
139
-
140
-
141
-
142
-
143
-
144
-
145
-
146
-
147
-
148
-
149
-
150
-
151
-
152
-
153
-
154
-
155
-
156
-
157
-
158
-
159
-
160
-
161
-
162
-
163
 |
 |
