JVC DVL120U Instruction Manual - Page 5
PROVIDED ACCESSORIES, How To Attach The Lens Cap - battery
 |
UPC - 046838160868
View all JVC DVL120U manuals
Add to My Manuals
Save this manual to your list of manuals |
Page 5 highlights
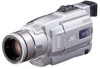
PROVIDED ACCESSORIES or AC Adapter AP-V10EG or AP-V12EG Shoulder Strap EN 5 Battery Pack BN-V408U Lens Cap (See below for attachment) Power Cord Core Filter (for optional S-Video cable ੬ pg. 6 for attachment) Audio/Video Cable (ø3.5 mini-plug to RCA plug) NOTE: In order to maintain optimum performance of the camcorder, provided cables may be equipped with one or more core filter. If a cable has only one core filter, the end that is closest to the filter should be connected to the camcorder. How To Attach The Lens Cap To protect the lens, attach the provided lens cap to the camcorder as shown in the illustration. NOTE: To confirm the lens cap is on correctly make sure the cap is flush to the camera. 1 2 3
-
 1
1 -
 2
2 -
 3
3 -
 4
4 -
 5
5 -
 6
6 -
 7
7 -
 8
8 -
 9
9 -
 10
10 -
 11
11 -
12
-
13
-
14
-
15
-
16
-
17
-
18
-
19
-
20
-
21
-
22
-
23
-
24
-
25
-
26
-
27
-
28
-
29
-
30
-
31
-
32
-
33
-
34
-
35
-
36
-
37
-
38
-
39
-
40
-
41
-
42
-
43
-
44
-
45
-
46
-
47
-
48
-
49
-
50
-
51
-
52
-
53
-
54
-
55
-
56
-
57
-
58
-
59
-
60
-
61
-
62
-
63
-
64
 |
 |

EN
5
PROVIDED ACCESSORIES
NOTE:
In order to maintain optimum performance of the camcorder, provided cables may be equipped with one or more
core filter. If a cable has only one core filter, the end that is closest to the filter should be connected to the camcorder.
Audio/Video Cable
(ø3.5 mini-plug to RCA plug)
Shoulder Strap
Battery Pack
BN-V408U
AC Adapter AP-V10EG
or AP-V12EG
Lens Cap
(See below for
attachment)
Power Cord
Core Filter
(for optional S-Video cable
±
pg. 6 for attachment)
How To Attach The Lens Cap
To protect the lens, attach the provided lens cap to the camcorder as shown in the illustration.
NOTE:
To confirm the lens cap is on correctly make sure the cap is flush to the camera.
1
2
3
or