JVC GY-DV300REM Instruction Manual - Page 33
Recording the Color Bar, Using the AE (Automatic Exposure) Function, The AE function becomes ON.
 |
View all JVC GY-DV300REM manuals
Add to My Manuals
Save this manual to your list of manuals |
Page 33 highlights
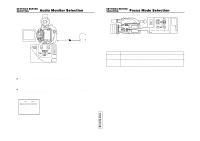
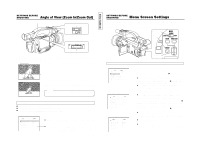
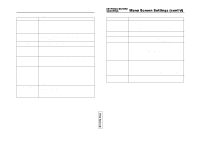
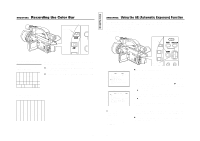
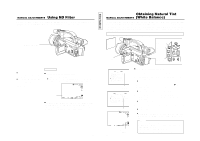
SHOOTING Recording the Color Bar BAR button BAR AW Color bar signal of the built-in signal generator An SMPTE standard color bar is output. (U MODEL) White Yellow Cyan Green Magenta Red Blue It can be selected whether the camera image should be output or whether the color bar of the built-in signal generator should be output during recording-standby and recording. Ⅲ The color bar is output when the BAR button is pressed while the camera image is output. Ⅲ To return to the camera image, press the BAR button again. Blue Black Magenta Black Cyan Black White Black White Black An EBU standard color bar is output. (E MODEL) White Yellow Cyan Green Magenta Red Blue Black 61 TENTATIVE SHOOTING Using the AE (Automatic Exposure) Function In addition to the automatic shooting mode, the GY-DV300 also offers the use of the AE (Automatic Exposure) function. The AE function combines the following three functions to automatically adjust the video signal level to their optimum levels. Gain : ALC (Auto Level Control) Shutter Speed : EEI Iris : Auto iris MENU button GAIN SHUTTER MENU SELECT dial TOP MENU screen MENU MO D E MANU AL E A R PHON E LEV EL 1 0 S YS T EM S E T . . D I S PLAY SE T . . CAME RA S E T [ C AM - A ] . . OPER AT I ON [ CAM- A ] . . C LOC K / TC . . MENU A L L R ESE T CANCE L EX I T OPERATION menu screen OPERA T I ON [ A ] AE ON IRI S -- - SHU T T E R --- WH I T E BA LA NC E P U SH AUTO OIS ON CH1 AUD I O L EVE L AUTO CH2 AUD I O L EVE L AUTO PAGE BACK ● When the AE item is ON, the IRIS and SHUTTER items cannot be set. White balance and audio recording level adjustment can be selected as AUTO or MANUAL. Ⅲ Engage the recording-standby mode. 1. Press the MENU button to display the TOP MENU screen. 2. Use the SELECT dial to set the MODE item to MANUAL on the TOP MENU screen. 3. Rotate the SELECT dial to align the cursor (f) with the OPERATION SET item on the TOP MENU screen, and then press the SELECT dial. ● The OPERATION menu screen appears. 4. Use the SELECT dial to set the AE item on the OPERATION menu screen to ON, and then press the SELECT dial. ● The AE function becomes ON. 5. To return to the normal screen, use either of the following methods. Press the MENU button or Return to the TOP MENU screen and then select the EXIT item from the TOP MENU screen before pressing the SELECT dial. Ⅲ To stop use of the AE function, set the AE item to OFF on the OPERATION menu screen. 62
-
 1
1 -
2
-
3
-
4
-
5
-
6
-
7
-
8
-
9
-
10
-
11
-
12
-
13
-
14
-
15
-
16
-
17
-
18
-
19
-
20
-
21
-
22
-
23
-
24
-
25
-
26
-
27
-
 28
28 -
 29
29 -
 30
30 -
 31
31 -
 32
32 -
 33
33 -
 34
34 -
 35
35 -
 36
36 -
 37
37 -
 38
38 -
39
-
40
-
41
-
42
-
43
-
44
-
45
-
46
-
47
-
48
-
49
-
50
-
51
-
52
-
53
-
54
-
55
-
56
-
57
 |
 |
