JVC LX-UH1B Operation Manual
JVC LX-UH1B Manual
 |
View all JVC LX-UH1B manuals
Add to My Manuals
Save this manual to your list of manuals |
JVC LX-UH1B manual content summary:
- JVC LX-UH1B | Operation Manual - Page 1
DLP PROJECTOR LX-UH1 USER MANUAL - JVC LX-UH1B | Operation Manual - Page 2
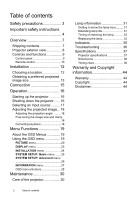
of contents Safety precautions 3 Important safety instructions 4 Overview 7 Shipping contents 7 Projector exterior view 8 Controls and functions 32 Replacing the lamp 33 Indicators 35 Troubleshooting 36 Specifications 37 Projector specifications 37 Dimensions 38 Timing chart 39 - JVC LX-UH1B | Operation Manual - Page 3
, if not installed and used in accordance with the instructions, may cause harmful interference to radio communications. However, technician for help. Declaration of Conformity Model Number: LX-UH1B, LX-UH1W Trade Name: JVC Responsible party: JVCKENWOOD USA Corporation Address: 1700 Valley Road - JVC LX-UH1B | Operation Manual - Page 4
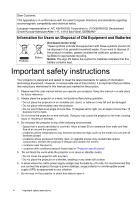
compatibility and electrical safety. European representative of JVC KENWOOD Corporation is: JVCKENWOOD Deutschland GmbH Konrad- you follow the instructions mentioned in this manual and marked on the product. 1. Please read this user manual before you operate your projector. Keep this manual in a - JVC LX-UH1B | Operation Manual - Page 5
circumstances should you ever undo or remove any other covers. Refer servicing only to suitably qualified professional service personnel. Please keep the original packing for possible future shipment. If you need to pack your projector after use, adjust the projection lens to an appropriate position - JVC LX-UH1B | Operation Manual - Page 6
. Do not have rubber or plastic products touching the projector for a long time. They will leave marks on the finish. If cleaning with a chemically treated cloth, be sure to follow the cleaning product's safety instructions. Disposal This product contains the following materials which are harmful - JVC LX-UH1B | Operation Manual - Page 7
depending on your region of purchase. Please check with your place of purchase. Some of the accessories may vary from region to region. (US) (EU) Projector Remote control and batteries Power cable User manual CD Quick start guide Overview 7 - JVC LX-UH1B | Operation Manual - Page 8
Projector exterior view Front and upper side view 1 2 3 4 Rear/bottom view 11 input jack 13. HDMI 1 port (HDCP 2.2) 14. HDMI 2 port 15. Mini USB port 22 21 Used for service. 16. RS-232 control port 17. USB Type-A port Used for charging external device. 18. 12VDC output terminal Used - JVC LX-UH1B | Operation Manual - Page 9
flashes when the lamp has developed a problem. 4. HIDE Used to blank the screen picture. Press most of the keys on the projector or remote control to restore the picture. the projector between standby mode and on. 8. Keystone keys ( , ) Launches the Keystone window. Use , to manually correct - JVC LX-UH1B | Operation Manual - Page 10
, exits and 7 saves menu settings. 14 10. BRIGHTNESS 15 Displays the setting bar for brightness 8 16 adjustment. 9 17 11. POWER Toggles the projector between standby mode 10 18 and on. 12. DYNAMIC Selects the picture mode: Dynamic. 13. GAMMA Displays the Select Gamma menu. 14 - JVC LX-UH1B | Operation Manual - Page 11
batteries according to the manufacturer's instructions and local environment regulations for your region. • Never throw the batteries into a fire. within 30 degrees perpendicular to the projector's IR remote control sensor(s) to function correctly. The distance between the remote control and the - JVC LX-UH1B | Operation Manual - Page 12
• Size and position of your screen • Electrical outlet location • Location and distance between the projector and the rest of your equipment You can install your projector in the following ways. 1. Front: Select this location with the projector placed near the floor in front of the screen. This is - JVC LX-UH1B | Operation Manual - Page 13
lens shift is lowered to its lowest level) C: Lens center movement distance (when lens shift is set to maximum left) D: Lens center movement distance (when lens shift is set to maximum right) E: Projection distance from the projector to the screen F: Size of the projected image • The screen aspect - JVC LX-UH1B | Operation Manual - Page 14
projection size, distance, and the projector's optical characteristics prior to the installation. This helps you determine the exact mounting position which best suits your installation. The projection range for lens shift a a c d b a: - JVC LX-UH1B | Operation Manual - Page 15
the connection illustrations shown below, cables are not included with the projector (see "Shipping contents"). They are commercially available from electronics cable Terminal HDMI 1 HDMI 2 HDCP ver. 2.2 1.4 Only HDMI 1 connector supports 4K (Ultra HD)/HDR. Used for 4K/HDR source Up to FHD (2K - JVC LX-UH1B | Operation Manual - Page 16
message. 2. Press a second time. The POWER indicator light flashes orange and the fans run for about two minutes to cool the lamp. The projector doesn't respond to any commands during the cooling process. 3. When the cooling process ends, the POWER indicator light will show a solid orange. If - JVC LX-UH1B | Operation Manual - Page 17
picture results, you should select and use an input signal which outputs at this resolution. Any other resolutions will be scaled by the projector depending upon the Aspect Ratio setting, which may cause some image distortion or loss of picture clarity. See "Aspect Ratio" for details. Operation - JVC LX-UH1B | Operation Manual - Page 18
image is noticeably wider at either the top or bottom. It occurs when the projector is not perpendicular to the screen. Besides adjusting the height of the projector, you may correct this manually by following the instructions below: 1. Do one of the following steps to display the Keystone window - JVC LX-UH1B | Operation Manual - Page 19
input signal Status Press BACK to go back to the previous window or to Exit exit. To access the OSD menu, press MENU on the projector or remote control. It consists of the following main menus. Check the links after the menu items below to learn more details. 1. PICTURE menu (see - JVC LX-UH1B | Operation Manual - Page 20
Maximizes the brightness of the projected image. This mode is suitable for environments where extra-high brightness is required, such as using the projector in well lit rooms. • User 1/User 2: Recalls the customized settings. After User 1/User 2 is selected, some of the sub-menus under the DISPLAY - JVC LX-UH1B | Operation Manual - Page 21
Submenu Functions and Descriptions Tint Sharpness Adjusts the red and green color tones of the picture. The higher the value, the more reddish the picture becomes. The lower the value, the more greenish the picture becomes. Makes the picture look sharper or softer. The higher the value, the - JVC LX-UH1B | Operation Manual - Page 22
Submenu Functions and Descriptions • 3D Color Management Provides six sets (RGBCMY) of colors to be adjusted. You can select any of them to adjust its color range and saturation. 1. Press OK to display the 3D Color Management window. 2. Select Primary Color and use / to select a color from R (Red), - JVC LX-UH1B | Operation Manual - Page 23
• Auto 15:9 picture Scales a picture proportionally to fit the projector's native resolution in its horizontal or vertical width. This makes the Image Position window. You may use the directional arrow keys on the projector or remote control to adjust the position of the projected picture. The - JVC LX-UH1B | Operation Manual - Page 24
free from distortion. To close the test pattern, go back to this menu and select Off. Lamp Settings 12V Trigger • Lamp Mode Select the projector lamp power from the following modes. • Normal: Provides full lamp brightness. • Eco: Reduces system noise and lamp power consumption by 30%. If the Eco - JVC LX-UH1B | Operation Manual - Page 25
the On-Screen Display (OSD) menus. Background Color Sets the background color for the projector. Splash Screen Allows you to select which logo screen displays during projector start-up. You can choose JVC logo screen, Blue screen, or Black screen. Auto Power Off Prevents unnecessary projection - JVC LX-UH1B | Operation Manual - Page 26
: 1. Press and hold OK for 3 seconds when the password error message displays. The projector will display a coded number on the screen. 2. Write down the number and turn off your projector. 3. Seek help from the local JVC service center to decode the number. You may be required to provide proof of - JVC LX-UH1B | Operation Manual - Page 27
Panel Key Lock will function, except POWER. To unlock the keys, press and hold Off here using the remote control. on the projector for 3 seconds or select Reset All Settings The function is accessible through the remote control or keypad. Returns all settings to the factory preset values - JVC LX-UH1B | Operation Manual - Page 28
MoviePro DISPLAY INSTALLATION Auto Aperture Reset Current Picture Mode Aspect Ratio Image Position Overscan Adjustment Phase H. Size e-shift Projector Mode Test Pattern Lamp Mode Lamp Settings Reset Lamp Timer Lamp Information 12V Trigger High Altitude Mode Options Natural/Cinema - JVC LX-UH1B | Operation Manual - Page 29
Color System Lamp Usage Time Firmware Version Menu Position Menu Display Time Reminder Message Change Password Power On Lock Norsk Green/Black/Blue Black/Blue/JVC Disable/5 min/10 min/15 min/ 20 min/25 min/30 min Off/On Center/Top-Left/Top-Right/ Bottom-Right/Bottom-Left Always On - JVC LX-UH1B | Operation Manual - Page 30
detergent. Then wipe the case. Never use wax, alcohol, benzene, thinner or other chemical detergents. These can damage the case. Storing the projector To store the projector for an extended time: • Make sure the temperature and humidity of the storage area are within the recommended range for the - JVC LX-UH1B | Operation Manual - Page 31
to your desired mode, and press OK. 3. When done, press MENU to save your changes and exit. Setting Auto Power Off This function allows the projector to turn off automatically if no input source is detected after a set period of time. 1. Go to SYSTEM SETUP: Basic > Auto Power Off. 2. Press / to - JVC LX-UH1B | Operation Manual - Page 32
cause a malfunction in the projector and in some instances the power off and let the projector cool for 45 minutes. projector is normally run with Eco selected operate the projector until the inconvenience when the Notice projector runs out of lamp time before the projector will operate normally. - JVC LX-UH1B | Operation Manual - Page 33
that you use respirators, safety glasses, goggles or face shield and wear protective clothing such as gloves. 1. Turn the power off and disconnect the projector from the power outlet. If the lamp is hot, avoid burns by waiting for approximately 45 minutes until the lamp has cooled. 2. Use a pair - JVC LX-UH1B | Operation Manual - Page 34
or near flammable materials. • Do not insert your hands into the projector after the lamp is removed. If you touch the optical components inside • Do not over tighten the screw. 17. Connect the power and restart the projector. 18. After the startup logo displays, reset the lamp timer via the OSD - JVC LX-UH1B | Operation Manual - Page 35
. Check the following information about the indicator lights. If there is anything wrong, turn the projector off and contact your dealer. Light Status & Description Off Off Off Off Red Flashing Red Red Flashing Red Off Green Red Orange Flashing Orange Off - JVC LX-UH1B | Operation Manual - Page 36
Troubleshooting Problem The projector does not turn on. No picture. Image is unstable. Picture is blurred. Remote control does not work correctly. Cause Remedy There is no power from the power cable. Plug the power cable into the AC inlet on the rear of the projector, and plug the power cable - JVC LX-UH1B | Operation Manual - Page 37
Specifications Projector specifications All specifications are subject to change without notice. Optical Input terminals Resolution 3840 x 2160 with e-shift Display system Single-chip DLPTM system Lens F = 1.809, f = - JVC LX-UH1B | Operation Manual - Page 38
Dimensions 333 mm x 324 mm x 122 mm (13 1/8" x 12 7/8" x 4 7/8") (W x D x H) Unit: mm (inches) 324 (12 7/8") 122 (4 7/8") 333 (13 1/8") 55.2 51.2 (2 1/8") (2 1/8") Ceiling mount screws: M4 Max. L = 25 mm; Min. L = 20 mm (Max. L= 1" ; Min. L= 7/8") 60.87 (2ɾ1/2") 63.62 (2ɾ5/8") 1.45 (1/8") 198 - JVC LX-UH1B | Operation Manual - Page 39
Timing chart Supported timing for PC input Format Resolution Refresh rate (Hz) 720 x 400 640 x 480 800 x 600 1024 x 768 1152 x 864 1280 x 720 1280 x 768 1280 x 800 - JVC LX-UH1B | Operation Manual - Page 40
x 1080_60 (Reduce Blanking) 60 67.5 148.5 1920 x 1200@60Hz 1920 x 1200_60 (Reduce Blanking) 59.95 74.038 154 The timings showing above may not be supported due to EDID file and VGA graphic card limitations. It is possible that some timings cannot be chosen. 40 Maintenance - JVC LX-UH1B | Operation Manual - Page 41
Supported timing for HDMI (HDCP) input Format Resolution Vertical Frequency (Hz) Horizontal Frequency (KHz) VGA_60 59.940 31.469 640 x 480 VGA_72 VGA_75 72.809 75. - JVC LX-UH1B | Operation Manual - Page 42
3840 x 2160 3840 x 2160_30 30 67.5 297 3840 x 2160_60 3840 x 2160 Only via HDMI 1 60 port) 135 594 The timings showing above may not be supported due to EDID file and VGA graphic card limitations. It is possible that some timings cannot be chosen. 42 Maintenance - JVC LX-UH1B | Operation Manual - Page 43
Timing 480i 480p 576i 576p 720/50p 720/60p 1080/24P 1080/25P 1080/30P 1080/50i 1080/60i 1080/50P 1080/60P 2160/24P 2160/25P 2160/30P 2160/50P 2160/60P Resolution 720 (1440) x 480 720 x 480 720 (1440) x 576 720 x 576 1280 x 720 1280 x 720 1920 x 1080 1920 x 1080 1920 x 1080 1920 x 1080 1920 x 1080 - JVC LX-UH1B | Operation Manual - Page 44
of any defective parts (labor included). To obtain warranty service, immediately notify the dealer from which you purchased the instructions, especially the ambient humidity and altitude must meet the environmental requirements listed in the user manual, and avoiding to operate the projector
-
 1
1 -
 2
2 -
 3
3 -
 4
4 -
 5
5 -
 6
6 -
 7
7 -
8
-
9
-
10
-
11
-
12
-
13
-
14
-
15
-
16
-
17
-
18
-
19
-
20
-
21
-
22
-
23
-
24
-
25
-
26
-
27
-
28
-
29
-
30
-
31
-
32
-
33
-
34
-
35
-
36
-
37
-
38
-
39
-
40
-
41
-
42
-
43
-
44
 |
 |
USER MANUAL
DLP PROJECTOR
LX-UH1