JVC LX-UH1B Operation Manual - Page 11
Installing/replacing the remote control battery, Remote control effective range - throw distance
 |
View all JVC LX-UH1B manuals
Add to My Manuals
Save this manual to your list of manuals |
Page 11 highlights
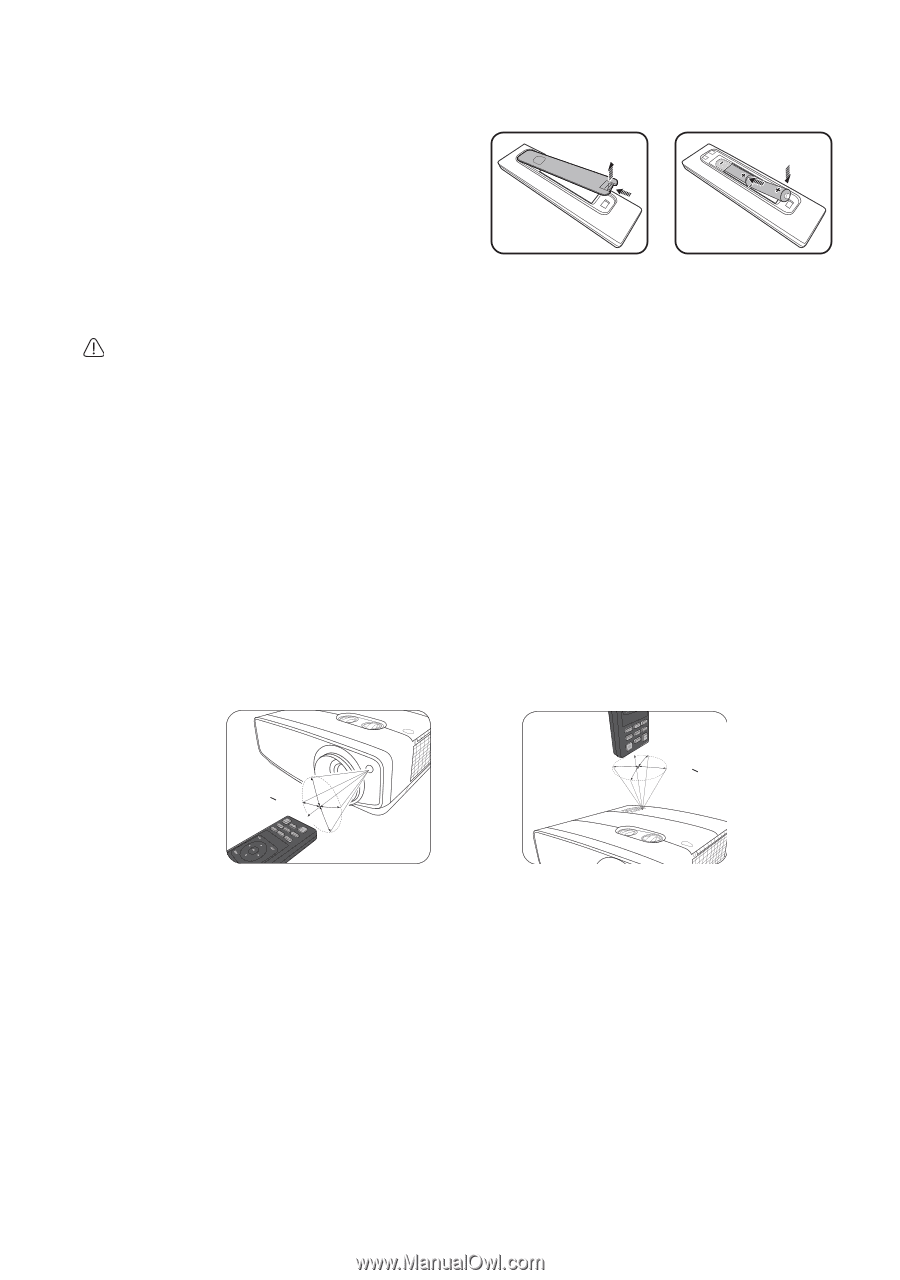
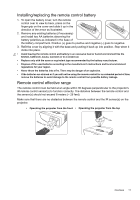
Installing/replacing the remote control battery 1. To open the battery cover, turn the remote control over to view its back, press on the finger grip on the cover and slide it up in the direction of the arrow as illustrated. 2. Remove any existing batteries (if necessary) and install two AA batteries observing the battery polarities as indicated in the base of the battery compartment. Positive (+) goes to positive and negative (-) goes to negative. 3. Refit the cover by aligning it with the base and pushing it back up into position. Stop when it clicks into place. • Avoid leaving the remote control and battery in an excessive heat or humid environment like the kitchen, bathroom, sauna, sunroom or in a closed car. • Replace only with the same or equivalent type recommended by the battery manufacturer. • Dispose of the used batteries according to the manufacturer's instructions and local environment regulations for your region. • Never throw the batteries into a fire. There may be danger of an explosion. • If the batteries are drained or if you will not be using the remote control for an extended period of time, remove the batteries to avoid damage to the remote control from possible battery leakage. Remote control effective range The remote control must be held at an angle within 30 degrees perpendicular to the projector's IR remote control sensor(s) to function correctly. The distance between the remote control and the sensor(s) should not exceed 8 meters (~ 26 feet). Make sure that there are no obstacles between the remote control and the IR sensor(s) on the projector. • Operating the projector from the front • Operating the projector from the top Approx. +30º Approx. +30º Overview 11
-
 1
1 -
2
-
3
-
4
-
5
-
 6
6 -
 7
7 -
 8
8 -
 9
9 -
 10
10 -
 11
11 -
 12
12 -
 13
13 -
 14
14 -
 15
15 -
 16
16 -
17
-
18
-
19
-
20
-
21
-
22
-
23
-
24
-
25
-
26
-
27
-
28
-
29
-
30
-
31
-
32
-
33
-
34
-
35
-
36
-
37
-
38
-
39
-
40
-
41
-
42
-
43
-
44
 |
 |