Kenwood DDX372BT User Manual - Page 11
Discs
 |
View all Kenwood DDX372BT manuals
Add to My Manuals
Save this manual to your list of manuals |
Page 11 highlights
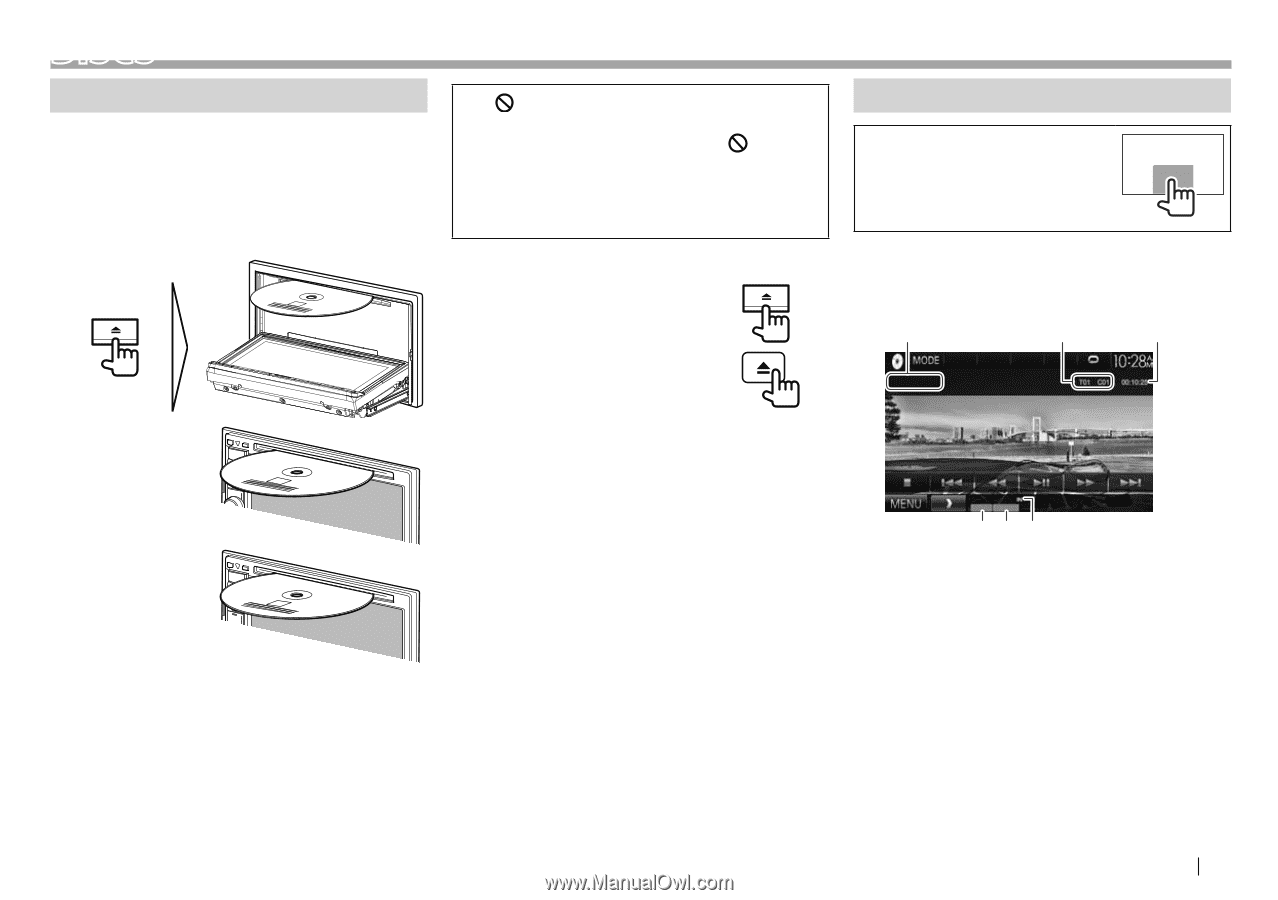
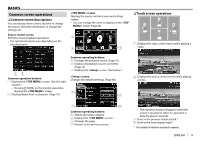
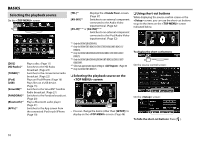
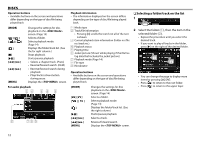
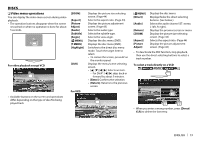
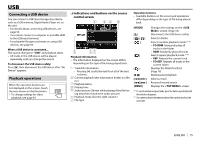
DISCS Playing a disc • If a disc does not have a disc menu, all tracks on it will be played repeatedly until you change the source or eject the disc. • For playable disc types/file types, see page 59. ❏ Inserting a disc Insert a disc with the label side facing up. DDX672BH DDX492/DDX392/ DDX372BT/ DDX320BT/DDX272 DDX415BT/DDX315 The source changes to "DISC" and playback starts. • The IN indicator lights up while a disc is inserted. • If " " appears on the screen, the unit cannot accept the operation you have tried to do. - In some cases, without showing " ," operations will not be accepted. • When playing back a multi-channel encoded disc, the multi-channel signals are downmixed to stereo. ❏ Ejecting a disc DDX672BH DDX492/DDX415BT/DDX392/ DDX372BT/DDX320BT/DDX315/ DDX272 • When removing a disc, pull it horizontally. • You can eject a disc when playing another AV source. • If the ejected disc is not removed within 15 seconds, the disc is automatically inserted again into the loading slot to protect it from dust. Closing the monitor panel (only for DDX672BH) After removing the disc, press M on the monitor panel. The monitor panel closes. Playback operations When the operation buttons are not displayed on the screen, touch the area shown on the illustration. • To change settings for video playback, see page 43. ❏ Indications and buttons on the source control screen For video playback 1 2 3 45 6 Playback information • The information displayed on the screen differs depending on the type of disc/file being played back. 1 Media type 2 Current playback item information (title no./ chapter no./folder no./file no./track no.) 3 Playing time 4 Playback mode (Page 14) 5 File type 6 IN indicator ENGLISH 11
-
 1
1 -
2
-
3
-
4
-
5
-
 6
6 -
 7
7 -
 8
8 -
 9
9 -
 10
10 -
 11
11 -
 12
12 -
 13
13 -
 14
14 -
 15
15 -
 16
16 -
17
-
18
-
19
-
20
-
21
-
22
-
23
-
24
-
25
-
26
-
27
-
28
-
29
-
30
-
31
-
32
-
33
-
34
-
35
-
36
-
37
-
38
-
39
-
40
-
41
-
42
-
43
-
44
-
45
-
46
-
47
-
48
-
49
-
50
-
51
-
52
-
53
-
54
-
55
-
56
-
57
-
58
-
59
-
60
-
61
-
62
-
63
-
64
-
65
-
66
-
67
-
68
 |
 |