Kenwood DDX372BT User Manual - Page 57
Removing, DDX492, DDX392, DDX320BT - microphone
 |
View all Kenwood DDX372BT manuals
Add to My Manuals
Save this manual to your list of manuals |
Page 57 highlights
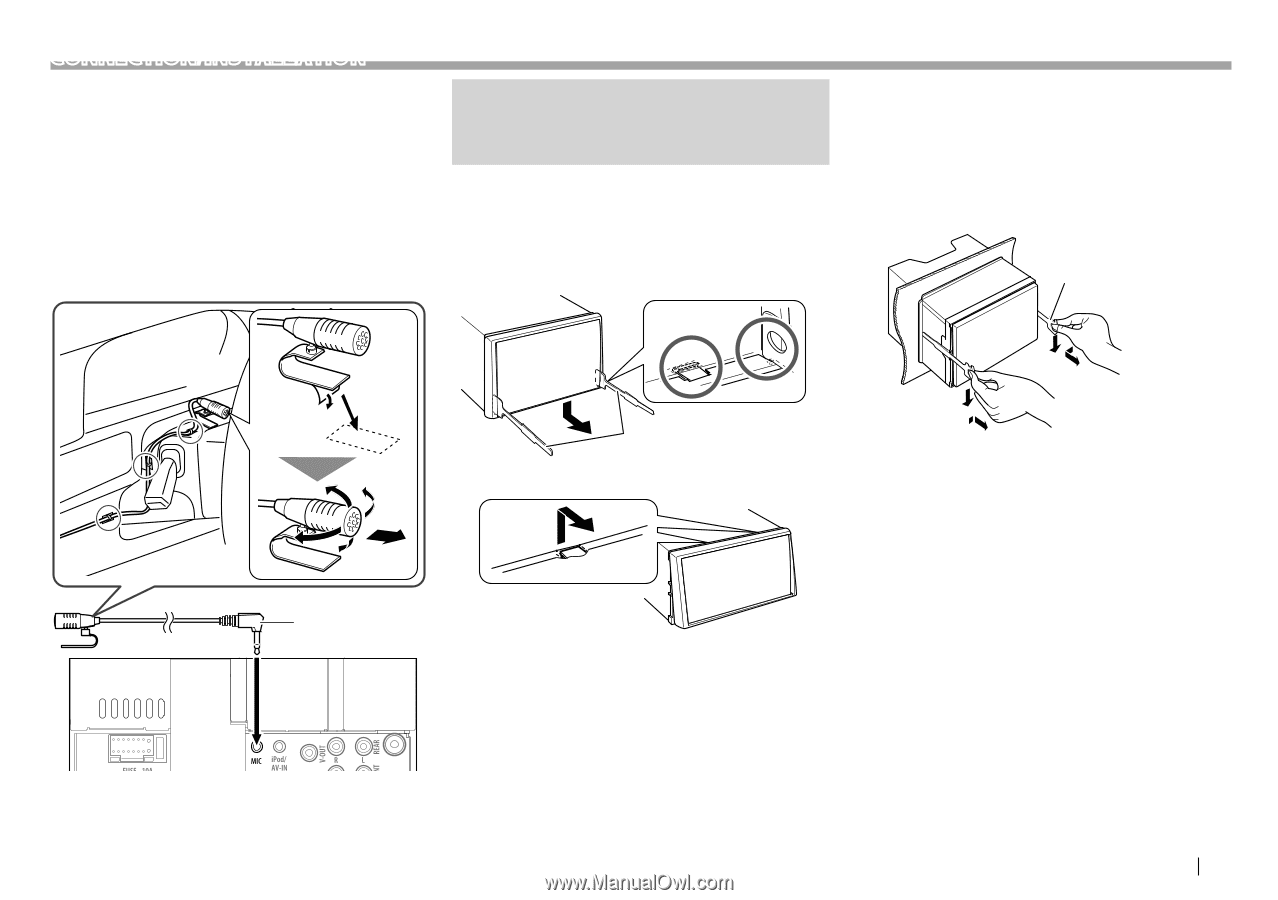
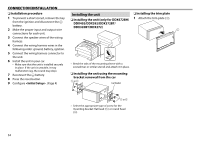
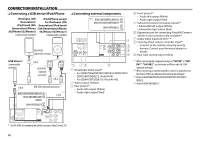
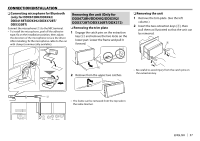
CONNECTION/INSTALLATION ❏ Connecting microphone for Bluetooth (only for DDX672BH/DDX492/ DDX415BT/DDX392/DDX372BT/ DDX320BT) Connect the microphone (7) to the MIC terminal. • To install the microphone, peel off the adhesive tape, fix on the installation position, then adjust the direction of the microphone to face the driver. After installing, fix the microphone cable to the car with clamps (commercially available). Removing the unit (Only for DDX672BH/DDX492/DDX392/ DDX372BT/DDX320BT/DDX272) ❏ Removing the trim plate 1 Engage the catch pins on the extraction key (4) and remove the two locks on the lower part. Lower the frame and pull it forward. ❏ Removing the unit 1 Remove the trim plate. (See the left column.) 2 Insert the two extraction keys (4), then pull them as illustrated so that the unit can be removed. 4 4 2 Remove from the upper two catches. • Be careful to avoid injury from the catch pins on the extraction key. 7 • The frame can be removed from the top side in the same manner. ENGLISH 57
-
 1
1 -
2
-
3
-
4
-
5
-
6
-
7
-
8
-
9
-
10
-
11
-
12
-
13
-
14
-
15
-
16
-
17
-
18
-
19
-
20
-
21
-
22
-
23
-
24
-
25
-
26
-
27
-
28
-
29
-
30
-
31
-
32
-
33
-
34
-
35
-
36
-
37
-
38
-
39
-
40
-
41
-
42
-
43
-
44
-
45
-
46
-
47
-
48
-
49
-
50
-
51
-
 52
52 -
 53
53 -
 54
54 -
 55
55 -
 56
56 -
 57
57 -
 58
58 -
 59
59 -
 60
60 -
 61
61 -
 62
62 -
63
-
64
-
65
-
66
-
67
-
68
 |
 |