Kenwood DNX6190HD Instruction Manual - Page 42
Display Setup, Monitor angle control, Panel color coordinate
 |
View all Kenwood DNX6190HD manuals
Add to My Manuals
Save this manual to your list of manuals |
Page 42 highlights
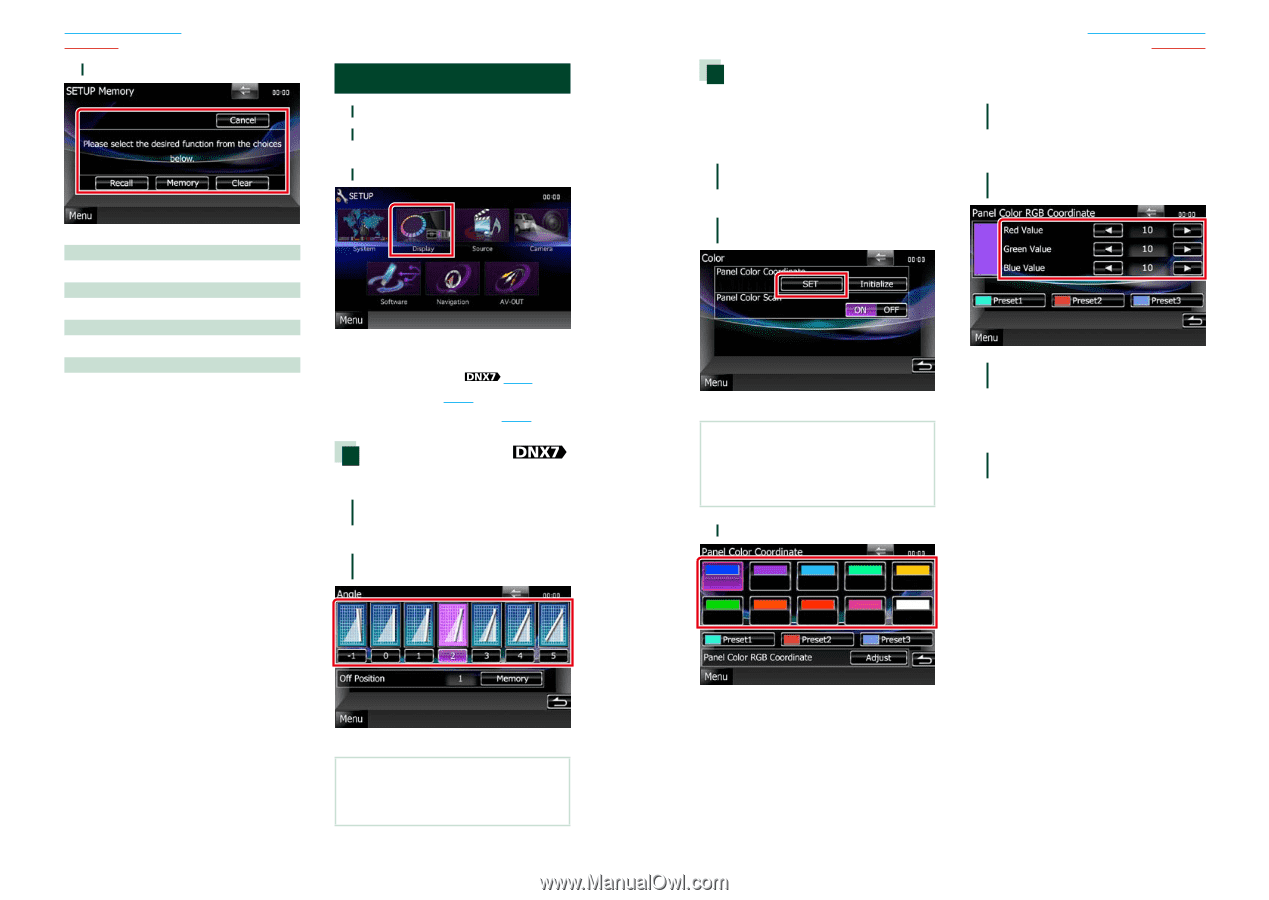
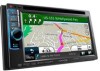
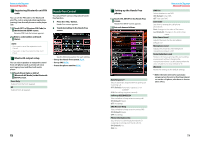
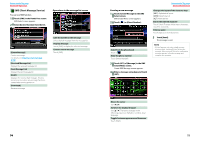
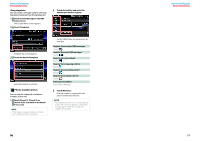
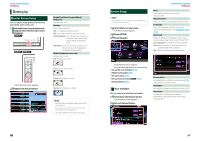
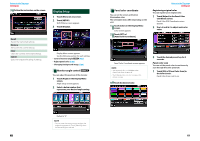
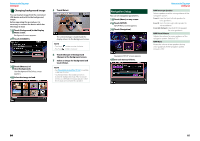
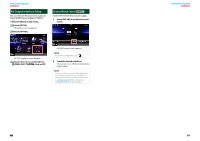
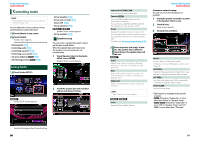
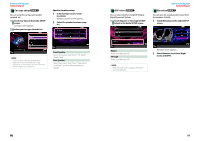
Return to the Top page Setting Up 3 Follow the instruction on the screen. Display Setup 1 Touch [Menu] on any screen. 2 Touch [SETUP]. SETUP Menu screen appears. 3 Touch [Display]. Recall Recalls the memorized settings. Memory Memorizes the current settings. Clear Clears the currently memorized settings. Cancel Quits memorization/recalling of settings. Display Menu screen appears. See the following section for each setting. • Control monitor angle (P.82) • Adjust panel color (P.83) • Changing background image (P.84) Monitor angle control You can adjust the position of the monitor. 1 Touch [Angle] in the Display Menu screen. Angle setup screen appears. 2 Select a below number that represents your desired angle setting. Panel color coordinate You can set the screen and button illumination color. The selectable items differ depending on the unit. 1 Touch [Color] in the Display Menu screen. Color screen appears. 2 Touch [SET] of [Panel Color Coordinate]. Return to the Top page Setting Up Registering original color You can register your original color. 1 Touch [Adjust] in the Panel Color Coordinate screen. Panel Color RGB Coordinate screen appears. 2 Use [2] and [3] to adjust each color value. Panel Color Coordinate screen appears. NOTE • You can touch [SET] or [Initialize] when [Panel Color Scan] is set to off. • Touch [Initialize] to reset the settings to the default settings. 3 Touch the desired color. 3 Touch the desired preset key for 2 seconds. Panel color scan You can set the panel color to continuously scan through the color spectrum. 1 Touch [ON] of [Panel Color Scan] in the Color screen. Panel Color Scan is set to on. Default is "0". NOTE • You can store the current monitor angle as the angle during power off. Touch [Memory] when the desired angle is selected. 82 83
-
 1
1 -
2
-
3
-
4
-
5
-
6
-
7
-
8
-
9
-
10
-
11
-
12
-
13
-
14
-
15
-
16
-
17
-
18
-
19
-
20
-
21
-
22
-
23
-
24
-
25
-
26
-
27
-
28
-
29
-
30
-
31
-
32
-
33
-
34
-
35
-
36
-
 37
37 -
 38
38 -
 39
39 -
 40
40 -
 41
41 -
 42
42 -
 43
43 -
 44
44 -
 45
45 -
 46
46 -
 47
47 -
48
-
49
-
50
-
51
-
52
-
53
-
54
-
55
-
56
-
57
-
58
-
59
-
60
-
61
-
62
 |
 |