Kodak DX3500 User Manual - Page 54
Installing the Dock Insert, Connecting the Camera Dock
 |
UPC - 041778356425
View all Kodak DX3500 manuals
Add to My Manuals
Save this manual to your list of manuals |
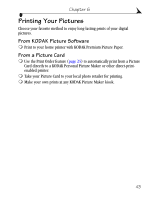
Page 54 highlights
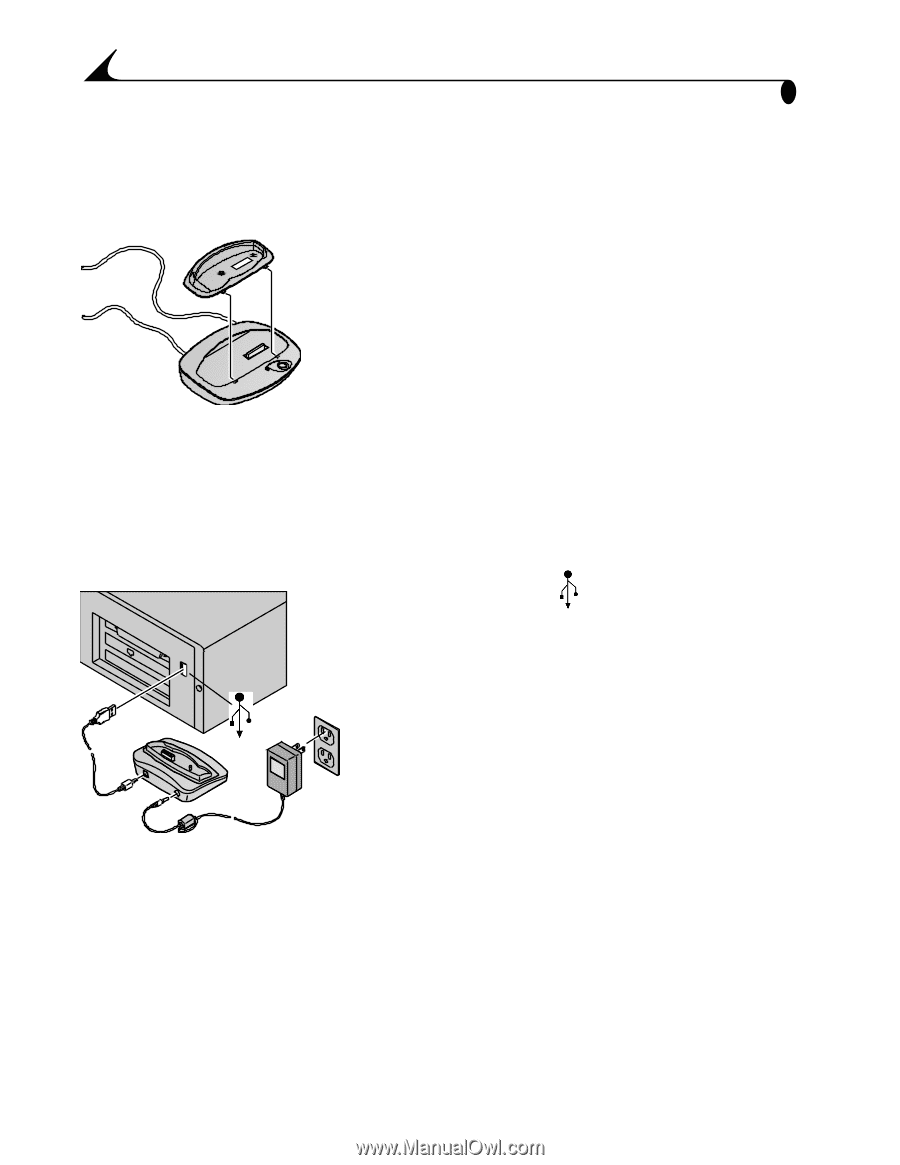
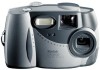
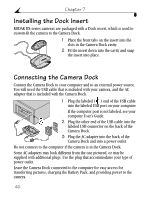
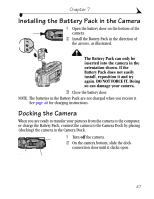
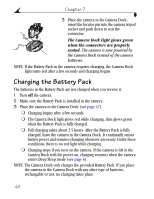
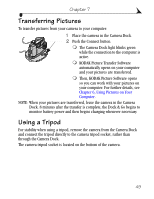
Chapter 7 Installing the Dock Insert KODAK DX-series cameras are packaged with a Dock insert, which is used to custom-fit the camera to the Camera Dock. 1 Place the front tabs on the insert into the slots in the Camera Dock cavity. 2 Fit the insert down into the cavity and snap the insert into place. Connecting the Camera Dock Connect the Camera Dock to your computer and to an external power source. You will need the USB cable that is included with your camera, and the AC adapter that is included with the Camera Dock. 1 Plug the labeled ( ) end of the USB cable into the labeled USB port on your computer. 1 2 If the computer port is not labeled, see your computer User's Guide. 2 Plug the other end of the USB cable into the labeled USB connector on the back of the Camera Dock. 3 3 Plug the AC adapter into the back of the Camera Dock and into a power outlet. Do not connect to the computer if the camera is in the Camera Dock. Some AC adapters may look different from the one pictured, or may be supplied with additional plugs. Use the plug that accommodates your type of power outlet. Leave the Camera Dock connected to the computer for easy access for transferring pictures, charging the Battery Pack, and providing power to the camera. 46
-
 1
1 -
2
-
3
-
4
-
5
-
6
-
7
-
8
-
9
-
10
-
11
-
12
-
13
-
14
-
15
-
16
-
17
-
18
-
19
-
20
-
21
-
22
-
23
-
24
-
25
-
26
-
27
-
28
-
29
-
30
-
31
-
32
-
33
-
34
-
35
-
36
-
37
-
38
-
39
-
40
-
41
-
42
-
43
-
44
-
45
-
46
-
47
-
48
-
 49
49 -
 50
50 -
 51
51 -
 52
52 -
 53
53 -
 54
54 -
 55
55 -
 56
56 -
 57
57 -
 58
58 -
 59
59 -
60
-
61
-
62
-
63
-
64
-
65
-
66
-
67
-
68
-
69
-
70
-
71
-
72
-
73
-
74
-
75
-
76
-
77
-
78
-
79
-
80
-
81
-
82
-
83
-
84
-
85
-
86
-
87
-
88
-
89
-
90
-
91
-
92
 |
 |