Konica Minolta AccurioPrint C2060L AccurioPress C2070/C2070P/C2060/Print C2060 - Page 108
Image Quality Adjustment, To manage the daily image quality
 |
View all Konica Minolta AccurioPrint C2060L manuals
Add to My Manuals
Save this manual to your list of manuals |
Page 108 highlights
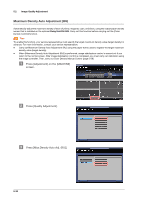
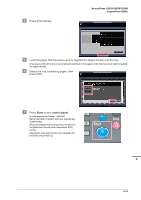
5.2 Image Quality Adjustment 5.2 Image Quality Adjustment Image Quality adjustment Adjust the color image quality at periodic intervals to maintain consistent printing results against a change in ambient temperature or humidity, a change of this machine conditions, or a change of the color tone due to the paper type or print mode. This machine provides the following two methods to adjust image quality. )To manage the daily image quality Carry out the density adjustment that is typically referred to as calibration. Two methods are available: To use an optional Relay Unit RU-509 and to use a colorimeter and applications supplied with the image controller. For details, refer to page 5-27. Using Relay Unit RU-509 Using the application Color Centro (Image Controller IC-603) Using the application Fiery Command WorkStation (Image Controller IC-417 / Image Controller IC-313) )To specify the reference image quality Execute this method at the time of installation or when changing conditions such as the screen. If you use this application when you cannot obtain the stable image quality after calibration, the image quality may be enhanced. For details, refer to page 5-48. 5-26
-
 1
1 -
2
-
3
-
4
-
5
-
6
-
7
-
8
-
9
-
10
-
11
-
12
-
13
-
14
-
15
-
16
-
17
-
18
-
19
-
20
-
21
-
22
-
23
-
24
-
25
-
26
-
27
-
28
-
29
-
30
-
31
-
32
-
33
-
34
-
35
-
36
-
37
-
38
-
39
-
40
-
41
-
42
-
43
-
44
-
45
-
46
-
47
-
48
-
49
-
50
-
51
-
52
-
53
-
54
-
55
-
56
-
57
-
58
-
59
-
60
-
61
-
62
-
63
-
64
-
65
-
66
-
67
-
68
-
69
-
70
-
71
-
72
-
73
-
74
-
75
-
76
-
77
-
78
-
79
-
80
-
81
-
82
-
83
-
84
-
85
-
86
-
87
-
88
-
89
-
90
-
91
-
92
-
93
-
94
-
95
-
96
-
97
-
98
-
99
-
100
-
101
-
102
-
 103
103 -
 104
104 -
 105
105 -
 106
106 -
 107
107 -
 108
108 -
 109
109 -
 110
110 -
 111
111 -
 112
112 -
 113
113 -
114
-
115
-
116
-
117
-
118
-
119
-
120
-
121
-
122
-
123
-
124
-
125
-
126
-
127
-
128
-
129
-
130
-
131
-
132
-
133
-
134
-
135
-
136
-
137
-
138
-
139
-
140
-
141
-
142
-
143
-
144
-
145
-
146
-
147
-
148
-
149
-
150
-
151
-
152
-
153
-
154
-
155
-
156
-
157
-
158
-
159
-
160
-
161
-
162
-
163
-
164
-
165
-
166
-
167
-
168
-
169
-
170
-
171
-
172
-
173
-
174
-
175
-
176
-
177
-
178
-
179
-
180
-
181
-
182
-
183
-
184
-
185
-
186
-
187
-
188
-
189
-
190
-
191
-
192
-
193
-
194
-
195
-
196
-
197
-
198
-
199
 |
 |
