Konica Minolta KIP 9900 User Guide - Page 17
Specification for Power Cord used in North America
 |
View all Konica Minolta KIP 9900 manuals
Add to My Manuals
Save this manual to your list of manuals |
Page 17 highlights
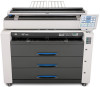
Name of part Exit Cover Interface Connector for Controller PC (CH-B) Folder Port S. DOWN Port Diag Port (USB) VGA Port USB Port Top Rear Cover Outlet for Controller PC Function Can remove the mis-fed media around Fuser section. Connect the cable here, which comes from a controller PC. D-Sub Connector 36 pins, 3.3Vdc maximum (large) Cable KATSURAGAWA ELECTRIC P/N: Z156400090 Connect this port and a finishing device (Folder, etc) with a cable. 12Vdc maximum See the document of the folder/controller for communication with the folder. Connect the Shutdown Signal Cable here. KIP 9900 will send a shutdown signal to the controller through this cable. 12Vdc maximum Cable KATSURAGAWA ELECTRIC P/N :Z156400380 For Service personnel only Connector Type B, 5Vdc maximum Connect the VGA cable here, which comes from a controller VGA port by UL-Listed cable for Touch screen LCD. 5Vdc maximum Connect the USB cable here, which comes from a controller USB Key Connector Type B for Touch screen LCD. 5Vdc maximum Cable KATSURAGAWA ELECTRIC P/N : Z156460020 Can access the Dehumidify Heater Switch. In case you place a controller unit outside of the KIP 9900, it is possible to supply AC power from the KIP 9900 to the controller unit if you connect the power cord to this outlet. (220 - 240V, 3A maximum) NOTE Specification for Power Cord used in North America Use the following type of Power Cord for a controller PC. 1) Rating minimum 250VAC 7A 2) Plug Type IEC60320: C13 3) Socket Type IEC60320: C14 4) Cord H05VV-F 3G-0.75mm, SVT3x18AWG 5) UL-Listed Dehumidify Heater Switch Turn on the Dehumidify Heater pressing "H" side of this switch to dehumidify the printing media. Press "L" side to turn it off. (continued on the next page) NOTE The above specifications are subject to change without notice. 1-9 Chapter 1 Before Use
-
 1
1 -
2
-
3
-
4
-
5
-
6
-
7
-
8
-
9
-
10
-
11
-
 12
12 -
 13
13 -
 14
14 -
 15
15 -
 16
16 -
 17
17 -
 18
18 -
 19
19 -
 20
20 -
 21
21 -
 22
22 -
23
-
24
-
25
-
26
-
27
-
28
-
29
-
30
-
31
-
32
-
33
-
34
-
35
-
36
-
37
-
38
-
39
-
40
-
41
-
42
-
43
-
44
-
45
-
46
-
47
-
48
-
49
-
50
-
51
-
52
-
53
-
54
-
55
-
56
-
57
-
58
-
59
-
60
-
61
-
62
-
63
-
64
-
65
-
66
-
67
-
68
-
69
-
70
-
71
-
72
-
73
-
74
-
75
-
76
-
77
-
78
-
79
-
80
-
81
-
82
-
83
-
84
-
85
-
86
-
87
-
88
-
89
-
90
-
91
-
92
-
93
-
94
-
95
-
96
-
97
-
98
-
99
-
100
-
101
-
102
-
103
-
104
-
105
-
106
-
107
-
108
-
109
-
110
-
111
-
112
-
113
-
114
-
115
-
116
-
117
-
118
-
119
-
120
-
121
-
122
-
123
-
124
-
125
-
126
-
127
-
128
-
129
-
130
-
131
-
132
-
133
-
134
-
135
-
136
-
137
-
138
-
139
 |
 |
