Kyocera KM-2050 1650/2050/2550 Operation Guide (Advanced) - Page 101
Paper Type in Auto Paper Selection, Priority Cassette, Paper select, Default cassette
 |
View all Kyocera KM-2050 manuals
Add to My Manuals
Save this manual to your list of manuals |
Page 101 highlights
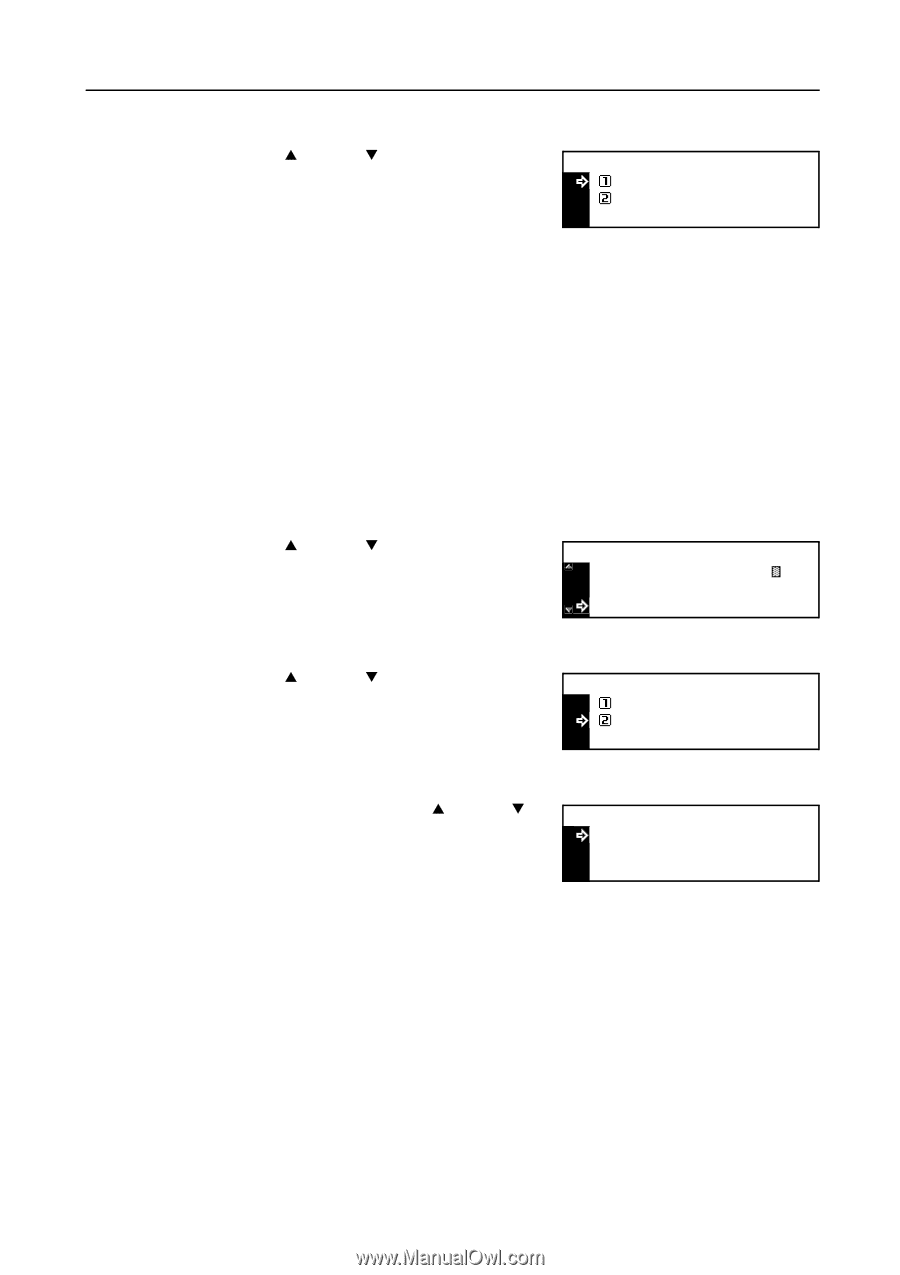
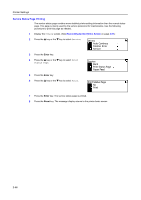
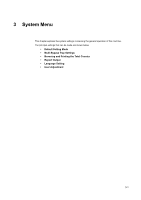
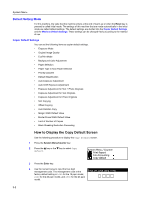
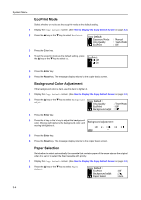
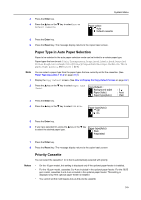
3 Press the Enter key. 4 Press the S key or the T key to select Auto or Default cassette. System Menu Paper select: * Auto Default cassette 5 Press the Enter key. 6 Press the Reset key. The message display returns to the copier basic screen. Paper Type in Auto Paper Selection Paper to be selected in the auto paper selection mode can be limited to a certain paper type. Paper types that can be set: Plain, Transparency, Preprinted, Labels, Bond, Recycled, Vellum, Rough, Letterhead, Color [Colour], Prepunched, Envelope, Cardstock, Thick paper, High quality, and Custom 1 (to 8) Note You can select a paper type from the paper types that are currently set for the cassettes. (See Paper Type (cassettes 1 to 4) on page 3-14.) 1 Display the Copy Default screen. (See How to Display the Copy Default Screen on page 3-2.) 2 Press the S key or the T key to select Paper type (Auto). Copy Default : Background adjst Paper Select Paper type(Auto) : 3 : Auto : Plain 3 Press the Enter key. 4 Press the S key or the T key to select Off or On. Paper type(Auto): Off * On 5 Press the Enter key. 6 If you have selected On, press the S key or the T key to select the desired paper type. Paper type(Auto): Plain Preprinted 7 Press the Enter key. 8 Press the Reset key. The message display returns to the copier basic screen. Priority Cassette You can select the cassette (1 to 4) that is automatically selected with priority. Notes • On the 16 ppm model, this setting is displayed only if the optional paper feeder is installed. • For the 16 ppm model, cassettes 2 to 4 are included in the optional paper feeder. For the 20/25 ppm model, cassettes 3 and 4 are included in the optional paper feeder. This setting is displayed only if the optional paper feeder is installed. • You cannot set the multi-bypass tray as the priority cassette. 3-5
-
 1
1 -
2
-
3
-
4
-
5
-
6
-
7
-
8
-
9
-
10
-
11
-
12
-
13
-
14
-
15
-
16
-
17
-
18
-
19
-
20
-
21
-
22
-
23
-
24
-
25
-
26
-
27
-
28
-
29
-
30
-
31
-
32
-
33
-
34
-
35
-
36
-
37
-
38
-
39
-
40
-
41
-
42
-
43
-
44
-
45
-
46
-
47
-
48
-
49
-
50
-
51
-
52
-
53
-
54
-
55
-
56
-
57
-
58
-
59
-
60
-
61
-
62
-
63
-
64
-
65
-
66
-
67
-
68
-
69
-
70
-
71
-
72
-
73
-
74
-
75
-
76
-
77
-
78
-
79
-
80
-
81
-
82
-
83
-
84
-
85
-
86
-
87
-
88
-
89
-
90
-
91
-
92
-
93
-
94
-
95
-
 96
96 -
 97
97 -
 98
98 -
 99
99 -
 100
100 -
 101
101 -
 102
102 -
 103
103 -
 104
104 -
 105
105 -
 106
106 -
107
-
108
-
109
-
110
-
111
-
112
-
113
-
114
-
115
-
116
-
117
-
118
-
119
-
120
-
121
-
122
-
123
-
124
-
125
-
126
-
127
-
128
-
129
-
130
-
131
-
132
-
133
-
134
-
135
-
136
-
137
-
138
-
139
-
140
-
141
-
142
-
143
-
144
-
145
-
146
-
147
-
148
-
149
-
150
-
151
-
152
-
153
-
154
-
155
-
156
-
157
-
158
-
159
-
160
-
161
-
162
-
163
-
164
-
165
-
166
-
167
-
168
-
169
-
170
-
171
-
172
-
173
-
174
-
175
-
176
 |
 |