Kyocera KM-2050 1650/2050/2550 Operation Guide (Advanced) - Page 27
Staple Copying, Staple, Left Top, Right Top
 |
View all Kyocera KM-2050 manuals
Add to My Manuals
Save this manual to your list of manuals |
Page 27 highlights
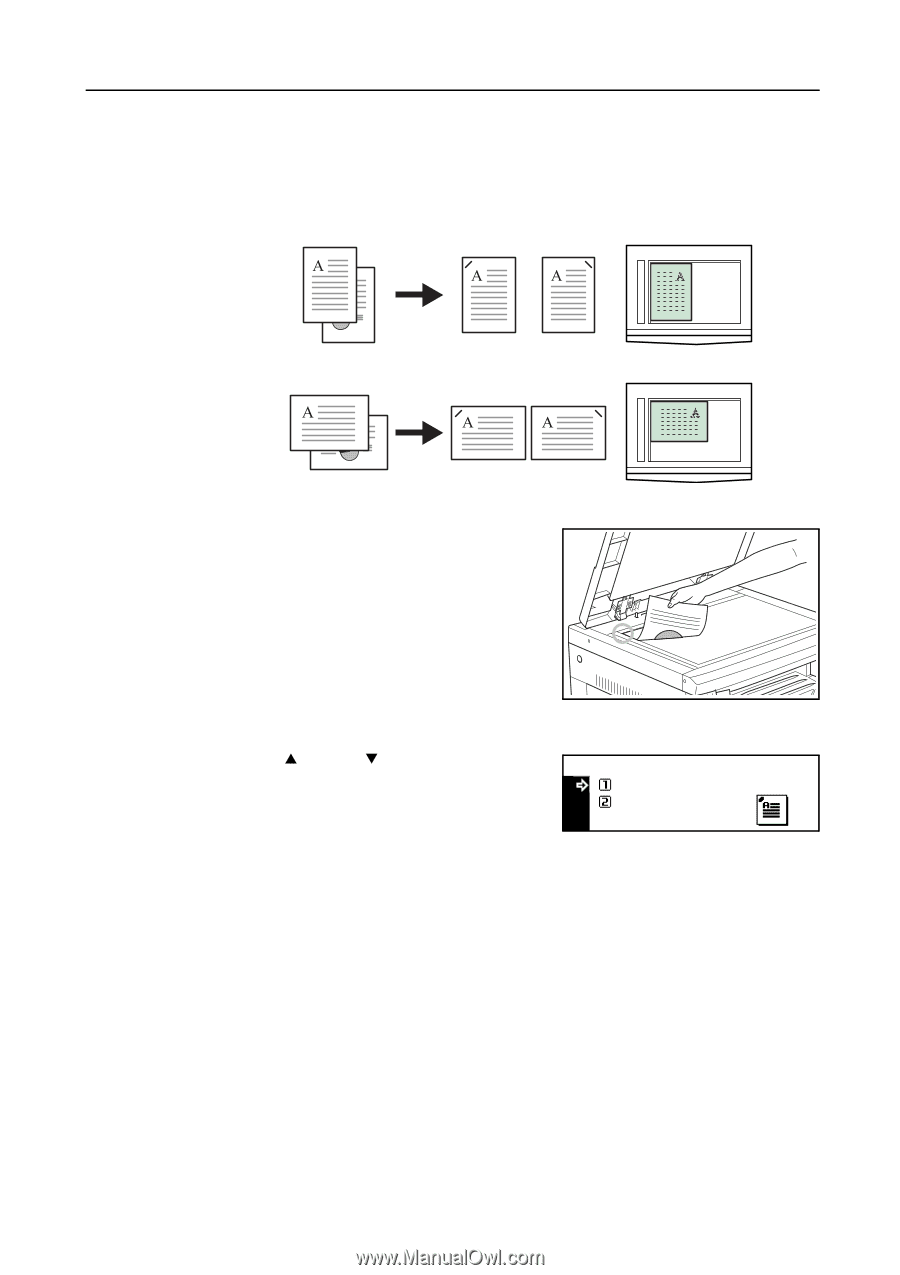
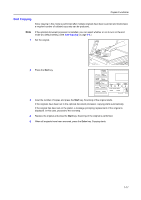
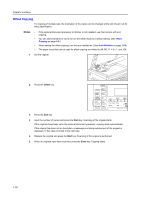
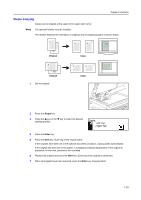
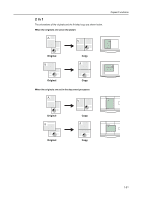
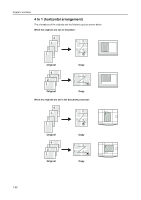
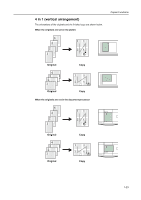
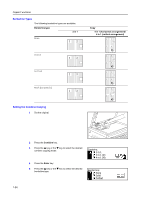
Copier Functions Staple Copying Copies can be stapled at the upper left or upper right corner. Note The optional finisher must be installed. The relation between the orientation of originals and the stapling position is shown below. Original Original 1 Set the original. Copy Copy 2 Press the Staple key. 3 Press the S key or the T key to select the desired stapling position. Staple: Left Top Right Top 4 Press the Enter key. 5 Press the Start key. Scanning of the original starts. If the originals have been set in the optional document processor, copying starts automatically. If the original has been set on the platen, a message prompting replacement of the original is displayed. In this case, proceed to the next step. 6 Replace the original and press the Start key. Scanning of the original is performed. 7 When all originals have been scanned, press the Enter key. Copying starts. 1-19
-
 1
1 -
2
-
3
-
4
-
5
-
6
-
7
-
8
-
9
-
10
-
11
-
12
-
13
-
14
-
15
-
16
-
17
-
18
-
19
-
20
-
21
-
 22
22 -
 23
23 -
 24
24 -
 25
25 -
 26
26 -
 27
27 -
 28
28 -
 29
29 -
 30
30 -
 31
31 -
 32
32 -
33
-
34
-
35
-
36
-
37
-
38
-
39
-
40
-
41
-
42
-
43
-
44
-
45
-
46
-
47
-
48
-
49
-
50
-
51
-
52
-
53
-
54
-
55
-
56
-
57
-
58
-
59
-
60
-
61
-
62
-
63
-
64
-
65
-
66
-
67
-
68
-
69
-
70
-
71
-
72
-
73
-
74
-
75
-
76
-
77
-
78
-
79
-
80
-
81
-
82
-
83
-
84
-
85
-
86
-
87
-
88
-
89
-
90
-
91
-
92
-
93
-
94
-
95
-
96
-
97
-
98
-
99
-
100
-
101
-
102
-
103
-
104
-
105
-
106
-
107
-
108
-
109
-
110
-
111
-
112
-
113
-
114
-
115
-
116
-
117
-
118
-
119
-
120
-
121
-
122
-
123
-
124
-
125
-
126
-
127
-
128
-
129
-
130
-
131
-
132
-
133
-
134
-
135
-
136
-
137
-
138
-
139
-
140
-
141
-
142
-
143
-
144
-
145
-
146
-
147
-
148
-
149
-
150
-
151
-
152
-
153
-
154
-
155
-
156
-
157
-
158
-
159
-
160
-
161
-
162
-
163
-
164
-
165
-
166
-
167
-
168
-
169
-
170
-
171
-
172
-
173
-
174
-
175
-
176
 |
 |