Kyocera TASKalfa 4820w TASKalfa 4820w Operation Guide - Page 34
Kyocera TASKalfa 4820w Manual
 |
View all Kyocera TASKalfa 4820w manuals
Add to My Manuals
Save this manual to your list of manuals |
Page 34 highlights
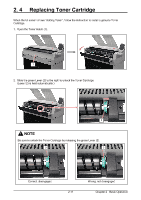
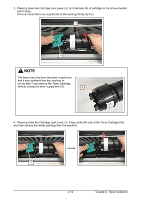
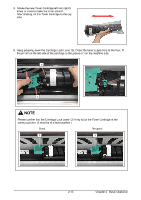
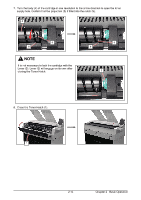
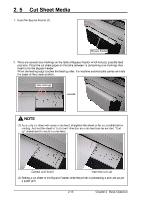
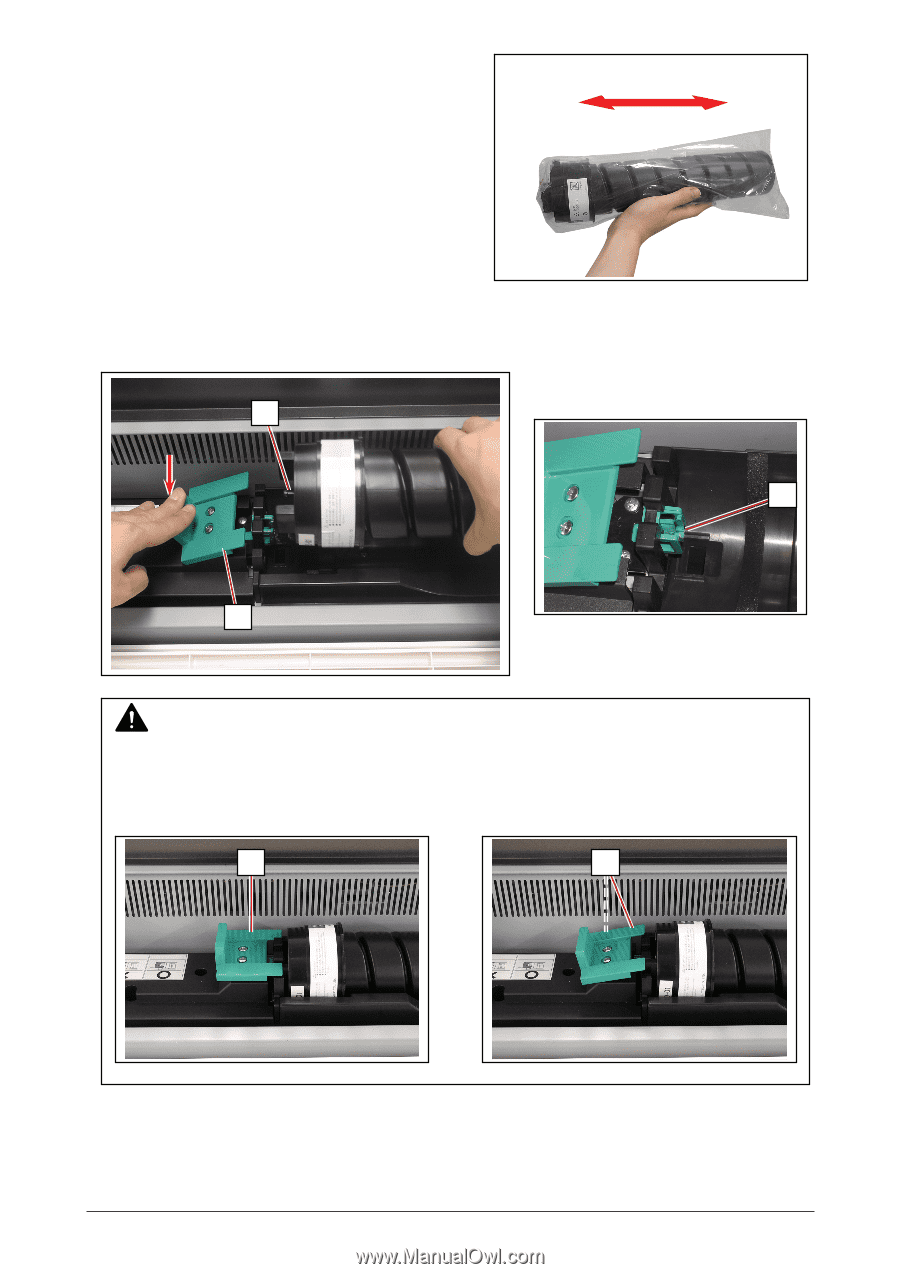
5. Shake the new Toner Cartridge left and right 5 times or more to make the toner smooth. After shaking, tilt the Toner Cartridge to the cap side. 6. Keep pressing down the Cartridge Lock Lever (3). Direct the toner supply hole to the floor, fit the pin (6) on the left side of the cartridge to the groove (7) on the machine side. 6 7 3 NOTE Please confirm that the Cartridge Lock Lever (3) firmly locks the Toner Cartridge at the correct position. (It must be at a level position.) Good 3 No good 3 2-13 Chapter 2 Basic Operation
-
 1
1 -
2
-
3
-
4
-
5
-
6
-
7
-
8
-
9
-
10
-
11
-
12
-
13
-
14
-
15
-
16
-
17
-
18
-
19
-
20
-
21
-
22
-
23
-
24
-
25
-
26
-
27
-
28
-
 29
29 -
 30
30 -
 31
31 -
 32
32 -
 33
33 -
 34
34 -
 35
35 -
 36
36 -
 37
37 -
 38
38 -
 39
39 -
40
-
41
-
42
-
43
-
44
-
45
-
46
-
47
-
48
-
49
-
50
-
51
-
52
-
53
-
54
-
55
-
56
-
57
-
58
-
59
 |
 |
Chapter 2
Basic Operation
2-13
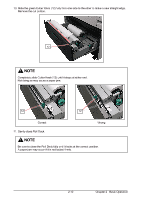
5.
Shake the new Toner Cartridge left and right 5
times or more to make the toner smooth.
After shaking, tilt the Toner Cartridge to the cap
side.
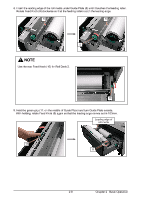
6.
Keep pressing down the Cartridge Lock Lever (3). Direct the toner supply hole to the floor, fit
the pin (6) on the left side of the cartridge to the groove (7) on the machine side.
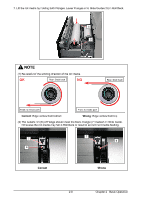
NOTE
Please confirm that the Cartridge Lock Lever (3) firmly locks the Toner Cartridge at the
correct position. (It must be at a level position.)
Good
No good
3
6
7
3
3