Kyocera TASKalfa 4820w TASKalfa 4820w Operation Guide - Page 49
Kyocera TASKalfa 4820w Manual
 |
View all Kyocera TASKalfa 4820w manuals
Add to My Manuals
Save this manual to your list of manuals |
Page 49 highlights
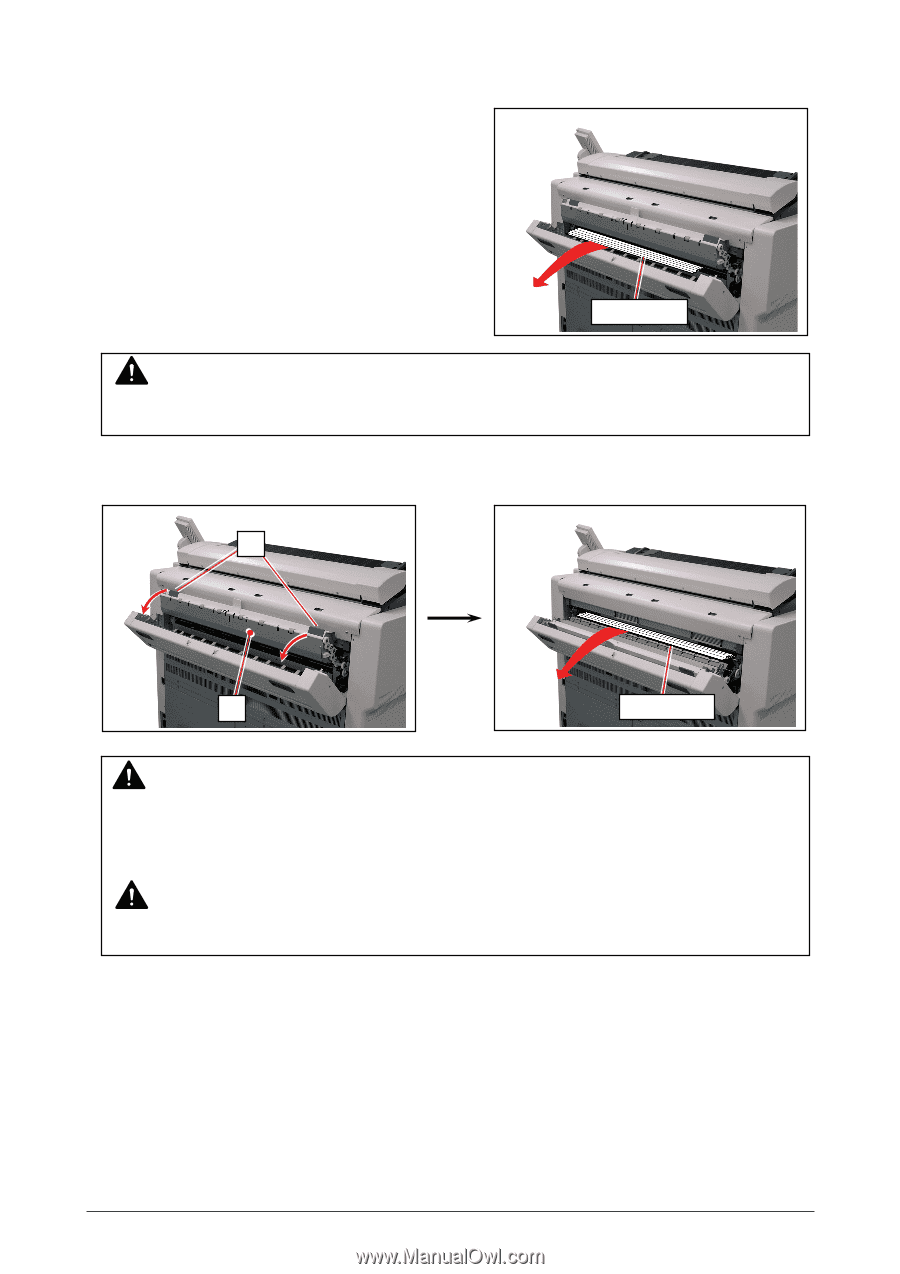
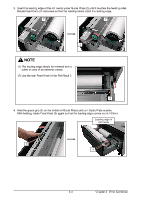
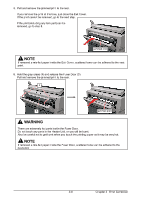
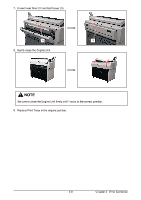
5. Pull and remove the jammed print to the rear. If you remove the print at this time, just close the Exit Cover. If the print cannot be removed, go to the next step. If the print (including any torn part) can be removed, go to step 8. jammed print NOTE If removed a mis-fed paper inside the Exit Cover, scattered toner can be adhered to the next print. 6. Hold the gray areas (4) and release the Fuser Door (5). Pull and remove the jammed print to the rear. 4 5 jammed print WARNING There are extremely hot parts inside the Fuser Door. Do not touch any parts in the Heater Unit, or you will be burnt. Also be careful not to get burnt when you touch the printing paper as it may be very hot. NOTE If removed a mis-fed paper inside the Fuser Door, scattered toner can be adhered to the next print. 3-8 Chapter 3 Error Correction
-
 1
1 -
2
-
3
-
4
-
5
-
6
-
7
-
8
-
9
-
10
-
11
-
12
-
13
-
14
-
15
-
16
-
17
-
18
-
19
-
20
-
21
-
22
-
23
-
24
-
25
-
26
-
27
-
28
-
29
-
30
-
31
-
32
-
33
-
34
-
35
-
36
-
37
-
38
-
39
-
40
-
41
-
42
-
43
-
 44
44 -
 45
45 -
 46
46 -
 47
47 -
 48
48 -
 49
49 -
 50
50 -
 51
51 -
 52
52 -
 53
53 -
 54
54 -
55
-
56
-
57
-
58
-
59
 |
 |