Kyocera TASKalfa 4820w TASKalfa 4820w Operation Guide - Page 51
Kyocera TASKalfa 4820w Manual
 |
View all Kyocera TASKalfa 4820w manuals
Add to My Manuals
Save this manual to your list of manuals |
Page 51 highlights
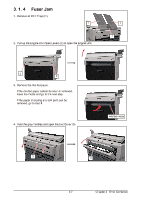
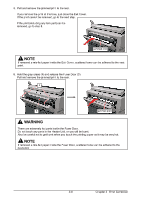
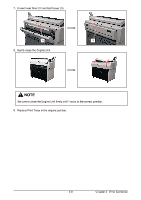
3. 1. 5 Stack Jam 1. Remove print(s) on Print Trays. 2. Remove all Print Trays (1). 1 1 1 3. Pull up the Engine Unit Open Levers (2) to open the Engine Unit. 2 2 4. Pull and remove the jammed print to the top. If the print cannot be removed, see [3.1.4 Fuser Jam] for the later procedure of clearing the jammed print. jammed print 5. Gently close the Engine Unit. NOTE Be sure to close the Engine Unit firmly until it locks at the correct position. 6. Replace Print Trays in the original position. 3-10 Chapter 3 Error Correction
-
 1
1 -
2
-
3
-
4
-
5
-
6
-
7
-
8
-
9
-
10
-
11
-
12
-
13
-
14
-
15
-
16
-
17
-
18
-
19
-
20
-
21
-
22
-
23
-
24
-
25
-
26
-
27
-
28
-
29
-
30
-
31
-
32
-
33
-
34
-
35
-
36
-
37
-
38
-
39
-
40
-
41
-
42
-
43
-
44
-
45
-
 46
46 -
 47
47 -
 48
48 -
 49
49 -
 50
50 -
 51
51 -
 52
52 -
 53
53 -
 54
54 -
 55
55 -
 56
56 -
57
-
58
-
59
 |
 |
Chapter 3
Error Correction
3-10
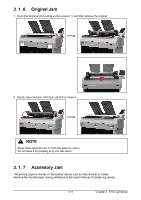
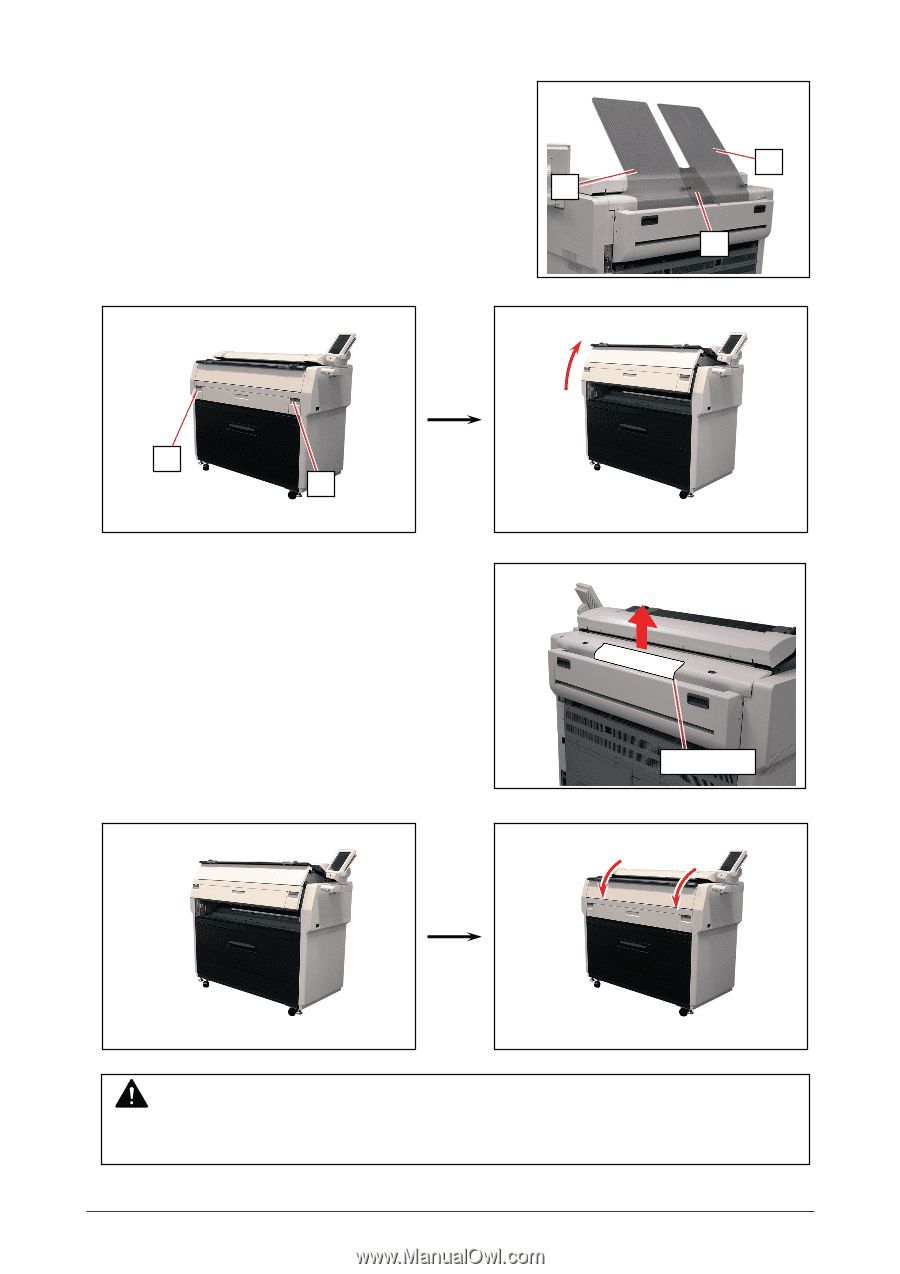
3. 1. 5
Stack Jam
1.
Remove print(s) on Print Trays.
2.
Remove all Print Trays (1).
3.
Pull up the Engine Unit Open Levers (2) to open the Engine Unit.
4.
Pull and remove the jammed print to the top.
If the print cannot be removed, see [3.1.4
Fuser
Jam] for the later procedure of clearing the
jammed print.
5.
Gently close the Engine Unit.
6.
Replace Print Trays in the original position.
2
2
1
jammed print
NOTE
Be sure to close the Engine Unit firmly until it locks at the correct position.
1
1