Kyocera TASKalfa 4820w TASKalfa 4820w Operation Guide - Page 52
Kyocera TASKalfa 4820w Manual
 |
View all Kyocera TASKalfa 4820w manuals
Add to My Manuals
Save this manual to your list of manuals |
Page 52 highlights
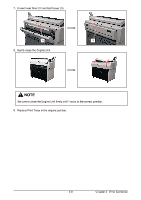
3. 1. 6 Original Jam 1. Open the Scanner Unit pulling up the Levers (1), and then remove the original. 1 1 2. Gently press Scanner Unit down and firmly close it. NOTE Press down Scanner Unit on both the sides to close it. Do not close it by pressing only one side down. 3. 1. 7 Accessory Jam The printing paper is mis-fed in the optional device such as Auto Stacker or Folder. Remove the mis-fed paper making reference to the User's Manual of concerning device. 3-11 Chapter 3 Error Correction
-
 1
1 -
2
-
3
-
4
-
5
-
6
-
7
-
8
-
9
-
10
-
11
-
12
-
13
-
14
-
15
-
16
-
17
-
18
-
19
-
20
-
21
-
22
-
23
-
24
-
25
-
26
-
27
-
28
-
29
-
30
-
31
-
32
-
33
-
34
-
35
-
36
-
37
-
38
-
39
-
40
-
41
-
42
-
43
-
44
-
45
-
46
-
 47
47 -
 48
48 -
 49
49 -
 50
50 -
 51
51 -
 52
52 -
 53
53 -
 54
54 -
 55
55 -
 56
56 -
 57
57 -
58
-
59
 |
 |
Chapter 3
Error Correction
3-11
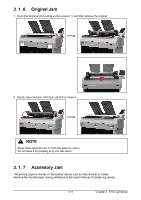
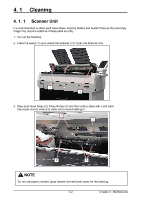
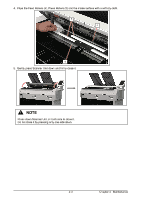
3. 1. 6
Original Jam
1.
Open the Scanner Unit pulling up the Levers (1), and then remove the original.
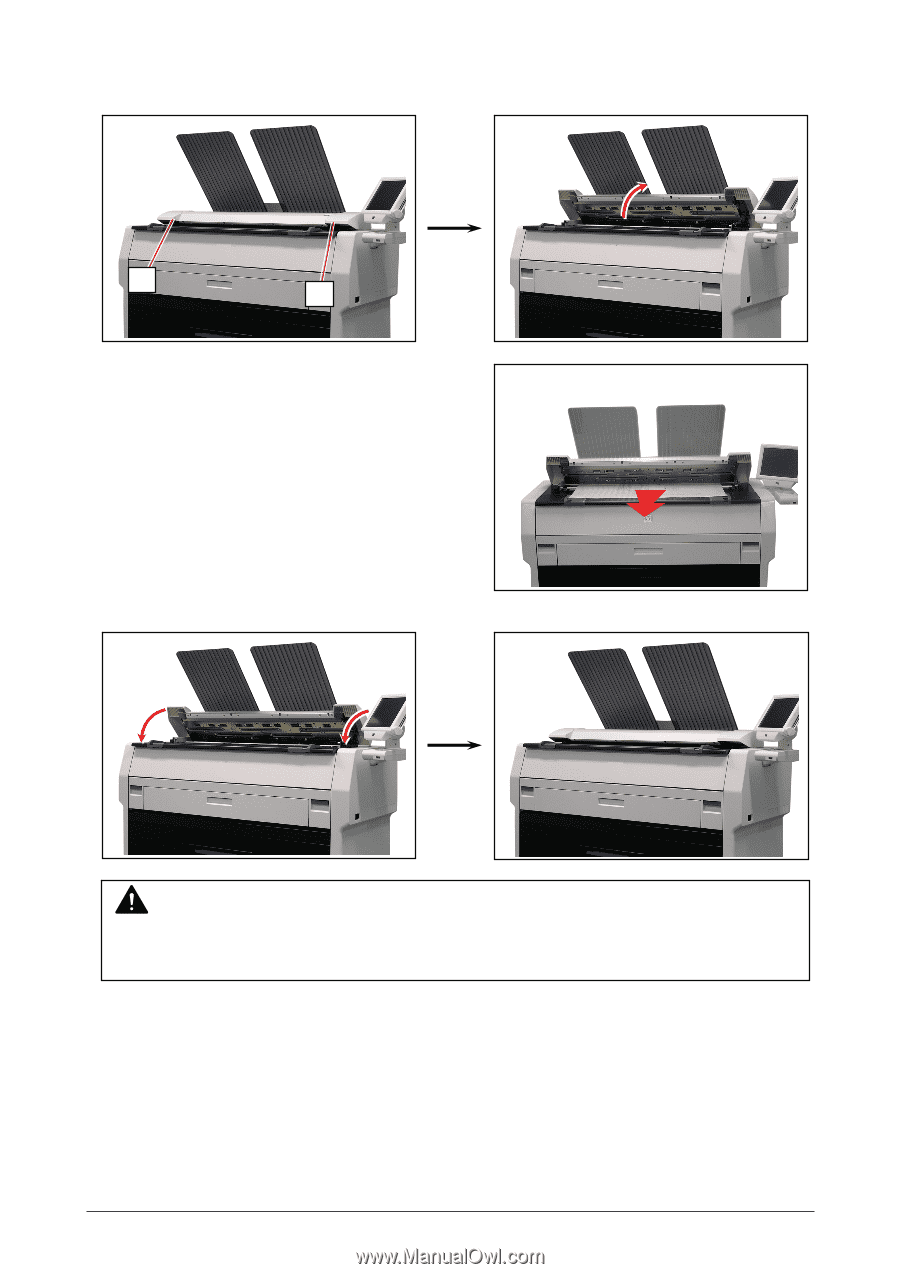
2.
Gently press Scanner Unit down and firmly close it.
3. 1. 7
Accessory Jam
The printing paper is mis-fed in the optional device such as Auto Stacker or Folder.
Remove the mis-fed paper making reference to the User’s Manual of concerning device.
NOTE
Press down Scanner Unit on both the sides to close it.
Do not close it by pressing only one side down.
1
1