Kyocera TASKalfa 4820w TASKalfa 4820w Operation Guide - Page 46
Kyocera TASKalfa 4820w Manual
 |
View all Kyocera TASKalfa 4820w manuals
Add to My Manuals
Save this manual to your list of manuals |
Page 46 highlights
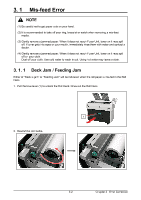
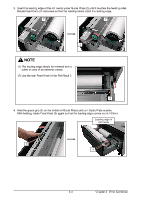
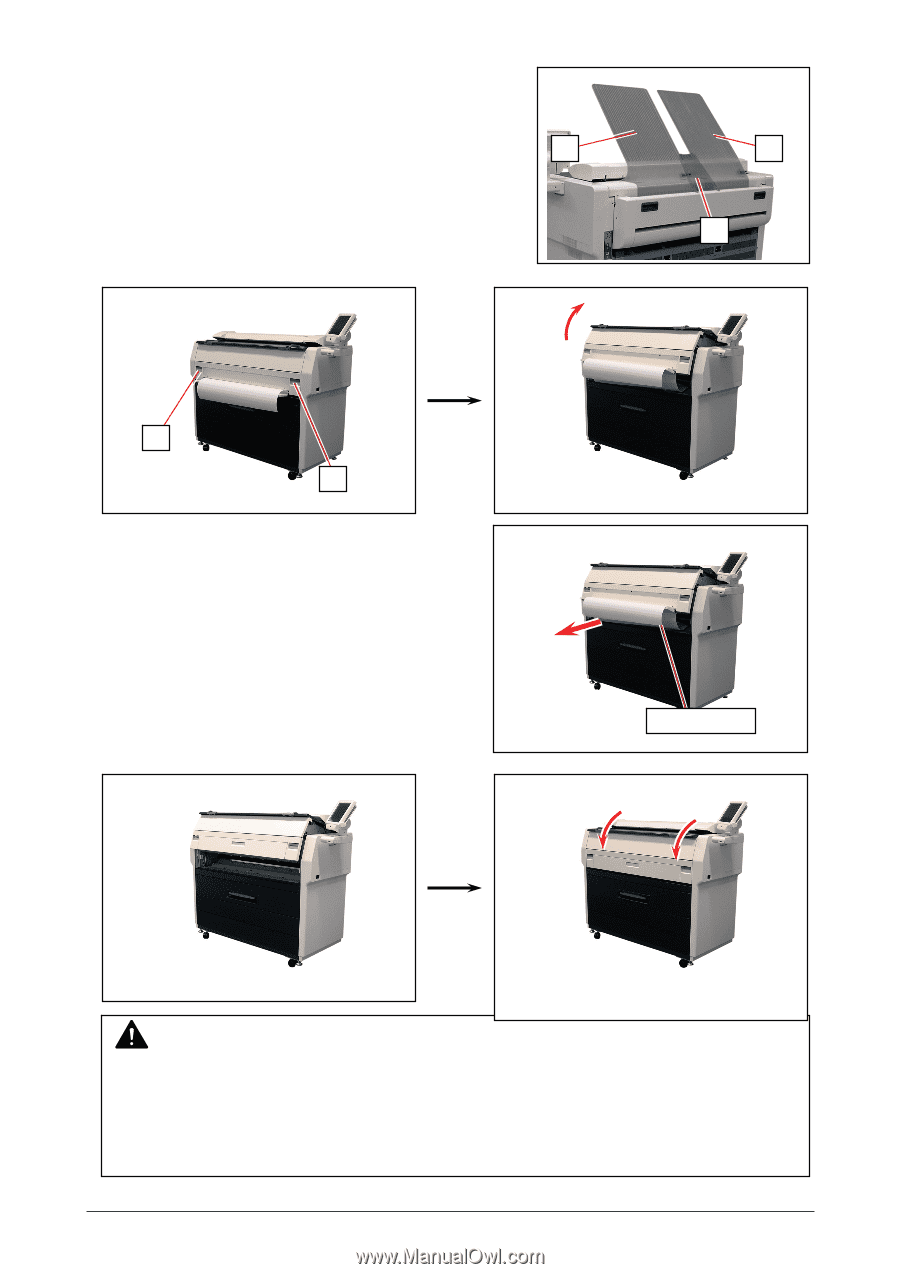
3. 1. 2 Manual Jam 1 1 1. Remove all Print Trays (1). 1 2. Pull up the Engine Unit Open Levers (2) to open the Engine Unit. 2 2 3. Remove the mis-fed paper pulling frontward. mis-fed media 4. Gently close the Engine Unit. NOTE (1) Be sure to close the Engine Unit firmly until it locks at the correct position. (2) The mis-feed cut sheet should be replaced with a new one if its leading edge has a torn or fold. Or it should be used upside down to keep the damaged edge from been inserted. An extremely creased cut sheet may cause mis-feed again. 5. Replace Print Trays in the original position. 3-5 Chapter 3 Error Correction
-
 1
1 -
2
-
3
-
4
-
5
-
6
-
7
-
8
-
9
-
10
-
11
-
12
-
13
-
14
-
15
-
16
-
17
-
18
-
19
-
20
-
21
-
22
-
23
-
24
-
25
-
26
-
27
-
28
-
29
-
30
-
31
-
32
-
33
-
34
-
35
-
36
-
37
-
38
-
39
-
40
-
 41
41 -
 42
42 -
 43
43 -
 44
44 -
 45
45 -
 46
46 -
 47
47 -
 48
48 -
 49
49 -
 50
50 -
 51
51 -
52
-
53
-
54
-
55
-
56
-
57
-
58
-
59
 |
 |
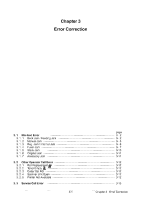
Chapter 3
Error Correction
3-5
3. 1. 2
Manual Jam
1.
Remove all Print Trays (1).
2.
Pull up the Engine Unit Open Levers (2) to open the Engine Unit.
3.
Remove the mis-fed paper pulling frontward.
4. Gently close the Engine Unit.
5.
Replace Print Trays in the original position.
NOTE
(1) Be sure to close the Engine Unit firmly until it locks at the correct position.
(2) The mis-feed cut sheet should be replaced with a new one if its leading edge has a torn
or fold. Or it should be used upside down to keep the damaged edge from been inserted.
An extremely creased cut sheet may cause mis-feed again.
2
2
1
1
mis-fed media
1