LG 26LD320H Setup Guide - Page 15
Installer Menu
 |
View all LG 26LD320H manuals
Add to My Manuals
Save this manual to your list of manuals |
Page 15 highlights
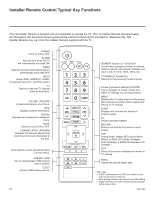
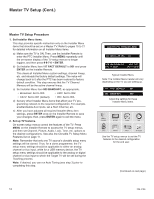
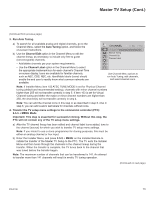
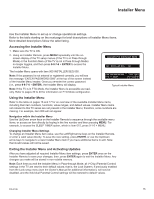
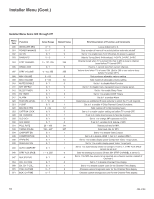
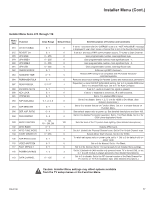
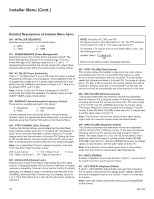
Installer Menu Use the Installer Menu to set up or change operational settings. Refer to the table starting on the next page for brief descriptions of Installer Menu items. More detailed descriptions follow the table listing. Accessing the Installer Menu 1. Make sure the TV is ON. 2. Using an Installer Remote, press MENU repeatedly until the onscreen display of the TV setup menus (if the TV is in Pass-through Mode) or the Function Menu (if the TV is not in Pass-through Mode) no longer toggles, and then press 9-8-7-6 + ENTER to access the Installer Menu. The Installer Menu opens with item 000 INSTALLER SEQ 000. Note: If the password is not entered or registered correctly, you will see the message "ENTER PASSWORD 0000" at the top of the screen instead of the Installer Menu header. Once you re-enter the correct password (i.e., press 9-8-7-6 + ENTER), the Installer Menu will display. Note: If the TV is in FTG Mode, the Installer Menu is accessible as readonly. Refer to pages 30 to 40 for information on FTG Mode configuration. xxLD340H PTC INSTALLER MENU 000 INSTALLER SEQ 000 UPN 000-000-000-000 ASIC 20E7 PTC V1.00.001 CPU V3.25.00 Typical Installer Menu Using the Installer Menu Refer to the table on pages 16 and 17 for an overview of the available Installer Menu items, including their item numbers, functions, value ranges, and default values. Installer Menu items not relevant to this TV series are not present in the Installer Menu; therefore, some numbers are missing. For example, item 006 will not appear. Navigation within the Installer Menu Use the Up/Down arrow keys on the Installer Remote to sequence through the available menu items, or access an item directly by keying in the line number and then pressing MENU. For example, to access the SLEEP TIMER option, which is item 015, press 0-1-5 + MENU. Changing Installer Menu Settings To change an Installer Menu item value, use the Left/Right arrow keys on the Installer Remote, or enter a valid value directly. To save the new setting, press ENTER, or use the Up/Down arrow keys to navigate to a new Installer Menu item if you have additional items to edit. Note that invalid values will not be saved. Exiting the Installer Menu and Activating Updates After you have adjusted all required Installer Menu item settings, press ENTER once on the Installer Remote to save your changes; then, press ENTER again to exit the Installer Menu. Any changes you make will be stored in non-volatile memory. Note: Each time you exit the Installer Menu in Pass-through Mode, all V-Chip (Parental Control) settings in the TV are reset to their default values; that is, the Lock System, if previously enabled from the Lock setup menu (see the Owner's Manual for additional information), will now be disabled, and the individual Parental Control settings will be restored to default values. 206-4186 15
-
 1
1 -
2
-
3
-
4
-
5
-
6
-
7
-
8
-
9
-
 10
10 -
 11
11 -
 12
12 -
 13
13 -
 14
14 -
 15
15 -
 16
16 -
 17
17 -
 18
18 -
 19
19 -
 20
20 -
21
-
22
-
23
-
24
-
25
-
26
-
27
-
28
-
29
-
30
-
31
-
32
-
33
-
34
-
35
-
36
-
37
-
38
-
39
-
40
-
41
-
42
-
43
-
44
-
45
-
46
-
47
-
48
-
49
-
50
-
51
-
52
-
53
-
54
-
55
-
56
-
57
-
58
-
59
 |
 |
