LG LGL40G User Guide - Page 38
View a photo
 |
View all LG LGL40G manuals
Add to My Manuals
Save this manual to your list of manuals |
Page 38 highlights
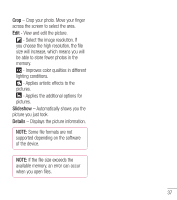
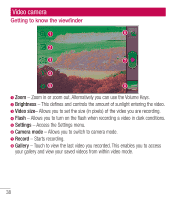
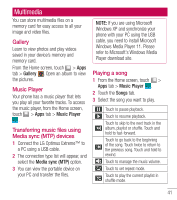
Camera • - Select the storage location to save images. • - Restore all camera default settings. • - Provides help information on some of the camera features. TIP! When you exit the camera, some settings return to their defaults, such as white balance, timer and scene mode. Check these before you take your next photo. TIP! The Settings menu is superimposed over the viewfinder so, when you change elements of the image color or quality, you see a preview of the image change behind the Settings menu. View a photo Learn to view photos saved in your phone's storage. 1 From Home screen, touch > Gallery . 2 Select a photo to view. While viewing a photo, use the following options: • To view more photos, scroll left or right. • To zoom in or out, tap the screen with two fingers and spread them apart (move your fingers closer together to zoom out). • To send a photo to others, touch , then select the method you want to use to share the image. TIP! If you have a social networking account and set it up on your phone, you can share your photo with the social networking community. • To delete a photo, touch Delete . Touch the Menu Key following options: to open the Set image as - Allows you to set the image as a Contact photo, Lockscreen Wallpaper or Wallpaper. Move - Allows you to move the image to other albums. Rename - Allows you to edit the name of the selected picture. Rotate left/right - Allows you to rotate the image left or right. 36
-
 1
1 -
2
-
3
-
4
-
5
-
6
-
7
-
8
-
9
-
10
-
11
-
12
-
13
-
14
-
15
-
16
-
17
-
18
-
19
-
20
-
21
-
22
-
23
-
24
-
25
-
26
-
27
-
28
-
29
-
30
-
31
-
32
-
 33
33 -
 34
34 -
 35
35 -
 36
36 -
 37
37 -
 38
38 -
 39
39 -
 40
40 -
 41
41 -
 42
42 -
 43
43 -
44
-
45
-
46
-
47
-
48
-
49
-
50
-
51
-
52
-
53
-
54
-
55
-
56
-
57
-
58
-
59
-
60
-
61
-
62
-
63
-
64
-
65
-
66
-
67
-
68
-
69
-
70
-
71
-
72
-
73
-
74
-
75
-
76
-
77
-
78
-
79
-
80
-
81
-
82
-
83
-
84
-
85
-
86
-
87
-
88
-
89
-
90
-
91
-
92
-
93
-
94
-
95
-
96
-
97
-
98
-
99
-
100
-
101
-
102
-
103
-
104
-
105
-
106
-
107
-
108
-
109
-
110
-
111
-
112
-
113
-
114
-
115
-
116
-
117
-
118
-
119
-
120
-
121
-
122
-
123
-
124
-
125
-
126
-
127
-
128
-
129
-
130
-
131
-
132
-
133
-
134
-
135
-
136
-
137
-
138
-
139
-
140
-
141
-
142
-
143
-
144
-
145
-
146
 |
 |
