LG LX-350 User Guide - Page 116
Upload, Assign, Picture ID, Screen Saver, Incoming Calls, Delete, Order Prints, Post to Service, - reviews
 |
View all LG LX-350 manuals
Add to My Manuals
Save this manual to your list of manuals |
Page 116 highlights
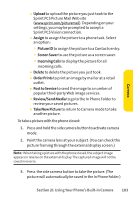
Camera Ⅲ Upload to upload the picture you just took to the Sprint PCS Picture Mail Web site (www.sprint.com/picturemail). Depending on your settings, you may be prompted to accept a Sprint PCS Vision connection. Ⅲ Assign to assign the picture to a phone task. Select an option: Ⅲ Picture ID to assign the picture to a Contacts entry. Ⅲ Screen Saver to use the picture as a screen saver. Ⅲ Incoming Calls to display the picture for all incoming calls. Ⅲ Delete to delete the picture you just took. Ⅲ Order Prints to print an image by mail or at a retail outlet. Ⅲ Post to Service to send the image to a number of popular third-party Web image services. Ⅲ Review/Send Media to go to the In Phone Folder to review your saved pictures. Ⅲ Take New Picture to return to Camera mode to take another picture. To take a picture with the phone closed: 1. Press and hold the side camera button to activate camera mode. 2. Point the camera lens at your subject. (You can check the picture framing through the external display screen.) Note: When taking a picture with the phone closed, the subject image appears in reverse on the external display.The captured image will not be saved in reverse. 3. Press the side camera button to take the picture. (The picture will automatically be saved in the In Phone Folder.) Section 2I: Using Your Phone's Built-in Camera 103
-
 1
1 -
2
-
3
-
4
-
5
-
6
-
7
-
8
-
9
-
10
-
11
-
12
-
13
-
14
-
15
-
16
-
17
-
18
-
19
-
20
-
21
-
22
-
23
-
24
-
25
-
26
-
27
-
28
-
29
-
30
-
31
-
32
-
33
-
34
-
35
-
36
-
37
-
38
-
39
-
40
-
41
-
42
-
43
-
44
-
45
-
46
-
47
-
48
-
49
-
50
-
51
-
52
-
53
-
54
-
55
-
56
-
57
-
58
-
59
-
60
-
61
-
62
-
63
-
64
-
65
-
66
-
67
-
68
-
69
-
70
-
71
-
72
-
73
-
74
-
75
-
76
-
77
-
78
-
79
-
80
-
81
-
82
-
83
-
84
-
85
-
86
-
87
-
88
-
89
-
90
-
91
-
92
-
93
-
94
-
95
-
96
-
97
-
98
-
99
-
100
-
101
-
102
-
103
-
104
-
105
-
106
-
107
-
108
-
109
-
110
-
 111
111 -
 112
112 -
 113
113 -
 114
114 -
 115
115 -
 116
116 -
 117
117 -
 118
118 -
 119
119 -
 120
120 -
 121
121 -
122
-
123
-
124
-
125
-
126
-
127
-
128
-
129
-
130
-
131
-
132
-
133
-
134
-
135
-
136
-
137
-
138
-
139
-
140
-
141
-
142
-
143
-
144
-
145
-
146
-
147
-
148
-
149
-
150
-
151
-
152
-
153
-
154
-
155
-
156
-
157
-
158
-
159
-
160
-
161
-
162
-
163
-
164
-
165
-
166
-
167
-
168
-
169
-
170
-
171
-
172
-
173
-
174
-
175
-
176
-
177
-
178
-
179
-
180
-
181
-
182
-
183
-
184
-
185
-
186
-
187
-
188
-
189
-
190
-
191
-
192
-
193
-
194
-
195
-
196
-
197
-
198
-
199
-
200
-
201
-
202
-
203
-
204
-
205
-
206
-
207
-
208
-
209
-
210
-
211
-
212
-
213
-
214
-
215
-
216
-
217
 |
 |