Lacie Network Space 2 User Manual - Page 22
Map Shares Using LaCie Network Assistant, Fig. 23, Fig. 24 - Windows Vista users - can t list volumes
 |
View all Lacie Network Space 2 manuals
Add to My Manuals
Save this manual to your list of manuals |
Page 22 highlights
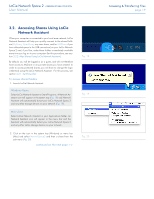
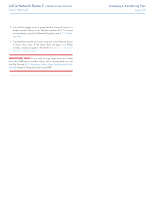
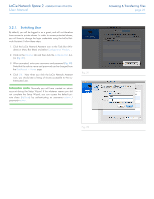
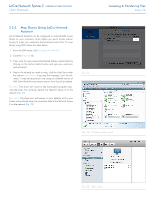
LaCie Network Space 2 • DESIGN BY NEIL POULTON User Manual 3.2.2. Map Shares Using LaCie Network Assistant LaCie Network Assistant can be configured to automatically mount shares on your computer, which allows you quick access without having to enter your username and password each time. To map shares using LNA, follow the steps below: 1. From the LNA menu, click Configuration Window. 2. Click the Volumes tab. 3. If you wish to map password-protected shares, authenticate by clicking on the Authentication button and type your username and password. 4. Next to the share(s) you wish to map, click the check box under the column Auto Mount. If you see the message "can't list volumes," it may be because you are using an outdated version of LNA. Download the most recent version from the LaCie website. PC users: The share will mount in My Computer/Computer automatically when the computer detects the Network Space 2 on the network (Fig. 24). Mac users: The share icon will appear on your desktop and in your Finder automatically when the computer detects the Network Space 2 on the network (Fig. 25). Fig. 23 Accessing & Transferring Files page 22 Fig. 24 - Windows Vista users Fig. 25 - Mac users
-
 1
1 -
2
-
3
-
4
-
5
-
6
-
7
-
8
-
9
-
10
-
11
-
12
-
13
-
14
-
15
-
16
-
 17
17 -
 18
18 -
 19
19 -
 20
20 -
 21
21 -
 22
22 -
 23
23 -
 24
24 -
 25
25 -
 26
26 -
 27
27 -
28
-
29
-
30
-
31
-
32
-
33
-
34
-
35
-
36
-
37
-
38
-
39
-
40
-
41
-
42
-
43
-
44
-
45
-
46
-
47
-
48
-
49
-
50
-
51
-
52
-
53
-
54
-
55
-
56
-
57
-
58
-
59
-
60
-
61
-
62
-
63
-
64
-
65
 |
 |
