Lacie Network Space 2 User Manual - Page 49
Dashboard: Copy, 4.13.1. Creating a Backup Job, 4.13.2. Auto Import of the USB Device
 |
View all Lacie Network Space 2 manuals
Add to My Manuals
Save this manual to your list of manuals |
Page 49 highlights
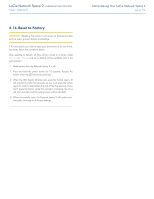
LaCie Network Space 2 • DESIGN BY NEIL POULTON User Manual Administering Your LaCie Network Space 2 page 49 4.13. Dashboard: Copy This page will allow administrators and users to set up backups (Fig. 75). 4.13.1. Creating a Backup Job 1. Click the green plus sign to the right of the page title ("Jobs List") (Fig. 76). 2. Set a Source share (what you want to back up) in the left menu and a Destination share (where you want to save the backup) in the right menu. 3. If you wish, set a time and date for the backup job. 4. After a moment, a message will appear saying that the backup has begun (Fig. 77). 5. A message will notify you when the backup is finished. Fig. 75 4.13.2. Auto Import of the USB Device If you toggle this box on, files located on an external USB device connected to the front USB port will be automatically copied to the Network Space 2 (Fig. 78). This feature allows you to copy the contents of an external hard drive onto the Network Space 2, making those files available on the network, without needing a computer. If this feature is toggled OFF, you can still configure and run manually a backup task that will copy files from the external USB disk to the Network Space 2 (OpenShare). See section 4.13. Dashboard: Copy for details. Once the backup is complete, the LED will stop blinking. You can then safely unplug the drive. Fig. 76 Fig. 77 Fig. 78
-
 1
1 -
2
-
3
-
4
-
5
-
6
-
7
-
8
-
9
-
10
-
11
-
12
-
13
-
14
-
15
-
16
-
17
-
18
-
19
-
20
-
21
-
22
-
23
-
24
-
25
-
26
-
27
-
28
-
29
-
30
-
31
-
32
-
33
-
34
-
35
-
36
-
37
-
38
-
39
-
40
-
41
-
42
-
43
-
 44
44 -
 45
45 -
 46
46 -
 47
47 -
 48
48 -
 49
49 -
 50
50 -
 51
51 -
 52
52 -
 53
53 -
 54
54 -
55
-
56
-
57
-
58
-
59
-
60
-
61
-
62
-
63
-
64
-
65
 |
 |
