Lenovo 41U5008 User Guide - Page 8
Installing the mouse, Using the software, In the Hardware Interface Selection window, select - drivers
 |
UPC - 883609648305
View all Lenovo 41U5008 manuals
Add to My Manuals
Save this manual to your list of manuals |
Page 8 highlights
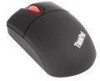
• If the CD does not start automatically, go into My Computer or Computer, browse the CD/DVD drive, and double-click Start.bat. 3. Follow the instructions on the screen. Note: In the Hardware Interface Selection window, select USB (Universal Serial Bus) Interface. 4. When prompted, restart your computer. Installing the mouse This topic contains information about installing the mouse. To install the mouse, connect the mouse to an available USB connector on your computer. The New Hardware Found window opens, and the Windows operating system will automatically install the proper device driver for the mouse. Then, the mouse is ready for use. Using the software Each mouse has multiple functions and features such as zooming and auto-scrolling, which help you increase your productivity. You also can assign frequently used functions or shortcuts to the mouse buttons using the Lenovo Mouse Suite software. To use the Lenovo Mouse Suite software, do the following: 1. Click Start ➙ All Programs ➙ Lenovo Mouse Suite ➙ Mouse Suite. 2. The main window opens with several tabs. Click each tab to view related settings. On each tab there are four buttons: • OK: Save your settings and close the window. • Cancel: Exit the window without saving. • Apply: Have your changes take effect without closing the window. • Help: View the help information system. Note: The Lenovo USB Laser Mouse supports the mouse resolution from 400 dots per inch (DPI) to 2000 DPI. By default, the mouse resolution setting is 1600 DPI. The ThinkPad USB Laser Mouse supports the mouse resolution from 400 DPI to 1600 DPI. By default, the mouse resolution setting is 1200 DPI. To change the resolution setting, do the following: 1. Click Start ➙ All Programs ➙ Lenovo Mouse Suite ➙ Mouse Suite. 2. In the Mouse Properties window, click the Lenovo tab. Then, click Advanced Properties. 3. In the Resolution Adjustment Setup area, select the corresponding radio button to set the preferred mouse resolution. 4. To confirm your setting, click Apply. For more information about the setting, click Help. 2 Lenovo Combined Mouse User Guide
-
 1
1 -
2
-
 3
3 -
 4
4 -
 5
5 -
 6
6 -
 7
7 -
 8
8 -
 9
9 -
 10
10 -
 11
11 -
 12
12 -
 13
13 -
14
-
15
-
16
-
17
-
18
-
19
-
20
-
21
-
22
-
23
-
24
-
25
-
26
-
27
-
28
-
29
-
30
-
31
-
32
-
33
-
34
-
35
-
36
-
37
-
38
-
39
-
40
-
41
-
42
-
43
-
44
-
45
-
46
-
47
-
48
-
49
-
50
-
51
-
52
-
53
-
54
 |
 |