Lenovo ThinkCentre Chromebox Hardware Maintenance Manual (HMM) - ThinkCentre C - Page 64
Enabling or disabling the write-protect function, Using the recovery shim
 |
View all Lenovo ThinkCentre Chromebox manuals
Add to My Manuals
Save this manual to your list of manuals |
Page 64 highlights
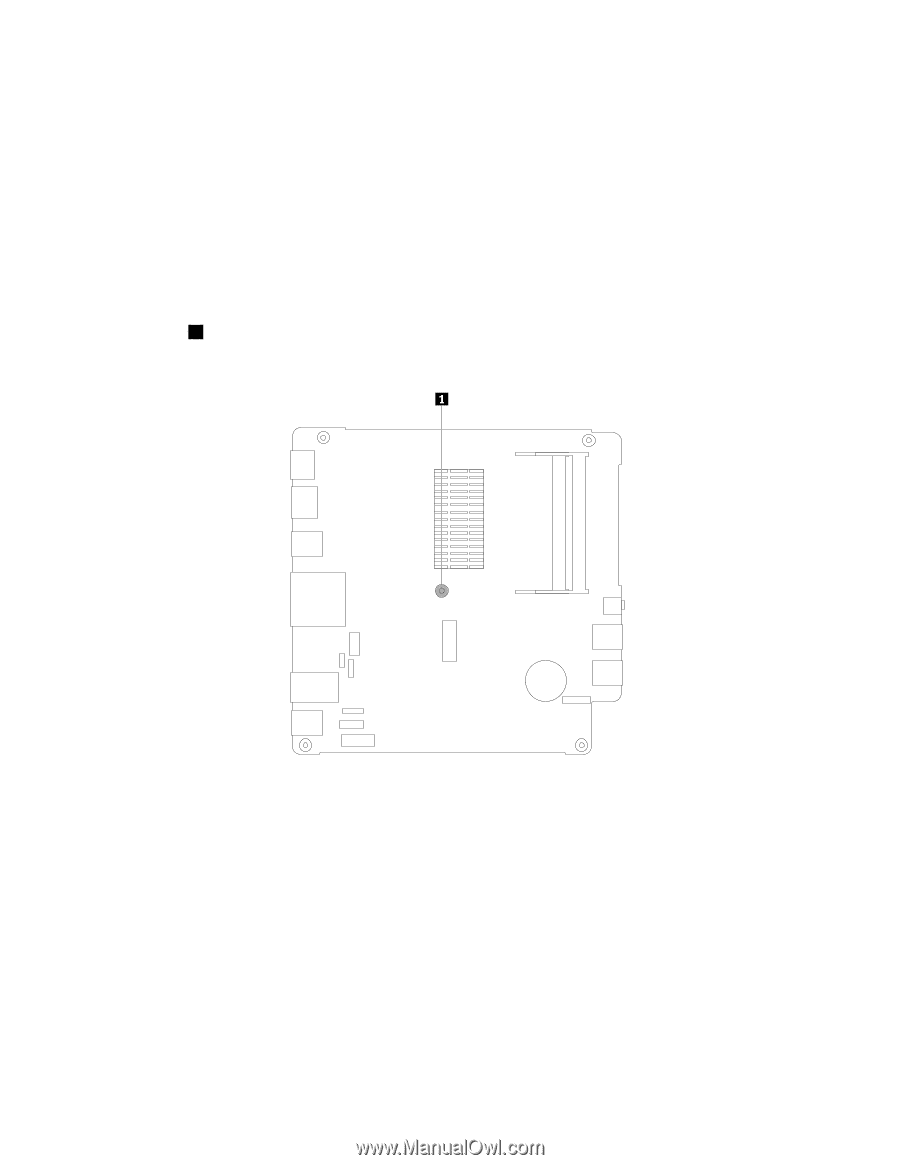
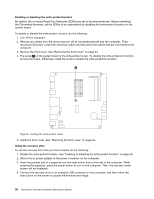
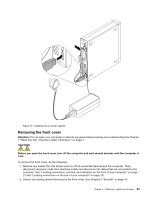
Enabling or disabling the write-protect function By default, the on-board Read-Only Memories (ROMs) are set to be write-protected. Before refreshing the Chromebox firmware, set the ROMs to be unprotected by disabling the write-protect function on the system board. To enable or disable the write-protect function, do the following: 1. Turn off the computer. 2. Remove any media from the drives and turn off all connected devices and the computer. Then, disconnect all power cords from electrical outlets and disconnect all cables that are connected to the computer. 3. Remove the front cover. See "Removing the front cover" on page 63. 4. The screw 1 on the system board is the write-protect screw. To disable the write-protection function, remove the screw. Otherwise, install the screw to enable the write-protection function. Figure 8. Locating the write-protect screw 5. Install the front cover. See "Removing the front cover" on page 63. Using the recovery shim To use the recovery shim that you have created, do the following: 1. Disable the write-protect function. See "Enabling or disabling the write-protect function" on page 58. 2. Attach the ac power adapter to the power connector on the computer. 3. Insert the pointed end of a paperclip into the reset button hole at the rear of the computer. While pressing the paperclip, press the power button to turn on the computer. Then, the recovery mode screen will be displayed. 4. Connect the recovery shim to an available USB connector on the computer, and then follow the instructions on the screen to update the firmware and image. 58 ThinkCentre Chromebox Hardware Maintenance Manual
-
 1
1 -
2
-
3
-
4
-
5
-
6
-
7
-
8
-
9
-
10
-
11
-
12
-
13
-
14
-
15
-
16
-
17
-
18
-
19
-
20
-
21
-
22
-
23
-
24
-
25
-
26
-
27
-
28
-
29
-
30
-
31
-
32
-
33
-
34
-
35
-
36
-
37
-
38
-
39
-
40
-
41
-
42
-
43
-
44
-
45
-
46
-
47
-
48
-
49
-
50
-
51
-
52
-
53
-
54
-
55
-
56
-
57
-
58
-
 59
59 -
 60
60 -
 61
61 -
 62
62 -
 63
63 -
 64
64 -
 65
65 -
 66
66 -
 67
67 -
 68
68 -
 69
69 -
70
-
71
-
72
-
73
-
74
-
75
-
76
-
77
-
78
-
79
-
80
-
81
-
82
-
83
-
84
-
85
-
86
-
87
-
88
-
89
-
90
-
91
-
92
-
93
-
94
-
95
-
96
-
97
-
98
-
99
-
100
-
101
-
102
-
103
-
104
-
105
-
106
-
107
-
108
-
109
-
110
-
111
-
112
 |
 |