Lenovo ThinkPad 600E Hardware Maintance Manual - June 1999: ThinkPad 600, 600E - Page 37
Audio Checkout, Diskette Drive Checkout
 |
View all Lenovo ThinkPad 600E manuals
Add to My Manuals
Save this manual to your list of manuals |
Page 37 highlights
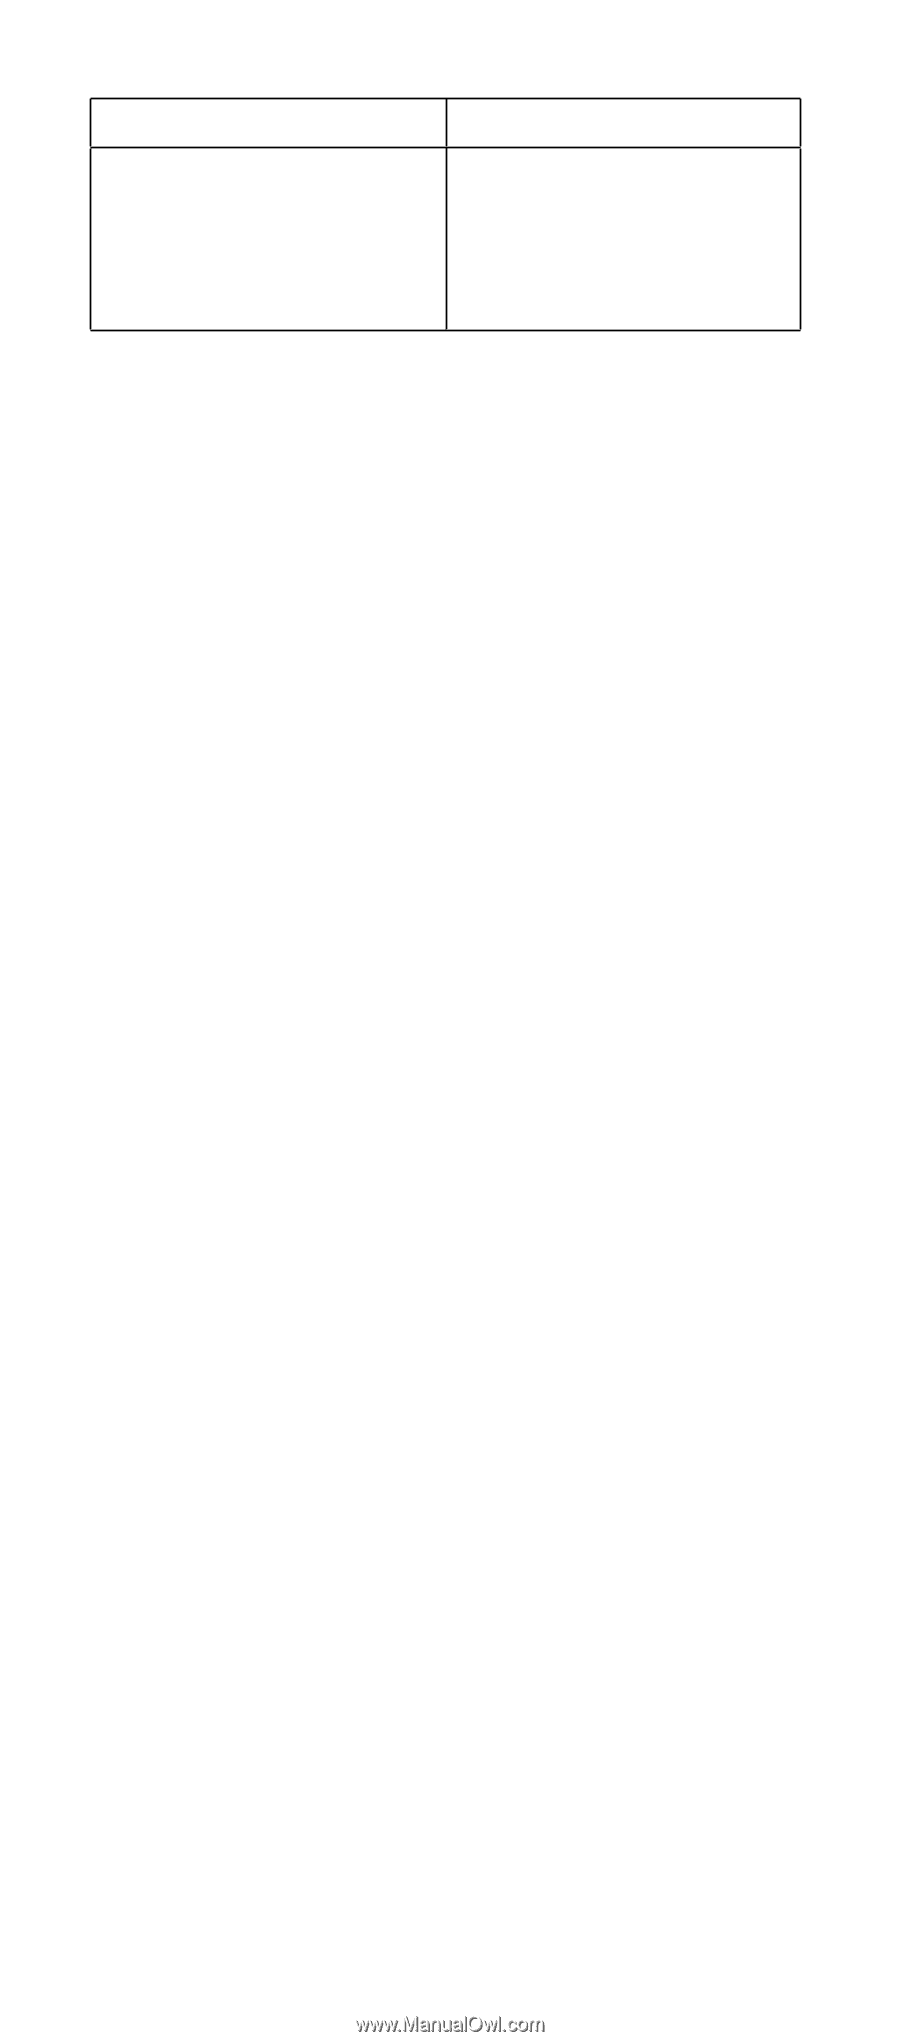
Symptoms (Verified) Symptoms cannot be re-created (intermittent problems). Checkout Guide Go To Use the customer-reported symptoms and go to "Symptom-to-FRU Index" section. Audio Checkout ISA Audio Check Out 1. Go to the diagnostic menu by selecting Test in the Easy-Setup menu. 2. Select Audio and run the diagnostic tests. 3. If the test detects a audio problem, replace the system board. PCI Audio Check Out 1. Power off the computer. 2. Insert the ThinkPad Hardware Maintenance Diskette Version 1.05 or later version into the diskette drive. 3. Power on the computer. 4. Select Test the audio feature from the main menu. 5. If FAIL is displayed on the screen, replace the system board. Diskette Drive Checkout Do the following to isolate the problem to a controller, drive, or diskette. A blank, formatted, write-enabled, nondefective 2HD diskette is required. FDD-1 represents the diskette drive in the bay. FDD-2 represents an external diskette drive. Note: Some ThinkPad 600E computers support only one FDD at a time. The icon of the diskette drive for such models is FDD instead of FDD-1 or FDD-2. Attention: Make sure that the diskette does not have more than one label attached to it. Multiple labels can cause damage to the drive or cause the drive to fail. Do the following to select the test device. See "Running the Diagnostics" on page 39 for details. 1. Start Easy-Setup. 2. Click on Test. 3. Press Ctrl+A to enter the advanced diagnostic mode. The ThinkPad FRU Connections window appears. 4. Click on Exit. The keyboard layout window appears. 5. Click on Exit. 6. Click on FDD-1 (or FDD-2) to start the test. General Descriptions 31
-
 1
1 -
2
-
3
-
4
-
5
-
6
-
7
-
8
-
9
-
10
-
11
-
12
-
13
-
14
-
15
-
16
-
17
-
18
-
19
-
20
-
21
-
22
-
23
-
24
-
25
-
26
-
27
-
28
-
29
-
30
-
31
-
 32
32 -
 33
33 -
 34
34 -
 35
35 -
 36
36 -
 37
37 -
 38
38 -
 39
39 -
 40
40 -
 41
41 -
 42
42 -
43
-
44
-
45
-
46
-
47
-
48
-
49
-
50
-
51
-
52
-
53
-
54
-
55
-
56
-
57
-
58
-
59
-
60
-
61
-
62
-
63
-
64
-
65
-
66
-
67
-
68
-
69
-
70
-
71
-
72
-
73
-
74
-
75
-
76
-
77
-
78
-
79
-
80
-
81
-
82
-
83
-
84
-
85
-
86
-
87
-
88
-
89
-
90
-
91
-
92
-
93
-
94
-
95
-
96
-
97
-
98
-
99
-
100
-
101
-
102
-
103
-
104
-
105
-
106
-
107
-
108
-
109
-
110
-
111
-
112
-
113
-
114
-
115
-
116
-
117
-
118
-
119
-
120
-
121
-
122
-
123
-
124
 |
 |