Lenovo ThinkPad 600E Hardware Maintance Manual - June 1999: ThinkPad 600, 600E - Page 43
Checking the Battery Pack, Terminal, Voltage V dc
 |
View all Lenovo ThinkPad 600E manuals
Add to My Manuals
Save this manual to your list of manuals |
Page 43 highlights
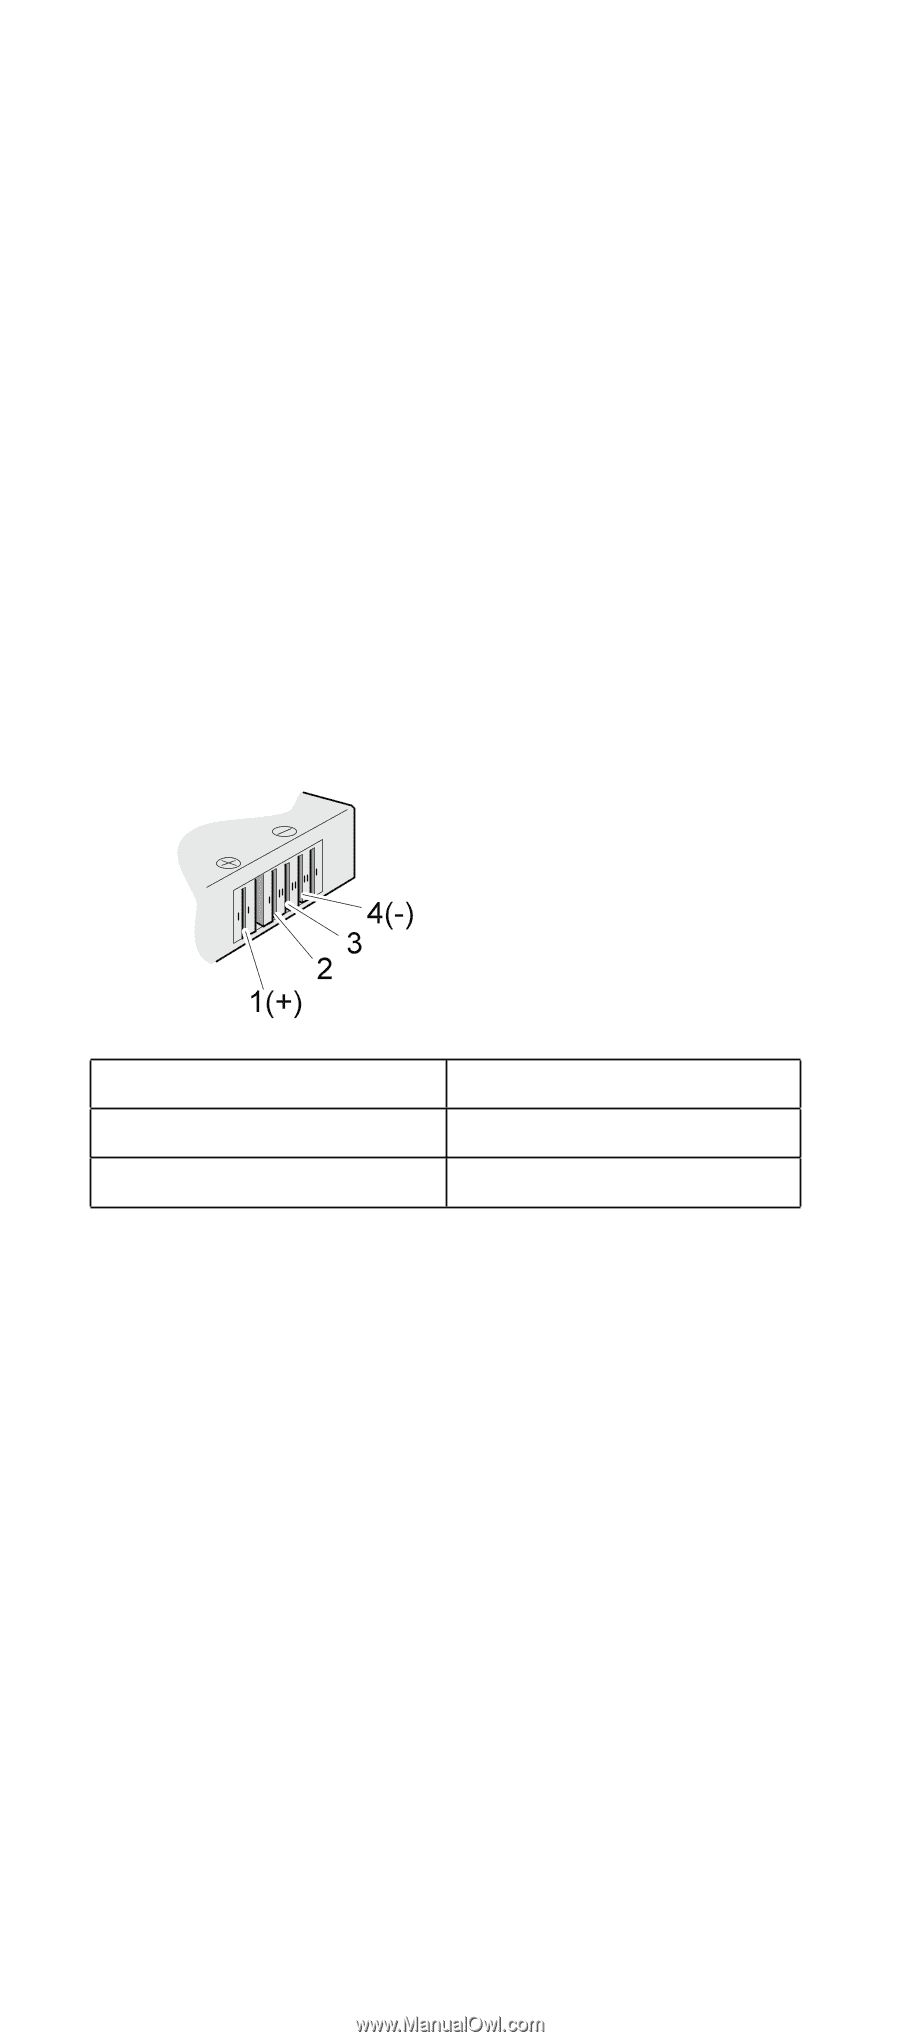
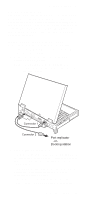
Checkout Guide pack. If the charge indicator or icon still does not turn on, replace the battery pack. If the charge indicator still does not turn on, replace either the system board or DC-DC card that the battery is connected to. Then reinstall the battery pack. If the reinstalled battery pack is not charged, go to the next section. Checking the Battery Pack: Battery charging will not start until the Fuel-Gauge shows that less than 95% of the total power remains; with this condition the battery pack can charge to 100% of its capacity. This protects the battery pack from being overcharged or having a shortened life. Do the following: 1. Power off the computer. 2. Remove the battery pack and measure the voltage between battery terminals 1 (+) and 4 (−). See the following figure: Terminal 1 4 Voltage (V dc) + 0 to + 12.6 Ground (−) 3. If the voltage is less than +11.0 V dc, the battery pack has been discharged. Recharge the battery pack. Note: In this case, the battery pack is over-discharged. It takes at least 3 hours to recharge the battery pack even if the indicator does not turn on. If the voltage is still less than +11.0 V dc after recharging, replace the battery. 4. If the voltage is more than +11.0 V dc, measure the resistance between battery terminals 3 and 4. The resistance must be 4 to 30 K ohm. If the resistance is not correct, replace the battery pack. If the resistance is correct, replace the system board. General Descriptions 37
-
 1
1 -
2
-
3
-
4
-
5
-
6
-
7
-
8
-
9
-
10
-
11
-
12
-
13
-
14
-
15
-
16
-
17
-
18
-
19
-
20
-
21
-
22
-
23
-
24
-
25
-
26
-
27
-
28
-
29
-
30
-
31
-
32
-
33
-
34
-
35
-
36
-
37
-
 38
38 -
 39
39 -
 40
40 -
 41
41 -
 42
42 -
 43
43 -
 44
44 -
 45
45 -
 46
46 -
 47
47 -
 48
48 -
49
-
50
-
51
-
52
-
53
-
54
-
55
-
56
-
57
-
58
-
59
-
60
-
61
-
62
-
63
-
64
-
65
-
66
-
67
-
68
-
69
-
70
-
71
-
72
-
73
-
74
-
75
-
76
-
77
-
78
-
79
-
80
-
81
-
82
-
83
-
84
-
85
-
86
-
87
-
88
-
89
-
90
-
91
-
92
-
93
-
94
-
95
-
96
-
97
-
98
-
99
-
100
-
101
-
102
-
103
-
104
-
105
-
106
-
107
-
108
-
109
-
110
-
111
-
112
-
113
-
114
-
115
-
116
-
117
-
118
-
119
-
120
-
121
-
122
-
123
-
124
 |
 |